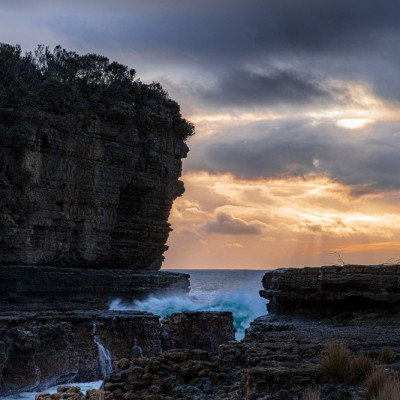
Varigotti has many photogenic opportunities for photographers. Winter especially is the peak season for powerful sea storms, and they are not likely to be seen anywhere else in Liguria, Italy.
There is a tiny hamlet named Varigotti in the Liguria region of Italy. It is not a well-known tourist location, but it has a unique charm. Varigotti has a rather tormented history. It was known in the pre-Roman period as “Varicottis." It then became Byzantine and was for centuries constantly under the threat of Saracen and Viking pirates. Disputed between Finale and Noli under the Del Carretto marquises in the twelfth century, it eventually became an autonomous municipality after the French revolution.
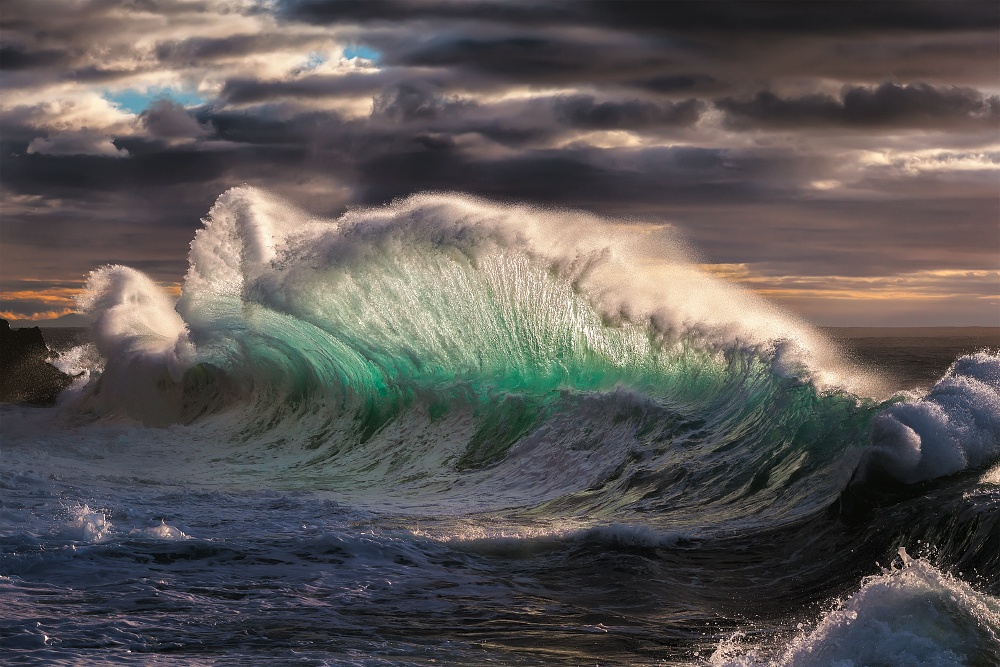
'Rough Sea' Settings: Canon 5D MarkII . Canon 70-200mm f/4L . f/9
Since I live nearby, I literally rush there when the sea is rough. Despite the fact that I have been doing this for fifteen years, I never grow tired of it. I try to bring home a nice photograph of a big wave each time.
"I prefer to not use a tripod because running away from an incoming wave while carrying one can be very tricky."
When the big waves reach the shore, they can be spotted only a few seconds in advance. I prefer to not use a tripod because running away from an incoming wave while carrying one can be very tricky. Each wave is a fast charging beast and emerges in two or three seconds, so I press the shutter release and follow the wave as it moves toward the shore.This shot was taken on a November morning at 8:00 a.m. The sun was low on the horizon and lit the scene from the right side. My position was ideal: when the waves broke, they turned into a beautiful, translucent emerald green. In high contrast scenes such as this one, the white foam on top of the wave is likely to be overexposed. I constantly checked the exposure using spot metering aimed at the white portion of the wave. Then I compensated for the exposure accordingly when the lighting conditions changed. The camera was set to Aperture Priority mode at an aperture of f/9 and ISO 200, allowing me to shoot with a shutter speed of at least 1/320 second. This is the minimum speed at which I could avoid blurred images.The weather was windy and partly cloudy. There was a high risk of getting soaked by sea spray, so I protected the camera and lens in a ziplock bag with a hole for the front of the lens. In such conditions I keep a microfiber cloth at hand since the lens needs to be wiped constantly.I knew that I would spend all day there, so I brought two fully charged spare batteries and plenty of memory cards (in a typical one-day session, my RAW files can easily exceed 32 GB). Since I sometimes like to shoot HD video too, I also brought my old trusty Epson P2000 portable hard disk for extra storage.One thing that amazes me is that the big waves come in “sets." About three or four waves arrive every five or six minutes. This gave me a few moments to clean the lens, check my camera settings and relax my arm. When the waves reappeared, I took about ten shots per wave.
POST PROCESSING
After I download my images, I put the RAW files in a folder, make a rough selection of the most outstanding ones and put them in a “keepers” folder. I never delete the unselected photos until a few months have passed so that I can give them a chance to grow on me. Perhaps I will choose them as keepers at a later stage. When I am done with this selection, I carefully inspect each selected file, discarding blurry images. I selected four images from about 1,200 photos I took that day.
I like to keep post-processing at a minimum, concentrating mainly on contrast and brightness adjustments, allowing the light and nature to do most of the job. My post-processing goal is to transform “machine vision” (poor dynamic range, low lens contrast) into human vision (broader dynamic range and a sense of experiencing it firsthand). If the lighting conditions are less than ideal, any attempt to adjust things in post-processing will look fake.
The post-processing for this image was as follows:
In Adobe Camera Raw:
1) Lower the Highlights slider to –100 to make the highlights a bit less bright while keeping the contrast.
2) Lower the Blacks slider to –50 to make the image look less flat. I make sure that the left side of the histogram does not get clipped by activating the Shadow Clipping Warning button at the top-left corner of the histogram.
3) In Sharpening, set the Amount slider to 70, Radius to 1 and Detail to 5.
4) In Noise Reduction, set the Luminance slider to 20.
5) Check the option Enable Lens Profile Corrections under the Lens Corrections tab.
6) Click on the button Open Image, which exports the image to Photoshop.
In Photoshop:
1) Carefully inspect the image, removing dust spots with the Clone Stamp tool.
2) Straighten the image using the horizon as reference.
3) Fine-tune contrast and brightness with Curve adjustment layers to get a balance between shadows and highlights.
4) Add a Hue/Saturation adjustment layer with Saturation set to +25.
TIPS
1) Study your subject. Observe what is going on around you before pressing the shutter release.
2) Be patient and persevering. It took me some fifteen years to get this shot, and I do not think I am done yet with this subject.
3) Protect yourself and your equipment.
4) When I am working on seascape photographs, I like to listen to one of my favorite albums, Atlantic Realm, by the mythical Irish group Clannad.
5) Enjoy yourself!
BIOGRAPHY
I am employed as a software engineer in Liguria, Italy. Although photography is not my main job, I treat it as if it were. Commitment, first-class equipment and a lot of passion are the ingredients for a photographer. I regularly exhibit my work in local shows and on the web.