The visit to Stokksnes peninsula was the main reason I went to Iceland last year. This location is very popular for photographers from all over the world, which is why I decided to go there. I was hoping to get a shot that was different from most of the images I had seen on the web.
"After scouting the area and checking some positions for the next morning, I went back to the camper, which stood near a cozy cafe at the bottom of Klifatindur mountain."
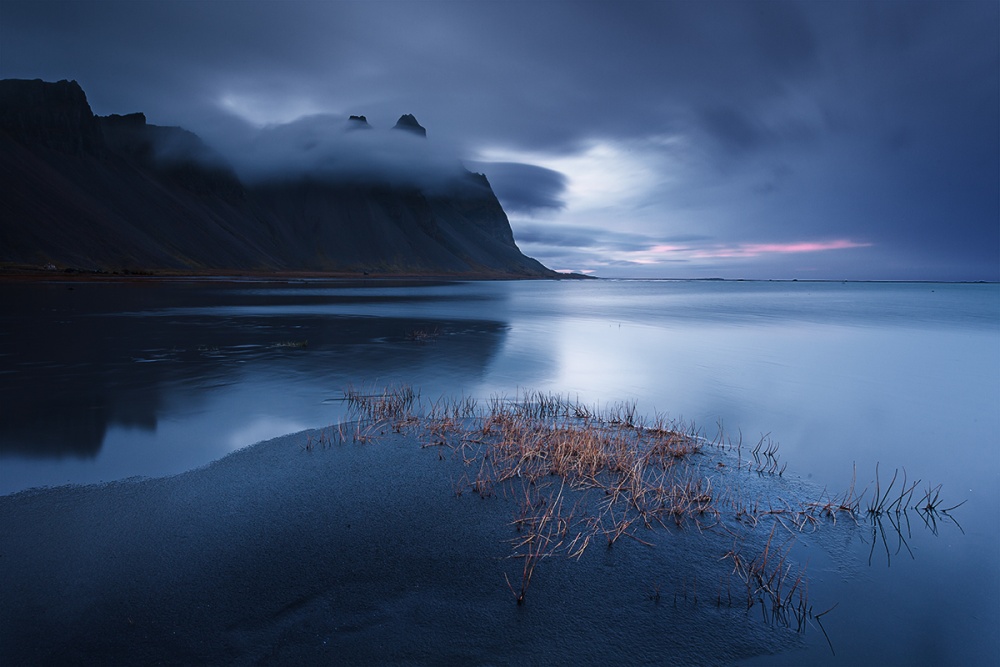
Stokksnes is located in southeast Iceland, near the town Hofn. I arrived there on September 15 with my little camper. It was an extremely dark day, and the clouds were hanging very low. That evening I decided to check out the beach of Stokksnes to search for a good spot to set up the next morning. I must confess that there are many great spots and angles to take pictures! The atmosphere on this particular evening was quite special. The dark clouds, the black beach and the diffused light at dusk made the place very mystical. After scouting the area and checking some positions for the next morning, I went back to the camper, which stood near a cozy cafe at the bottom of Klifatindur mountain.The next morning I got up at 5:00 a.m., grabbed my equipment and walked about half a mile down to the black sand. I positioned my tripod on a small mound of sand that had at least some clumps of grass growing on it. It seemed to be a good focal point for the foreground of the photo. Because of the dense, dark clouds, the rising sun couldn't break through, but every now and then there were small light leaks between the clouds that had red and orange tones. That's the reason I chose the title "Twilight".
"To obtain sharpness I referred to a chart with hyperfocal distances that I had brought with me."
I metered the light and then mounted a GND filter with 0.6 stops to protect the highlights in the frame. To obtain sharpness I referred to a chart with hyperfocal distances that I had brought with me. Based on the chart I focused on a point that was about three feet in front of the camera, and then I pressed the shutter button, taking only one shot from this point of view. After I looked at the image on the camera's display, I was satisfied with this one, so there was no reason to take another shot.
The image was processed in Lightroom and Photoshop.

1) I first made some basic adjustments in Lightroom. In the Lens Corrections panel, I selected Enable Profile Corrections, and in the Basic panel, I changed the White Balance to 8100K. Then I made these adjustments:

4) I created another Hue/Saturation adjustment layer to increase the saturation of the pink light leak in the sky.

6) Next I created a new layer, and in the dialog box I set the Mode to Soft Light and enabled "Fill with Soft-Light-neutral color (50% gray)." This created a layer that I could use to Burn (darken) and Dodge (lighten) the shapes in the foreground, using the Brush tool.

7) I added another Curves adjustment layer and increased the brightness a bit by pulling the curve upward. To darken the clouds in the sky I used a Gradient. Then I added a soft vignette to direct the viewer's eye to the grass in the foreground as well as the shapes and light leaks in the sky.

8) I desaturated the image again by applying another Black &White adjustment layer, set to 20% Opacity.

9) Then I sharpened the picture in two steps. First, I merged all visible layers into one layer and then applied the High Pass filter with a Radius of 2.5 to increase the sharpness in the details. The blending mode was set to Soft Light. Second, I repeated the first step but set the Radius higher this time (to 15). In this way I increased the contrast in the midtones while simultaneously sharpening the image.