by Lauren Malcampo
Published the 11th of February 2021
A picture is worth a thousand words. Each one of us has a story to tell.
Freezing our memories in frames also freezes our story in time.
Sony DSC-RX1 . Sony 35mmf/2 . f/2 . -0.7EV
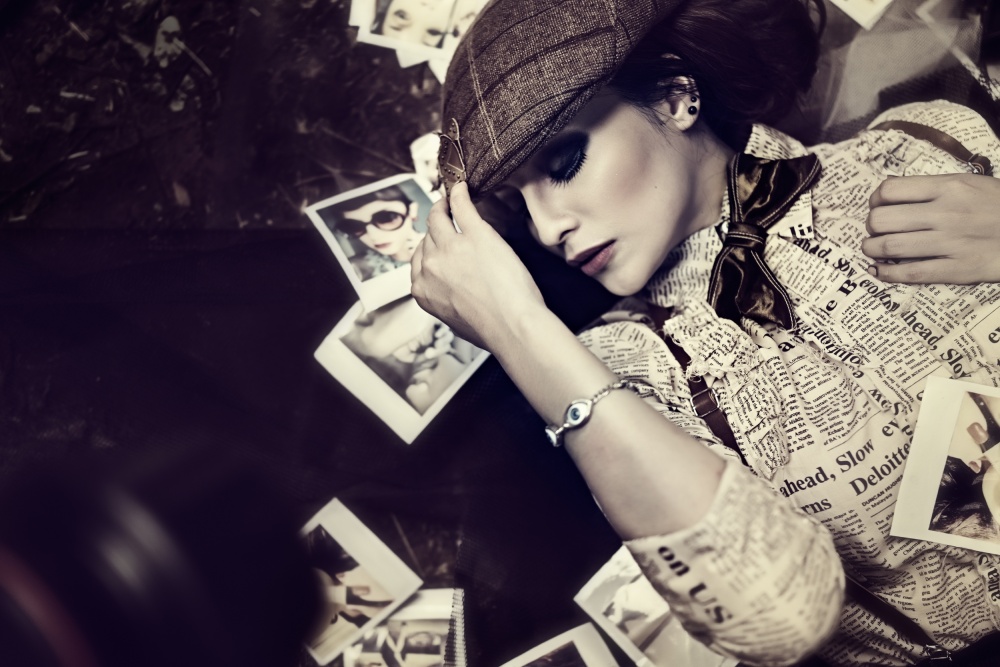
The concept for this photo is about a vintage photographer. It is not about any specific period in history, but is more of a general tribute to classic old school film photography.
It is in the spirit of "cosplay," which is short for "costume play." Cosplay is a popular performance art wherein participants dress up to look like fictional characters usually derived from manga comic books and anime.The woman in this picture was a professional model who has done advertising and commercial modeling assignments, so she was pretty comfortable in front of the camera and could easily follow my posing instructions. The location of the shoot was an old dilapidated amphitheater set in the middle of an open ground that was dotted with big, old shade trees. The model was asked to lie down on the floor.
"So the only way to bring the Polaroids closer to the model and get them reasonably sharp with a wide-open aperture of f/2 was to place both the prints and the model on the floor."
Some Polaroid prints were used as props and were scattered around the model to create some sort of frame around her. The setup could have easily been done with the model standing instead with the Polaroids scattered on a wall behind her, but it would not have been possible for me to shoot at an aperture of f/2 and still the get Polaroids sharp; the wall where the Polaroids would have been was too far away from the model. So the only way to bring the Polaroids closer to the model and get them reasonably sharp with a wide-open aperture of f/2 was to place both the prints and the model on the floor.The venue was very well lit with lots of ambient natural light; we were practically outdoors, although the area was shaded by the roof of the stage.
Shooting with this large aperture of f/2 allowed me to use a low ISO setting of 100 to minimize the possibility of noise in the photo. For a focal length of 35 mm, a shutter speed of 1/200 second was fast enough to minimize the possibility of motion blur. My camera was set to automatic white balance, and the exposure metering was set to matrix.The image was shot in RAW format, and the post-processing was done in Adobe Camera Raw, Photoshop CC and Nik Color Efex Pro 4 plugin.
1) In Camera Raw, I started in Camera Calibration where I set Camera Profile to Camera Neutral. I then adjusted the Brightness and the Contrast as needed. The image was then exported to Photoshop CC.
2) I wanted to give the image an overall vintage color tone, so I tweaked the color by applying the Old Photo filter in Nik Color Efex Pro 4 plugin. I used the preset Black and White #1, set the Grain value to 0 and moved the Highlights slider to 100% to protect the highlights. When you make such an adjustment in Nik Color Efex, it will be added as a new layer in Photoshop, and you can then set the strength of the effect by decreasing the layer Opacity. In this case I lowered it to 35%, which gave the photo a beautiful vintage touch.
3) I added a white layer mask to this layer and using a black Brush set to 30% Opacity, I revealed some of the reds of her lipstick in the underlying background layer, which added a little color.
4) Then I returned to Nik Color Efex and added a vignette using the default settings in the Darken/Lighten Center. Again, Nik Color Efex added the vignette in a new layer in Photoshop. Then I flattened all the layers.
5) Finally, I duplicated the layer and added sharpening with a High Pass filter set to Radius 1.8 in Overlay blending mode.
This image required very minimal post-processing with only a little bit of tweaking of the colors in Photoshop to refine the vintage mood that I wanted to create. I think that it is important to maintain a consistency in the color, the tone and the mood of a photograph. Colors can also be tweaked in Photoshop itself without using plugins, but that requires a higher level of skills in order to get the same results. Plugins already come with presets that make color tweaking fast and simple.
I'm from the Philippines. I am a certified public accountant with a full-time job and a passion for photography. I'have been a photography hobbyist since 2008. My photographic interest is in portraiture, but I also do some travel and landscape photography.