


|
|
|
|
by Editor Saurabh Chatterjee
Published the 10th of July 2020
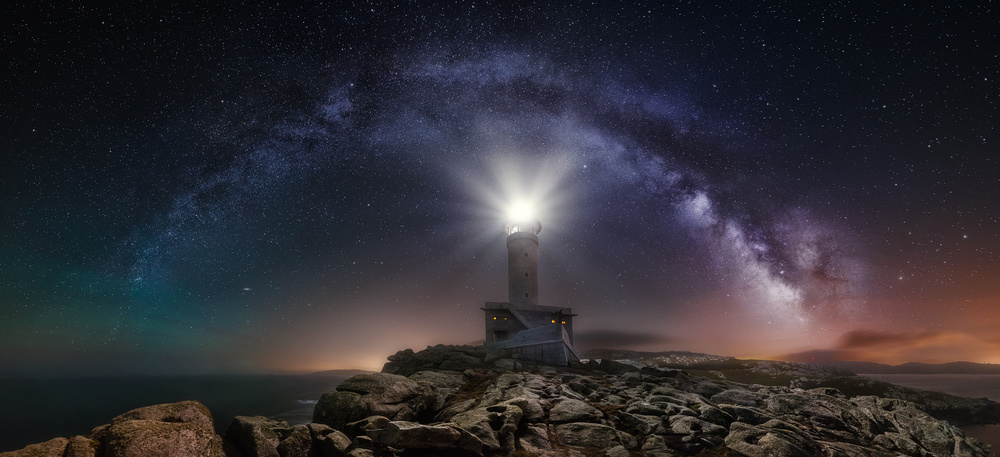
'Lighthouse and Milky Way' by Carlos F. Turienzo
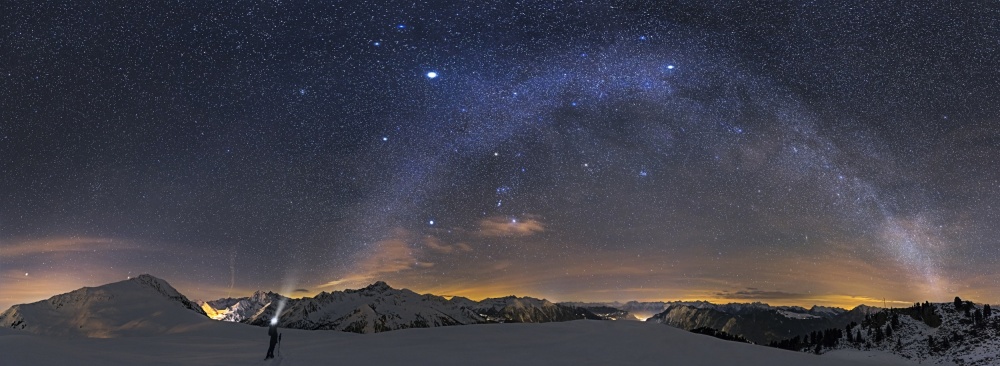
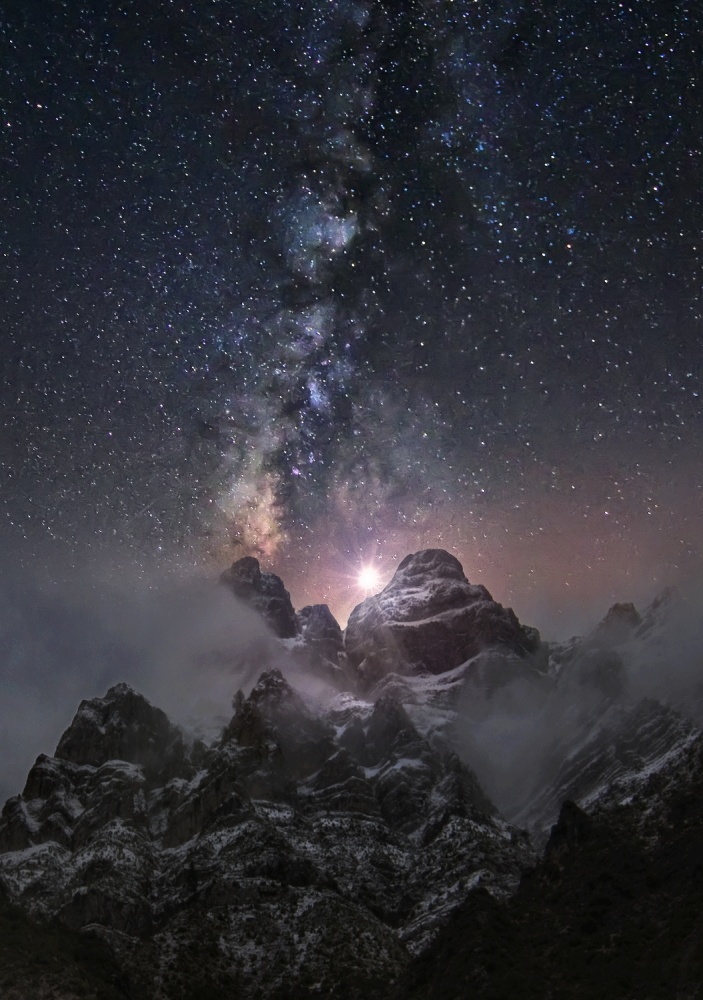
'Under the Starbow' by Dr. Nicholas Roemmelt
It was about 8 years ago, during a high altitude Himalayan trek I woke up in the middle of the night and went outside of my tent. Being away from the city with no light pollution, I would see millions of stars. As I scanned from horizon to horizon, I saw this very bright band of stars. With colours ranging from turquoise, to blue, green, red and orange, it looked so heavenly. Surprisingly, I could identify a dark horse with a very bright star near its mouth.
With whatever knowledge I had, I took a shot.
That was the first time I saw the Milky Way. There has been no looking back since then.
This article is an introduction to shooting the Milky Way.
Location
The most important factor is to identify the location where I would find dark skies. If you want great Milky Way pictures, there has to be minimal light and air pollution.
So basically, go out of the cities to places which have less or no habitation.
One of the best places to shoot the Milky Way is the Himalayas where you get dark skies.
I use www.darksitefinder.com to do that. This website uses an overlay on Google Maps and with the use of colour codes, helps us identify the areas which are suitable to shoot.
When to go?
Once I identify the place, the next factor is when to go?
There are some times of the year when the Milky Way rises right after sunset and continues to be visible for a long time.
For example, June and July is the best time of the year to shoot this in the Himalayas (or in most places in the Northern Hemisphere).
Any kind of light can impair the visibility of the Milky Way.
Even if you go to the darkest places, the light from the moon can affect the visibility of the Milky Way. You have to shoot when the moon is not visible, so either before moonrise or after moonset. You can go to www.timeanddate.com to find the moon calendar.
Composition
Composition is the most critical factor that can make or break your image.
The Milky Way looks almost identical whenever you shoot. It’s the foreground elements that makes a difference.
Ansel Adams said - A good photograph is knowing where to stand.
Every time, I want some new and interesting foreground. For this, we have to scout for the locations or take something different in the same location. This takes some effort. I rarely do the same composition that I have done before, so it becomes more challenging.
This picture by John Fan was taken with a Sony A99 and a Zeiss 16-35mm lens. It shows the importance of a compelling foreground. Without it, the picture will look quite ordinary.
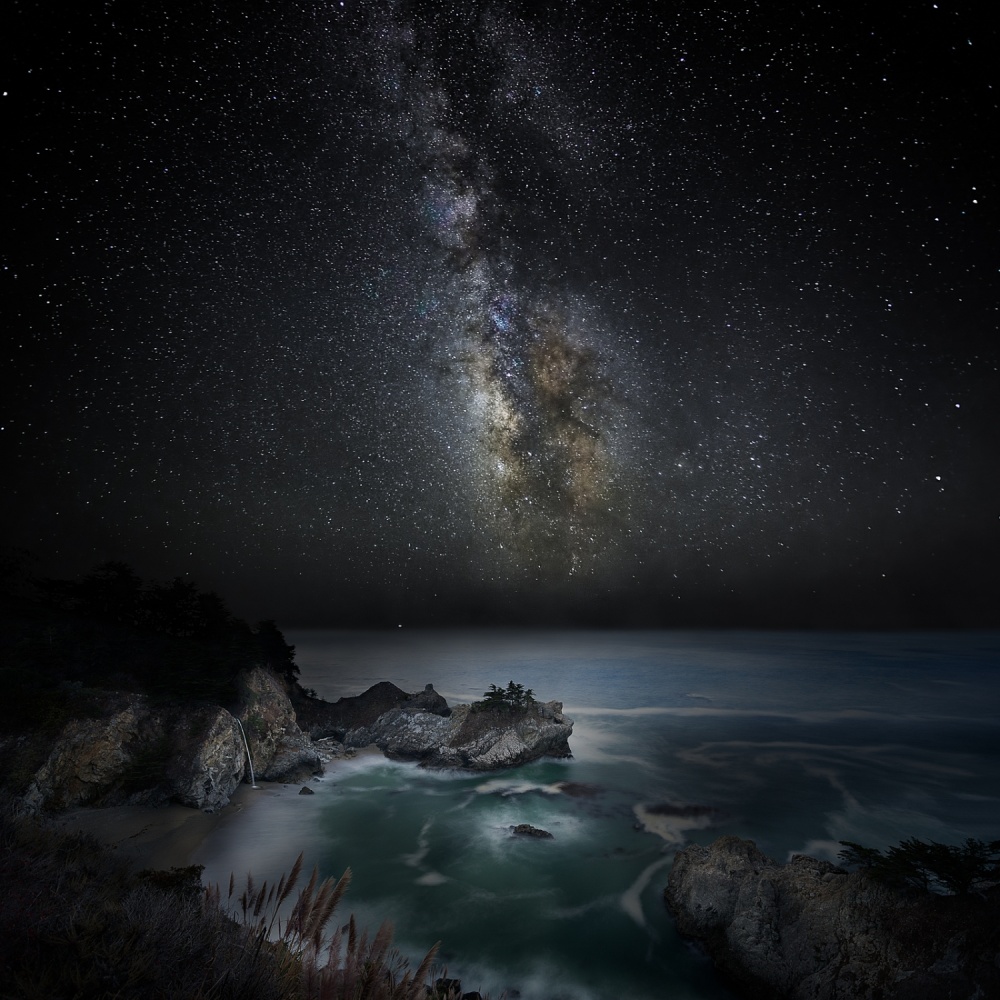
'Whisper of Darkness' by John Fan
Sometimes, to make make the foreground more visible (like foliage) and use a torch to 'paint' it. (like foliage) can make it more visible.
For example, in this picture, Matt Anderson used light to shot more details of the foreground and it definitely makes it look more interesting by giving us a sense of the place.
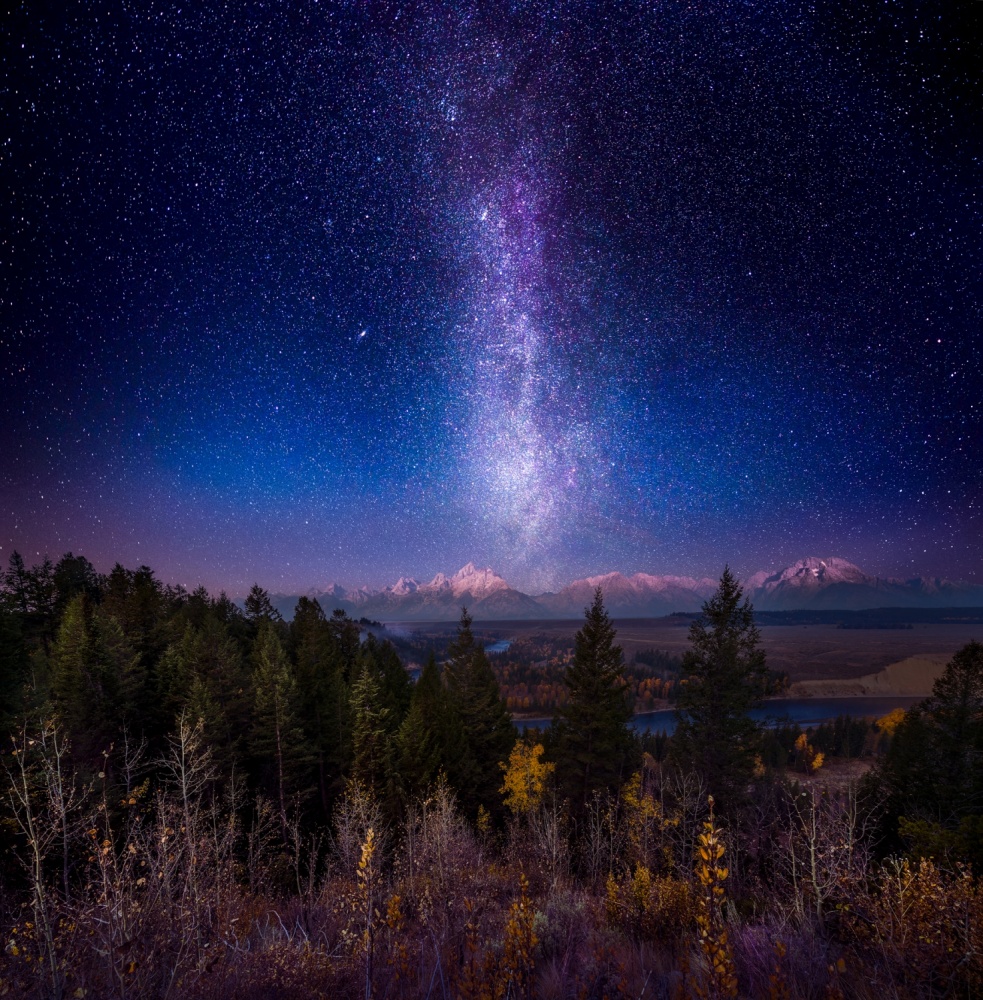
'Milky Way Twilight Afterflow over The Grand Tetons' by Matt Anderson
I use an app called Photopills to help me plan my composition. It has an impressive feature of ‘Augmented Reality’ which helps me find the time the Milky way will be visible in my compositions.
Let me explain how it works. Suppose I want the Milky Way between two mountains to make a perfect composition. I want to know what time it will be positioned there. Using this app, when I point my camera to the mountains and move a slider representing the time, I will actually be able to see the Milky Way moving as an overlay over the mountains. This helps me plan my shot well, so I don't have to wait all night.
Motivation
In the Himalayas, the places where we go to shoot are located at high altitudes (about 14000 feet above sea level). Our body starves for oxygen at this altitude, so don’t over-exert yourself.
Also the low temperatures and wind makes it more challenging. So, you have to keep yourself motivated.
Warm clothing is a must. You also have to keep yourself hydrated by drinking enough water.
Equipment
Camera - Any dSLR is capable enough to shoot the Milky Way, however having a full frame camera will help you get more details because of better noise performance.
Lens - To start with, you can use a 18-55mm lens. I suggest using a wide-angle lens like 14mm on a full-frame to capture as much as possible.
Also, having a lens with an aperture of 2.8 or wider allows more light coming in, which will help you to shoot at lower ISO.
Tripod
You definitely need a sturdy and stable tripod.
Other Important Accessories
Remote Release - I use a wired shutter release remote control, so I don't have to depend on batteries. Although it can be controlled using a phone, again batteries can be an issue.
Head Torch - I always carry a head torch.
GPS - GPS is a must have to find your orientation.
Settings
EXIF – 30s. f/2.8, ISO 4500 on my Nikon D610 with 15mm Tamron 15-30 f/2.8 lens
Shutter Speed
Ideally, we would like to shoot at the lowest ISO, to get least noise, but there is a limit to the longest shutter speed we can use. This is very critical because beyond that, the stars will lose their shape and will start forming trails.
To find the right shutter speed you have to follow the rule of 500.
Your shutter speed = 500/focal length
For example, if your focal length is 15mm, your maximum shutter speed should be 500/15 is 33.33 seconds.
If you are using a crop sensor camera, consider your crop factor and the effective focal length.
Aperture
Choose the widest open aperture (f/2.8 in this case) to allow maximum light to enter, which will allow us to minimise the ISO.
This also means that the depth of field reduces if you have some foreground element very close to the camera.
The workaround is to take a separate picture for the foreground and blend it later.
Chris Kaddas shot this with a Nikon D300 with a Tokina 11-16 f/2.8 EXIF 11mm 20s ISO 1600.
'At the edge of the world' by ChrisKaddas
ISO
The ISO can vary based on the location. I keep it between 2500 to 4500.
In the camera, I put my long exposure noise reduction set to Off and High ISO Noise Reduction to Normal.
A lot of people use image stacking for Noise Reduction. It requires taking several shots at lower ISOs and stack them to get less noise. You have to consider if it is worth the effort.
I do the noise reduction part in Lightroom and it works quite well.
White Balance
I generally keep the White Balance set to Auto and tweak it later in post processing. Since I shoot in the RAW format, it's very easy to do so.
Like in the example from Andrey Shumilin, he uses two bracketed exposures for the water and ground and 12 stacked 30 second exposures for the sky.
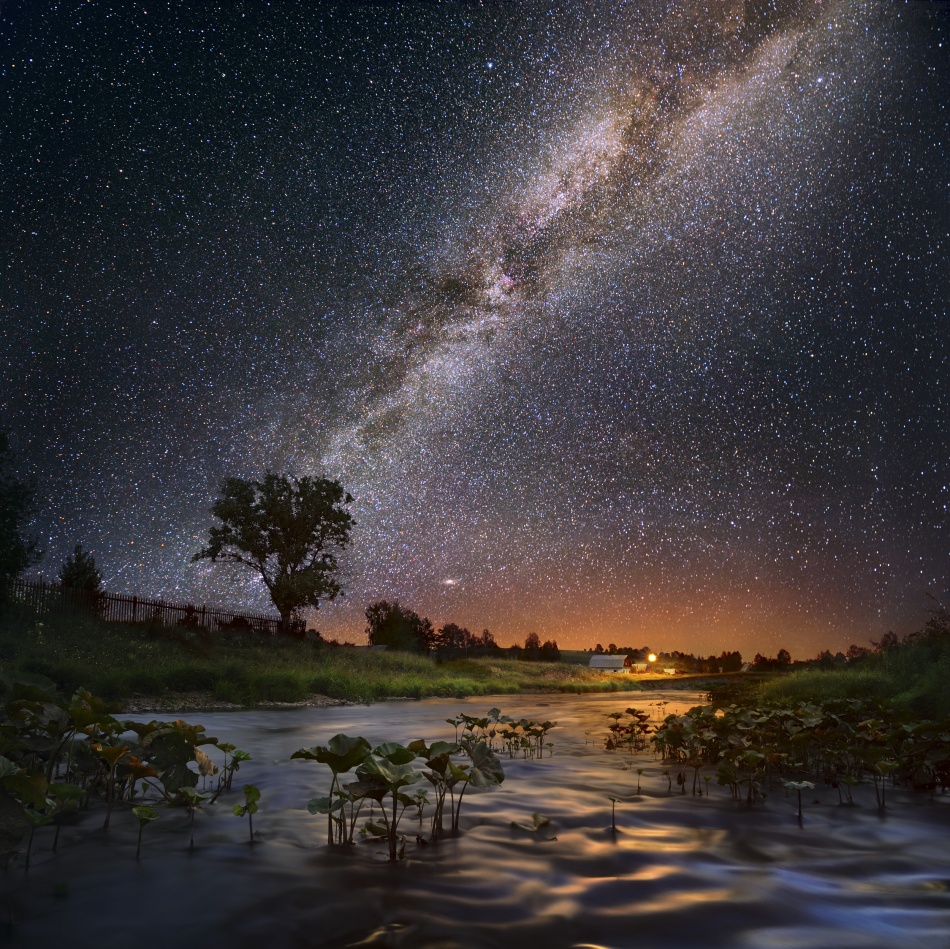
'Milky Way' by Andrey Shumilin
Manual Focus only
Because of very less contrast, there is no way that the AF will work. So, the only choice is Manual Focus.
Some lenses have an infinity symbol marking. I recommend to put it to a little less than infinity. For lenses where infinity is not marked (like the 18-55 kit lens for a Canon), you can rotate the focusing ring to a little less than the left most extreme. For a Nikon, its a little less than the rightmost extreme. Sometimes you need to do a little trial and error.
The other way to focus is to use the Live View, zoom in to maximum and focus manually on a bright star by adjusting the focus ring to get it perfect.
Creating a Panorama
Since it was way beyond the angle of view of my 15mm lens, I took 8 vertical shots and stitched them later. When you are doing a panorama, make sure you have roughly a 30% overlap between two frames. That will enable the software to make a seamless composition.
Image Stabilization / Vibration Reduction
If you are using a lens with IS/VR, remember to switch it off as this can cause shaky pictures.
Exposure Delay
Even the flipping up of the mirror can cause vibrations and can spoil the picture. I use Exposure Delay Mode in my Nikon cameras, so the mirror flips up before the actual exposure starts. This eliminates the chance of any vibration caused by the mirror movement.
Shooting in RAW
Shooting in RAW file format is very critical to get the most out of your picture.
Processing
Back to that shot I mentionned at the beginning.
This picture is shot in Pangong Lake, Ladakh, India which is one of my favorite places to shoot. It is definitely one of the most beautiful lakes in India. Being surrounded by mountains from all the sides, it's a visual delight for every photographer to shoot here.
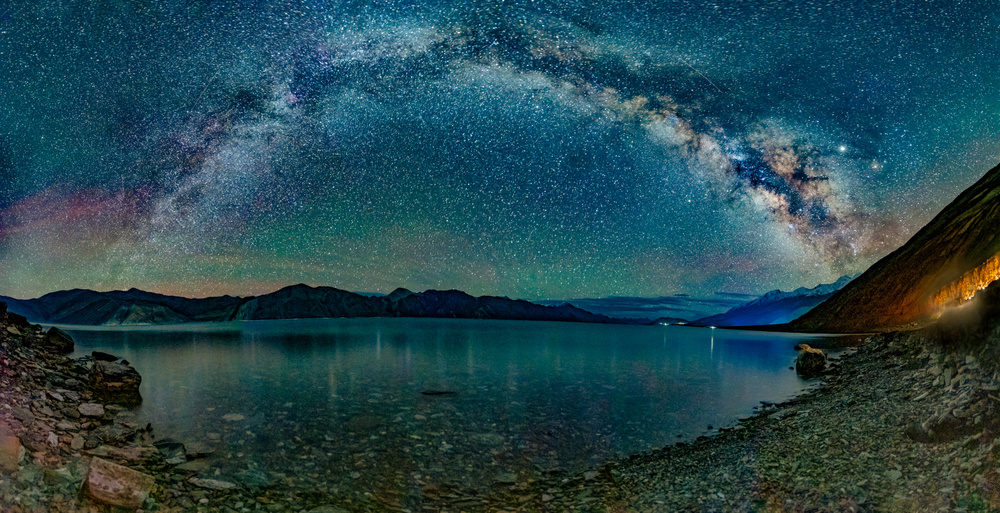
'Panorama of Milky Way at Pangong Tso, Ladakh' by Saurabh Chatterjee
I used Adobe Lightroom Classic to process this picture.
This is a stitch of 8 shots.
I processed one picture first for the exposure, contrast, clarity and dehaze and then the Noise Reduction to reduce the noise.
Then using Photo -> Photomerge -> Panorama, Lightroom created this panorama for me.
Finally, some tweaking to the final image to get this output.
To get the optimum dynamic range, you can also take this processed image to Photoshop and work on the layers.
Bonus Tip
It can be extremely annoying when your shot is open and someone switches on a torch and spoils the picture. To avoid doing this, I advise you to feel your camera like a blind person and change the settings. If you can do this, it will be really very helpful to change the settings without any torch.
My Blog - https://siaphotography.in/blog
Instagram - https://instagram.com/saurabhchatterje
 | Write |
 | Yvette Depaepe CREW Interesting article and great technical / practical advice, Saurabh. Great job you did. Thanks a lot and congratulations to the authors of this amazing Milky Way shots. I wish you all a fine weekend ahead. Best greetings, Yvette |