


|
|
|
|


by John Flury
Published the 14th of April 2020
This is how to use zone lighting and transitional zones to create a complexly and variably lit scene.
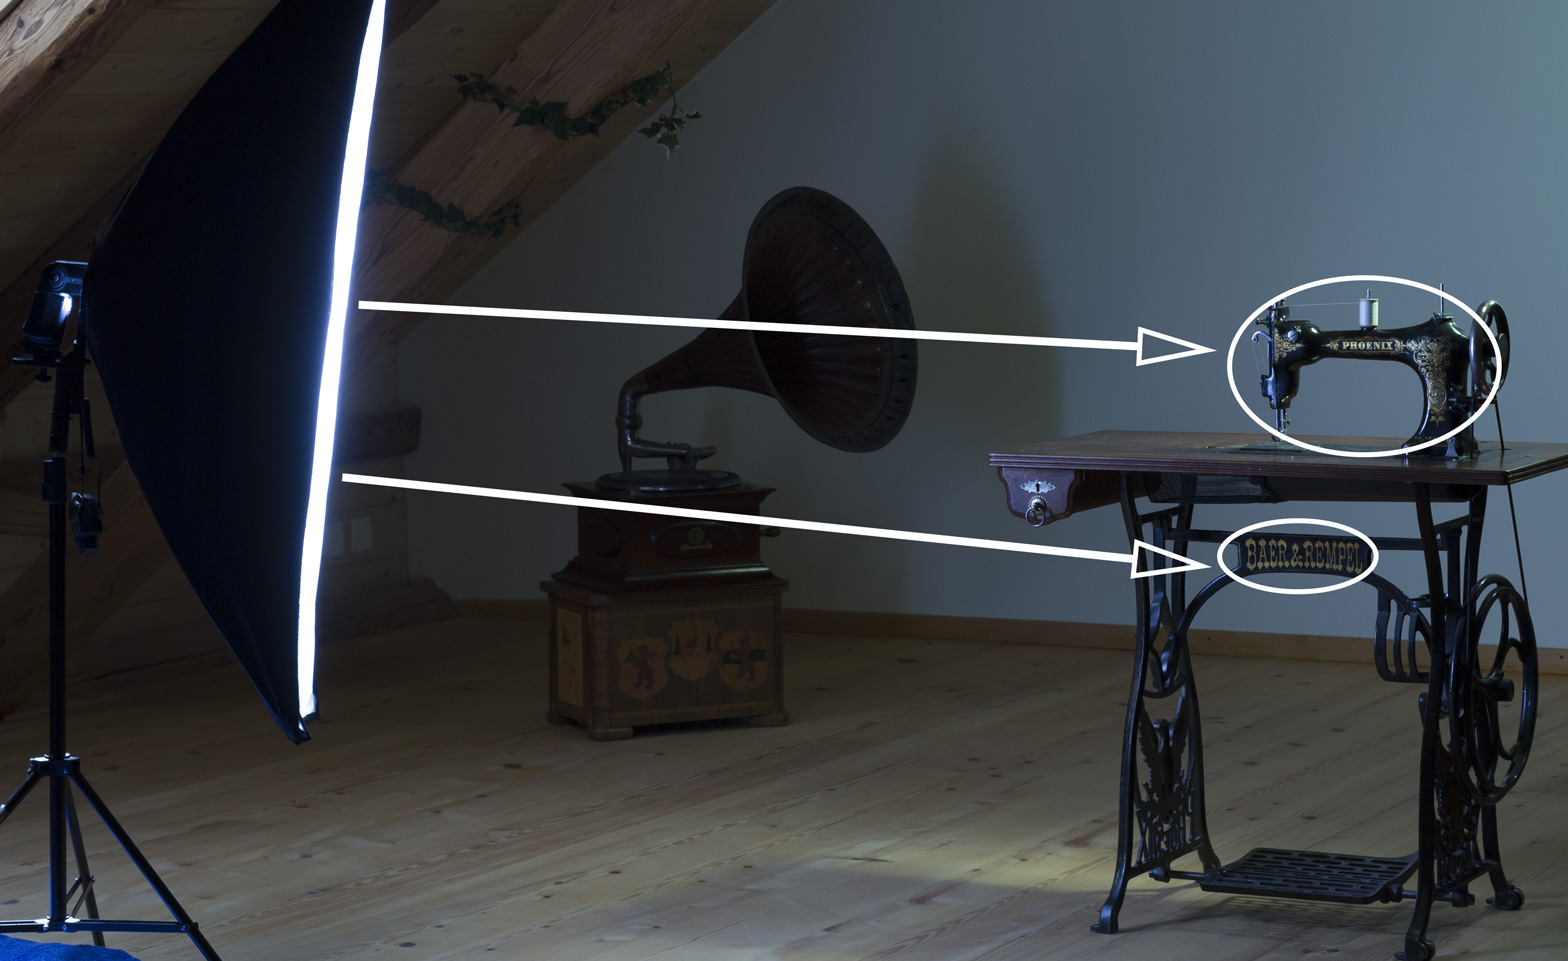
To create the image, I needed to light several areas separately. In total, I used three Speedlights, a gridded beauty dish, a Lastolite Hotrod Strip Softbox, colored gels, a tripod, three light stands and a boom.
Once everything in the scene was in place and visually balanced, I put my DSLR on its tripod and tethered it to my iPhone, via a WiFi connection. I used the Canon EOS Remote app, which adjusted the lights, triggered the shutter and allowed me to immediately to see the results on my phone display. I began to work through the zones from back to front. Using zones has two advantages: (1) you are able to focus your attention on one area at a time in order to light it according to its purpose in the overall image, and (2) you are able to light it according to the maximal desired effect within its zone. It also makes setting up easier since it didn’t matter if my light stands were somewhere inside the frame, as long as they weren’t in the zone I was currently working on. As I went along, I had to make sure that I had complete scene coverage from all my zones and that the lighting quality, angles and intensities weren’t too different between neighboring zones.
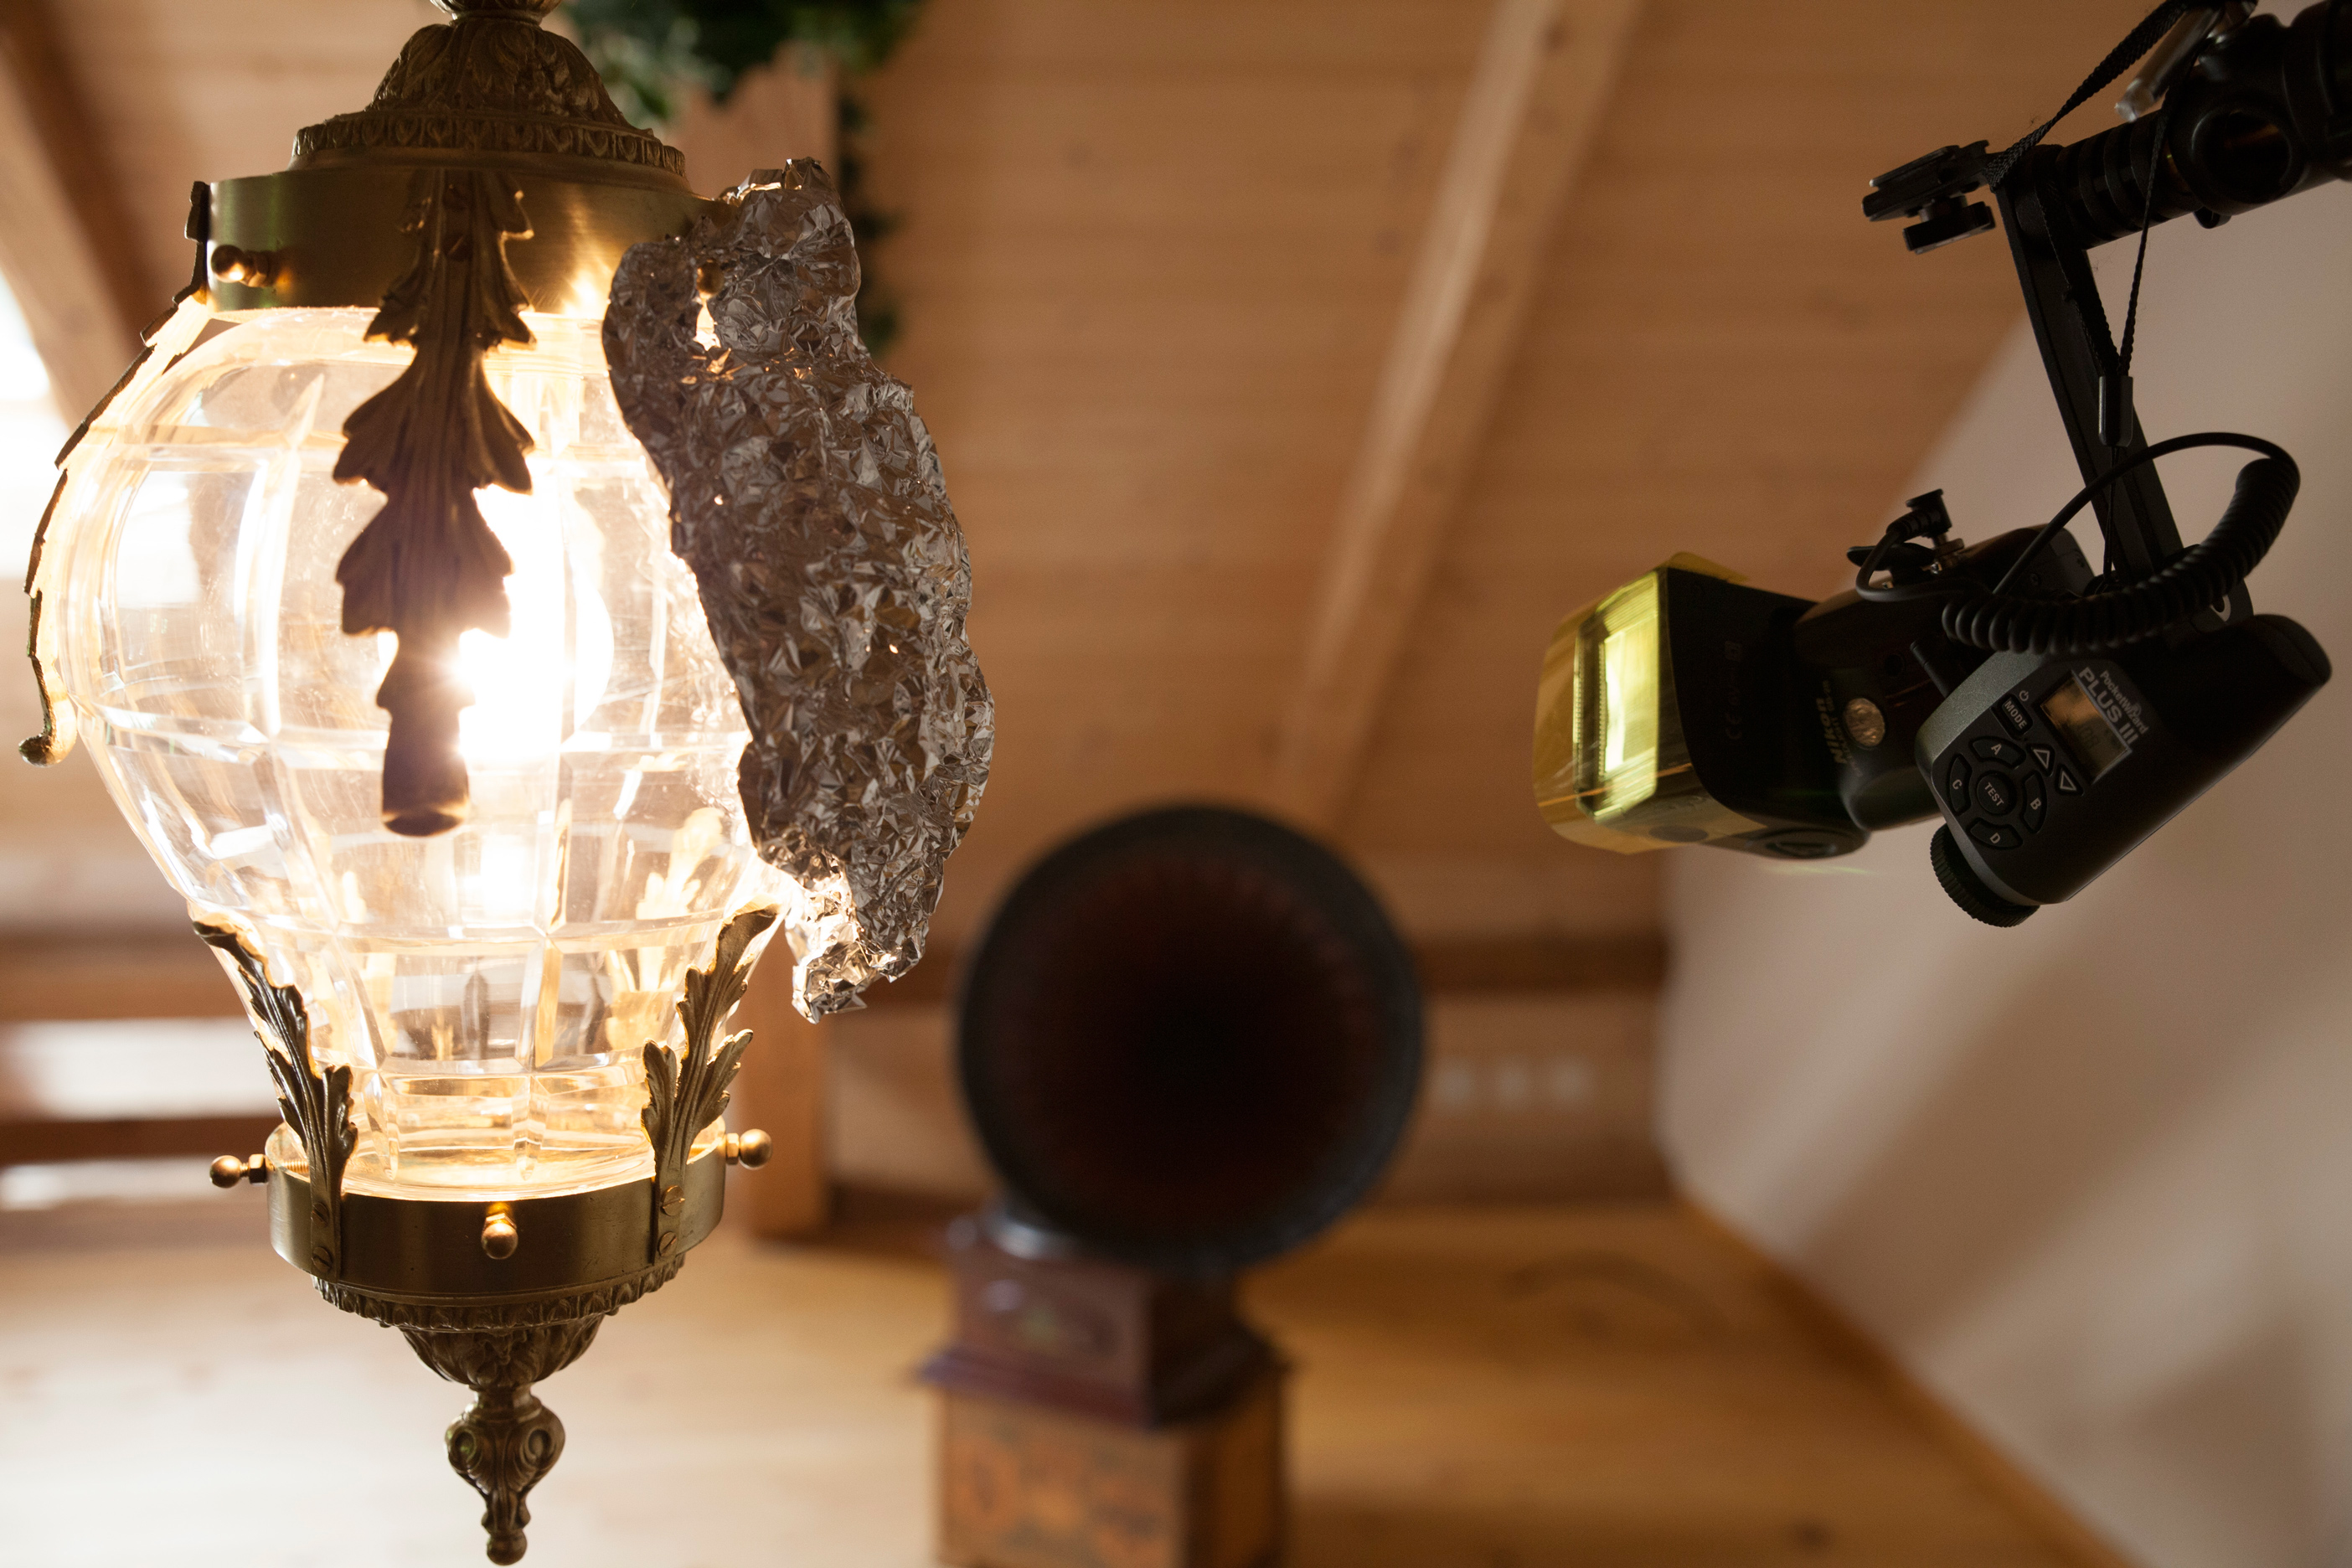
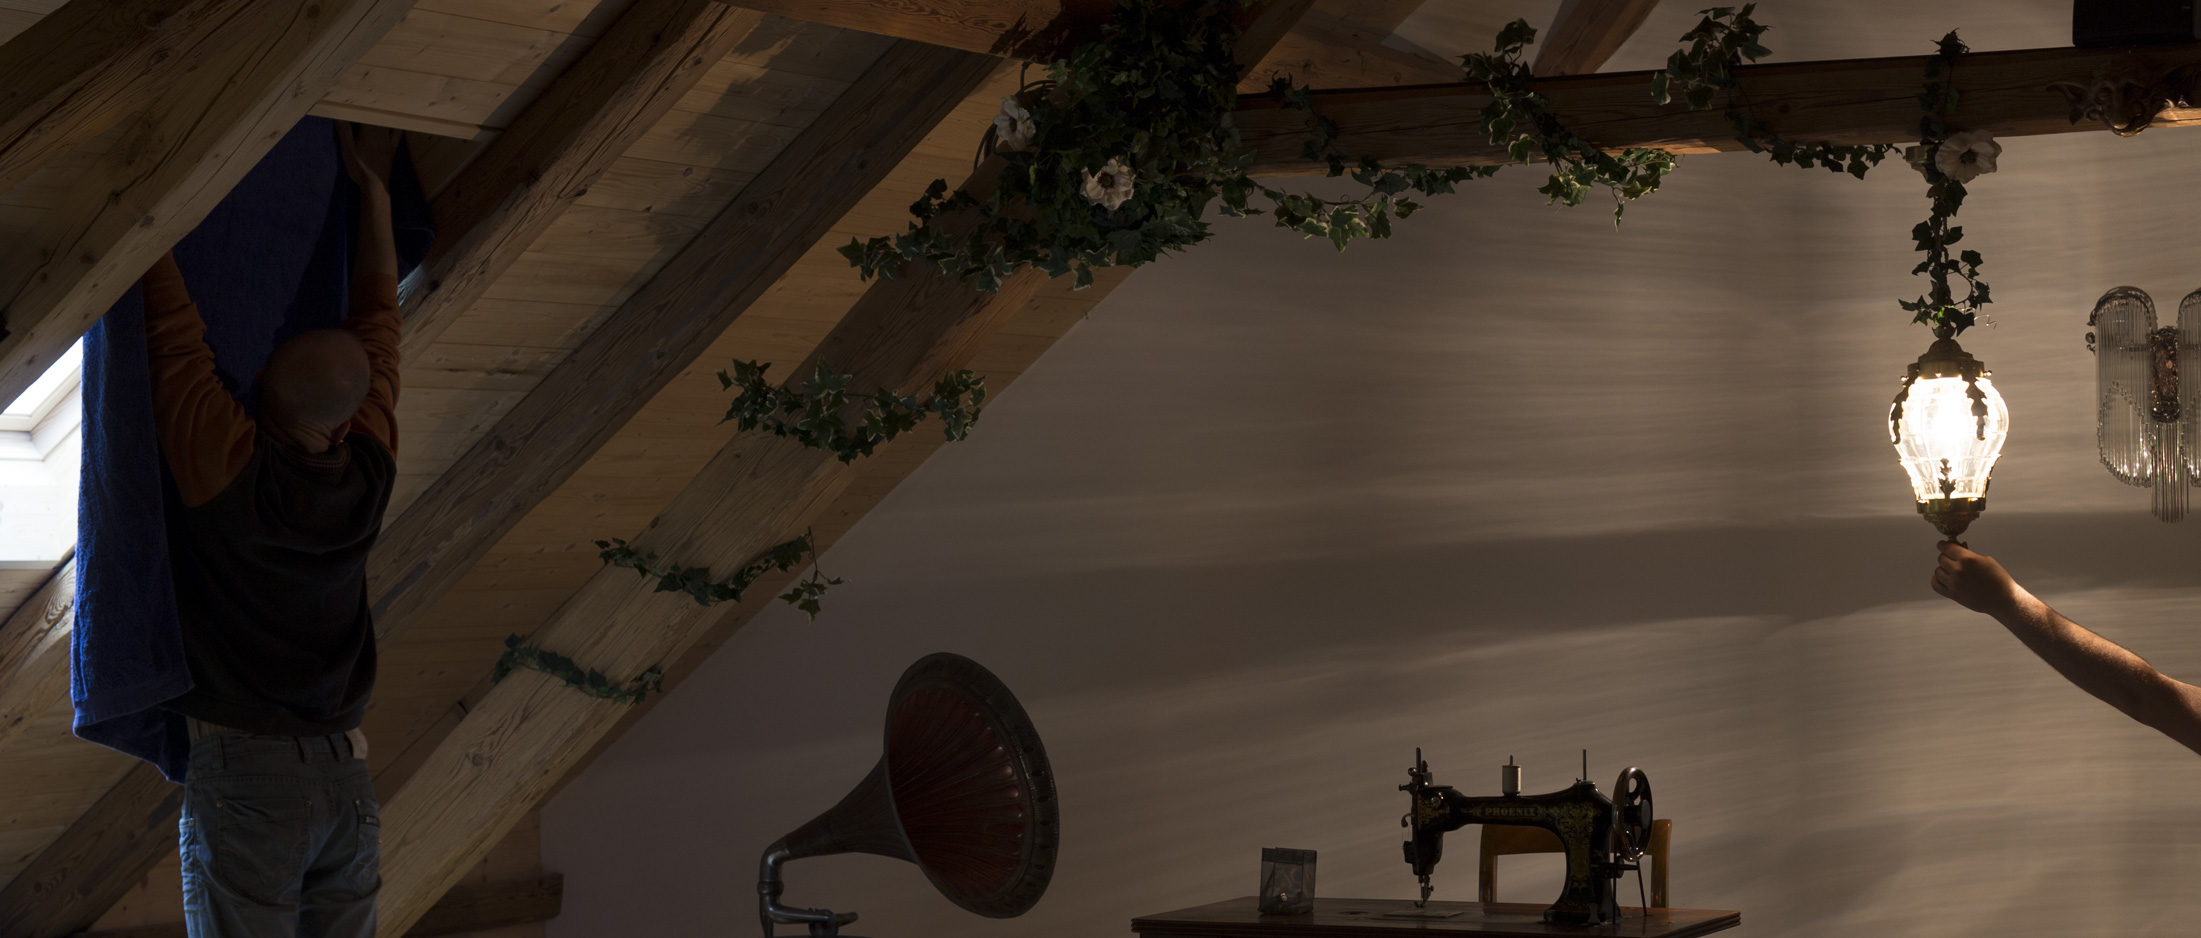
"In addition to the two strobes, I used a bit of trickery to mimic light emanating from the lamp hanging from the beam."
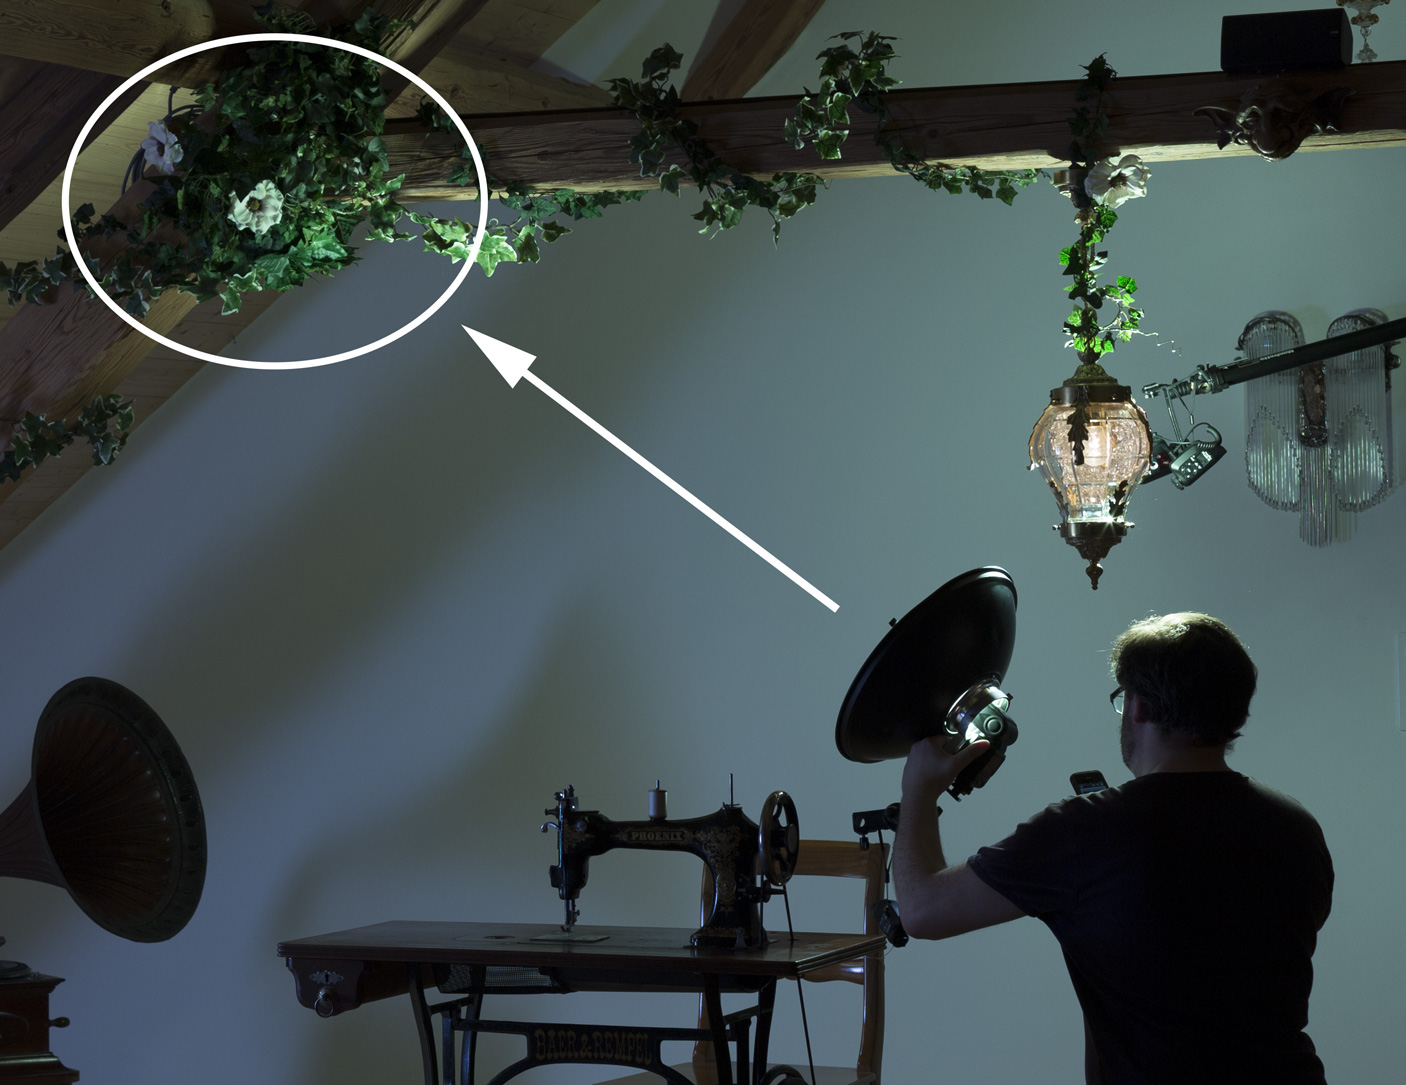
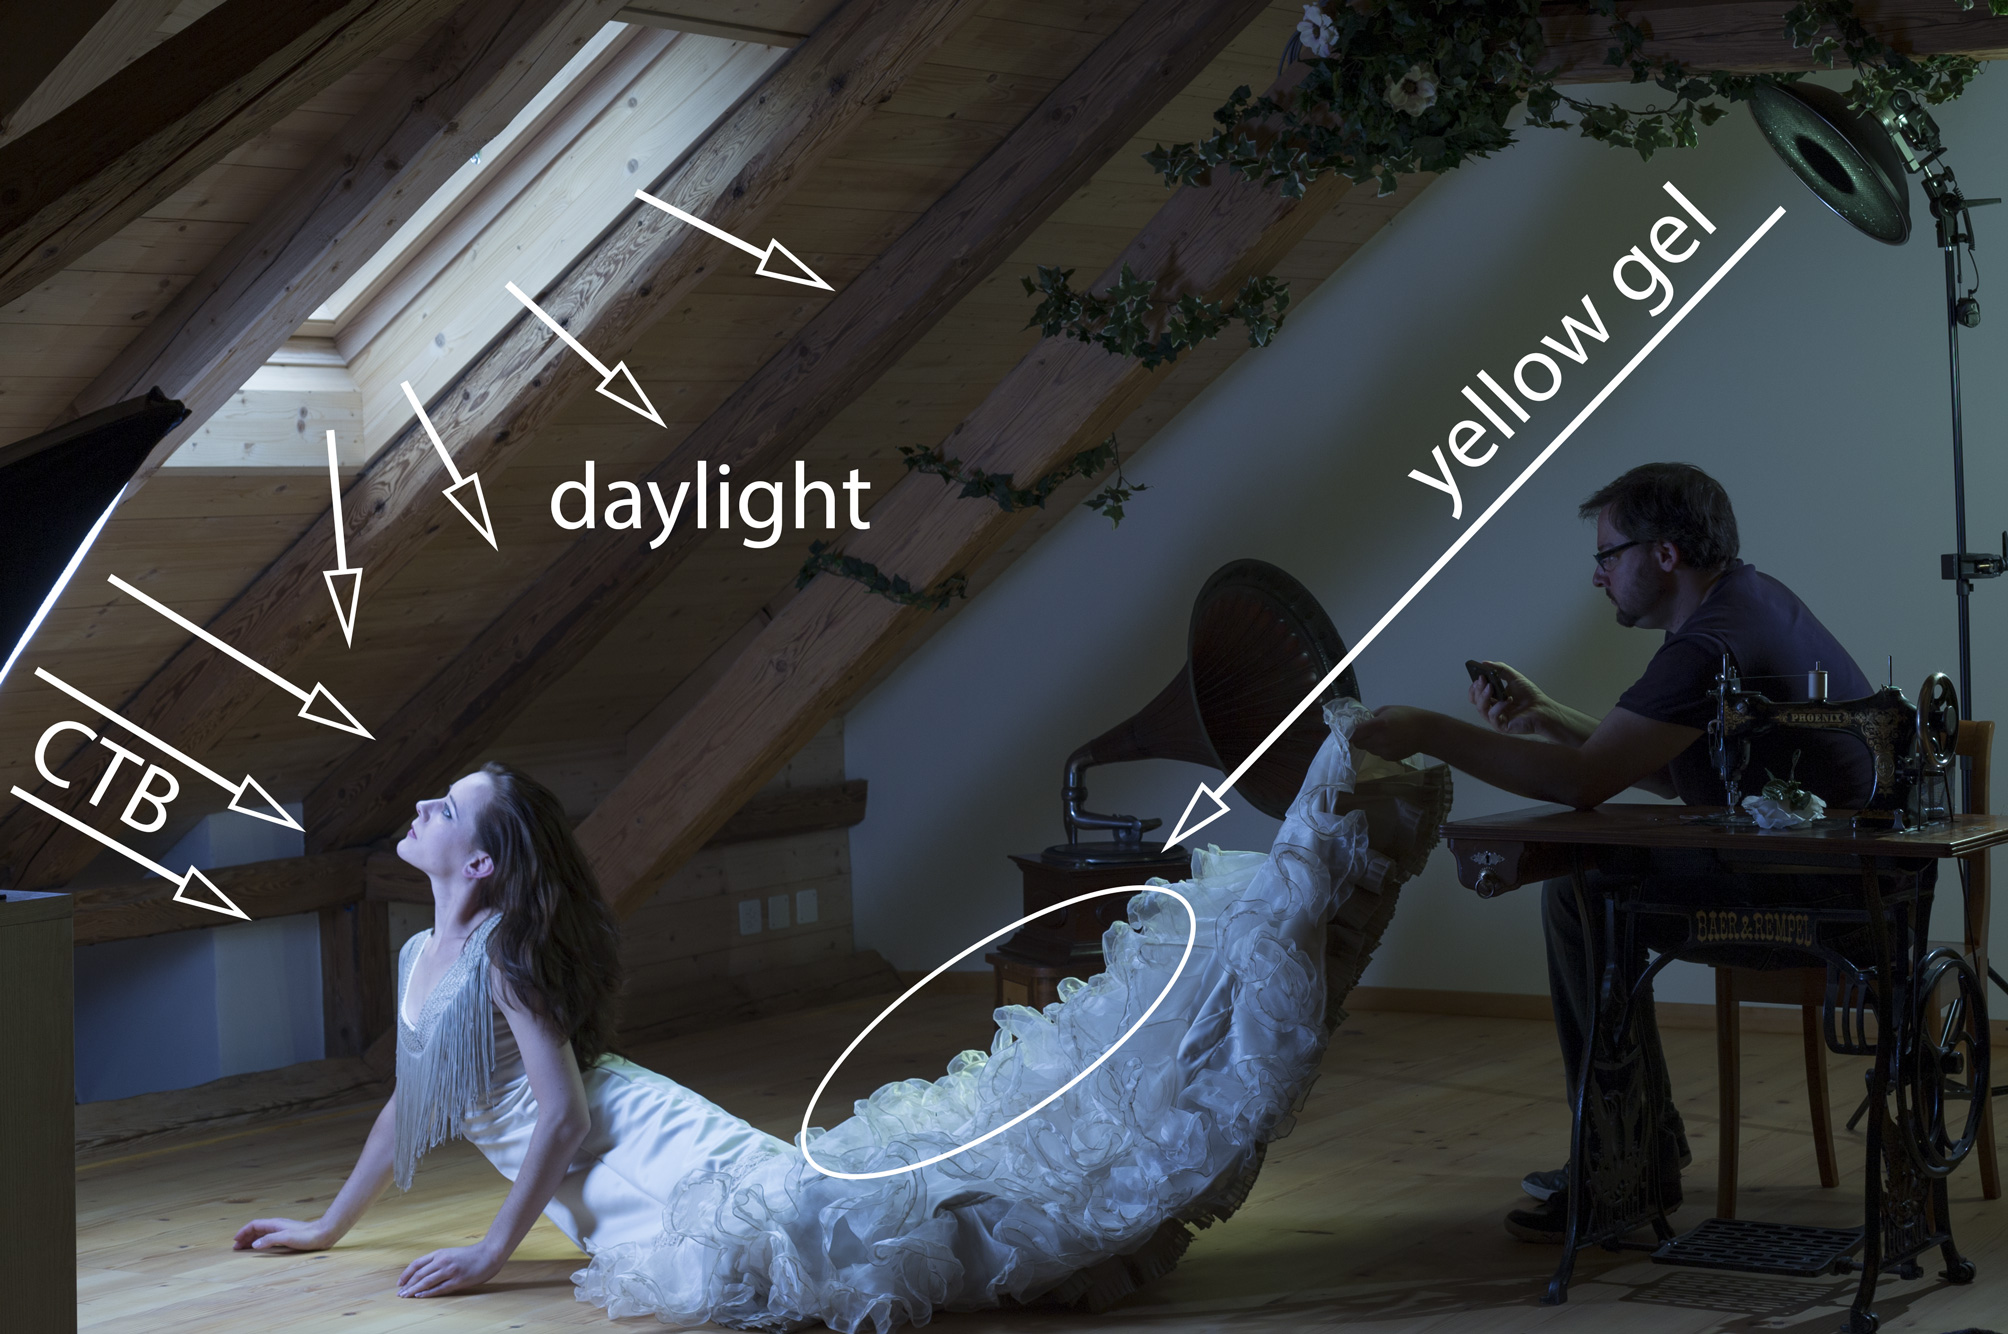
For the overall color scheme, I went for a range of cooler color temperatures to underline the mood of the story. I set my camera's white balance to tungsten, which shifted all light toward the blue spectrum (incuding the incident afternoon sunlight). In the zone on the right side, I added yellow gels (not CTO gels) to two Speedlights (the white balance transformed the hue of the light from yellow to a pale green). In addition to the two strobes, I used a bit of trickery to mimic light emanating from the lamp hanging from the beam. The lamp’s backside was covered with aluminum foil, and a Speedlight behind the lamp hit the round surface and the foil spread light to the back wall, ceiling and floor (the Speedlight was mounted on a horizontal boom to make sure that the shadow of the stand would be easy to remove in post-processing).
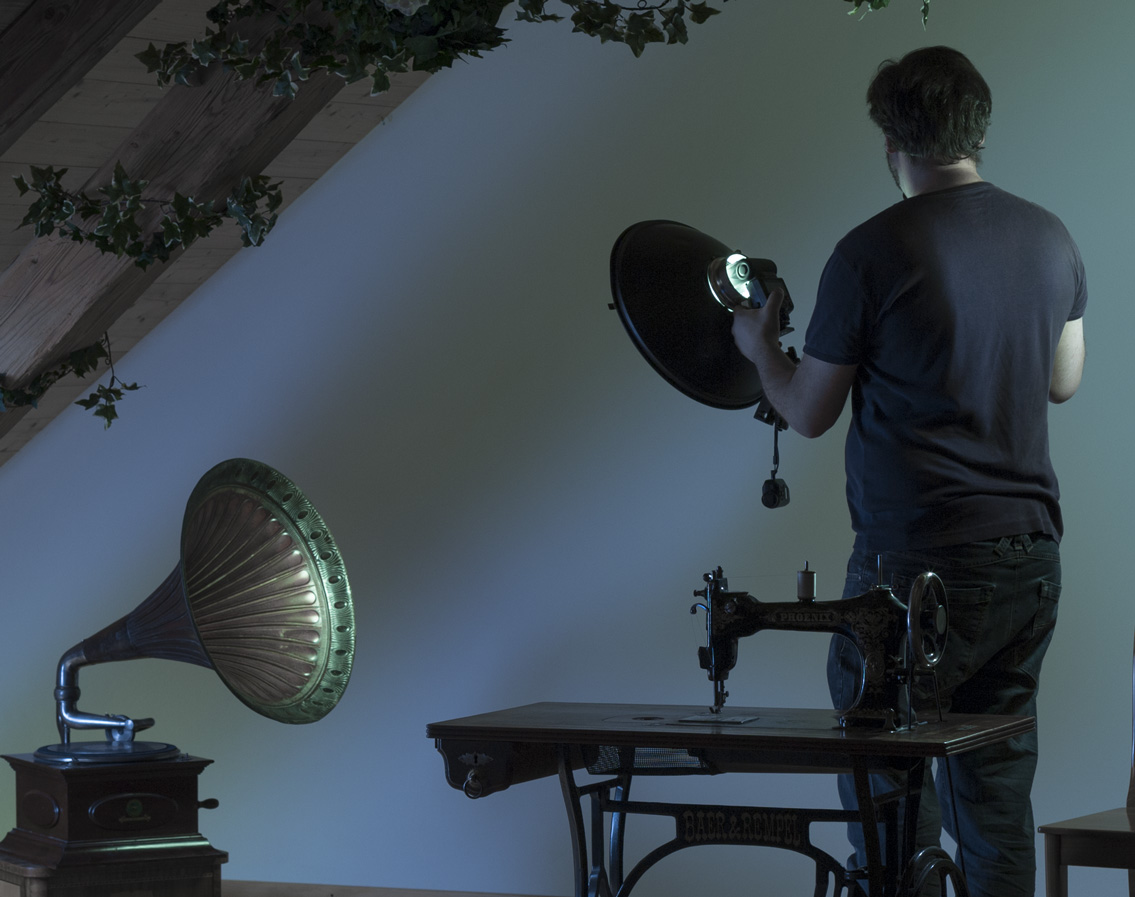
For the other zones, where lamplight came directly toward the camera, I used a separate Speedlight, in a beauty dish, to direct the light wherever needed within a certain zone. To achieve maximum control on the zone with the window, I placed an upright Striplight modifier, with a Speedlight inside, next to the window. I also kept it there for most of the other zones, just pulling it a little closer for the detail shot of the front of the sewing machine. The individual examples show how I lit different zones separately.
My model had very little modeling experience, but as a dancer she had a highly developed awareness of how to control the position and appearance of her body. This enabled her to do exactly what I needed.
POST PROCESSING
Here is a summary of the post-processing using Photoshop:
1) Compositing — saved separately and flattened for use as a starting point for the next steps
2) Beauty retouching — on her skin, eyes and eyelashes
3) Light dynamics — darkening backgrounds, brightening foregrounds, adding a glow around the lamp and a light beam from the window
4) Color — desaturating the image, especially the red tones from the wooden beams, careful balance of the blue and green side of the image
5) Texturing — a subtle surface texture was applied to the back wall and blended with the natural light pattern from the lamp without the aluminum foil
6) Selective sharpening — only in key areas, like the facial expression, patterns in the costumes, brand lettering of the sewing machine
TIPS
Here are the examples of individual zone lighting.
1) Zone lighting for the woman on the table: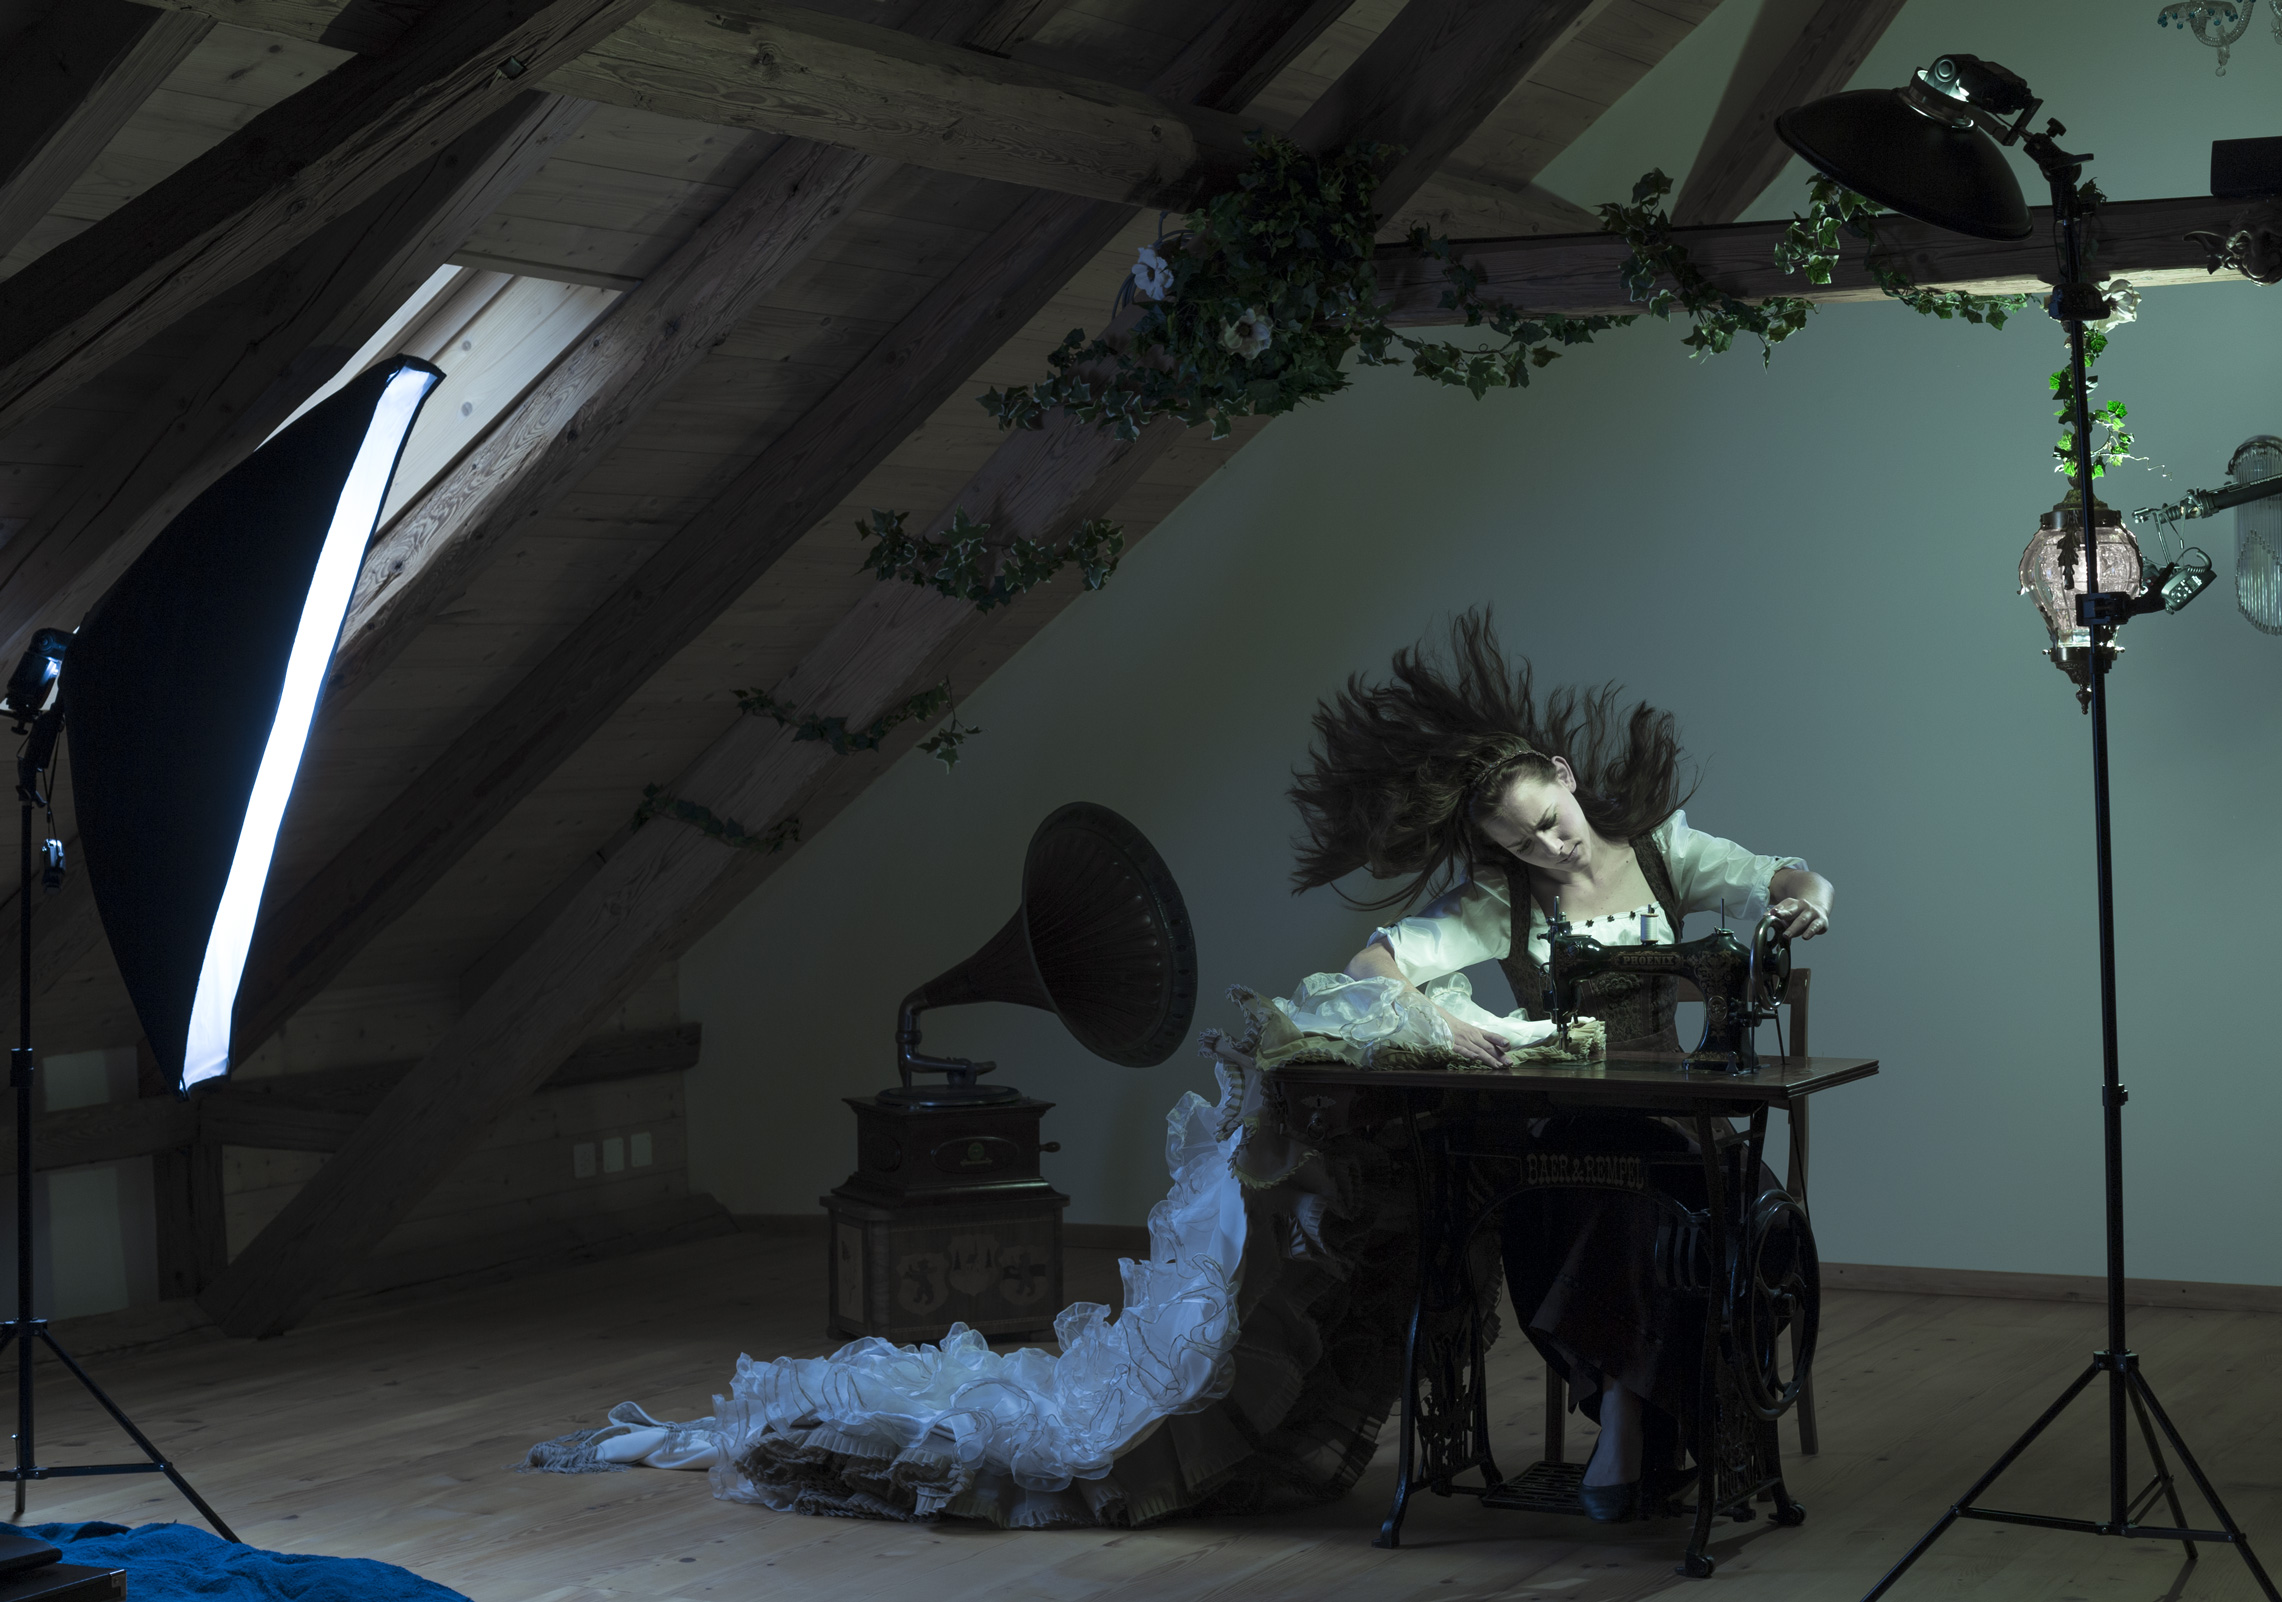
2) Mimic lamp light:
3) Zone lighting the ivy:
4) Zone lighting the gramophone:
5) Zone lighting the front of the sewing machine:
6) Zone lighting the woman on the floor:
7) Natural lamp light pattern
BIOGRAPHY
I am a photographer from Zurich, Switzerland. In my freelance work, I follow my urge to tell stories — a passion carried over from my childhood. Only the medium I use for storytelling has changed over the years. In my late twenties I discovered the power of photography and Photoshop to create realities.
My team and I are really happy with the result, and I'd like to thank my model and inspiration Daniela, as well as Roni and Tino, who provided us with the perfect location and props for this shoot with their lovely little museum for antique sewing machines in Dürnten, Switzerland.
If you've enjoyed my tutorial and like to tell stories yourself, or if you have questions, don't hesitate to get in touch with me.
Check out my homepage
 | Write |
 | Biao Huang PRO 大师,真是太棒,学习! |
 | Ralf Stelander FOUNDER Excellent tutorial, very interesting to follow behind the scenes of this beautiful shot! |
 | Madjid Momeni-Moghaddam Hi
This was one of the coolest and most exciting tutorials I've ever seen. Thank you very much. |