


|
|
|
|
by Editor Miro Susta
When the day draws to a close and the sun slowly disappears on the horizon, the world of night photography begins.
With a little practice night photography becomes an extremely enriching photo activity, but it is very demanding and time consuming.
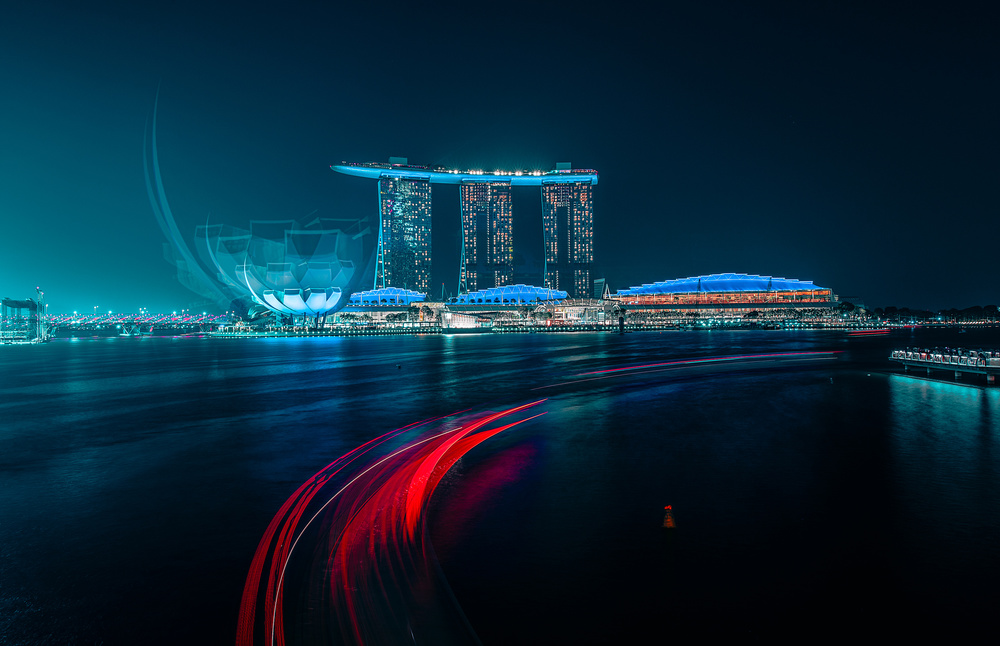
'The Red Wake' by Carmine Chiriacò
Due to the many different thematic areas it never gets tiresome, it is one of the most fascinating and wonderful areas of the photography.
Find out how the interplay of Aperture, ISO Value and Exposure Time works, where to pay attention to and which mistakes you can avoid right from the beginning.
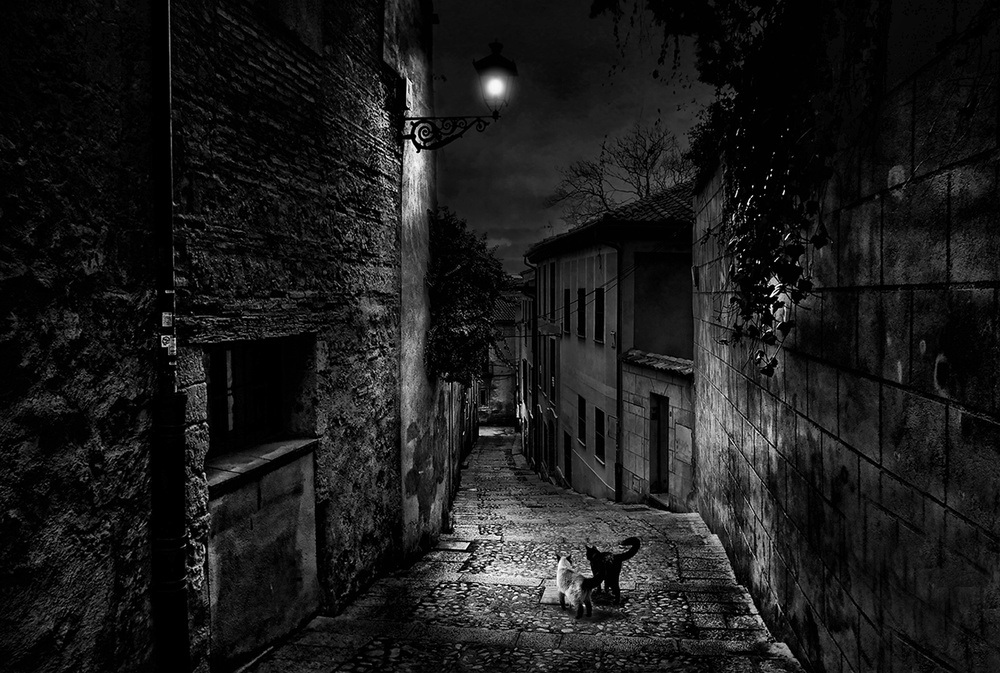
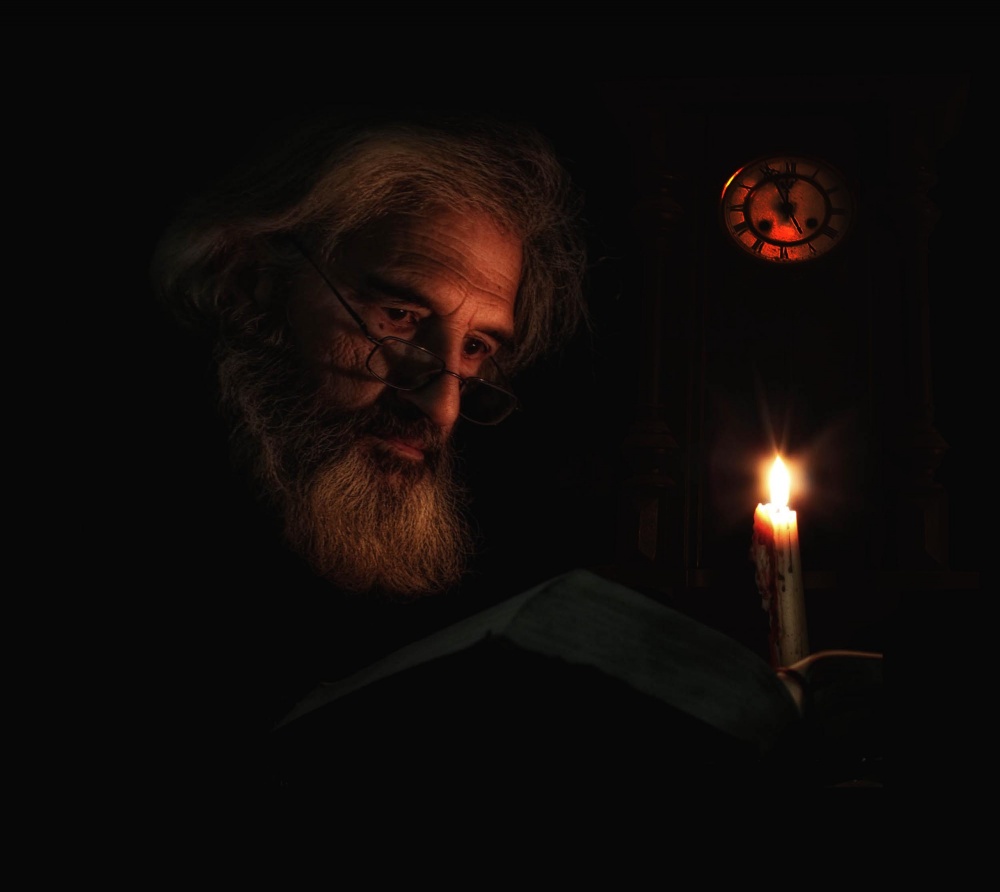
'Appointment at midnight' by Jose C. Lobato
Everything is complemented by wonderful night photo shots that were selected from the 1x-Photo Gallery.
Equipment
As in all areas of photography, the use of the right equipment plays a very important role in night photography.
This means that not only the camera and lenses, but also many other accessories available during night photo shooting tours are very important.
Camera
The choice of camera is often determined by the available budget, however, night photo shots are basically possible with almost any affordable camera.
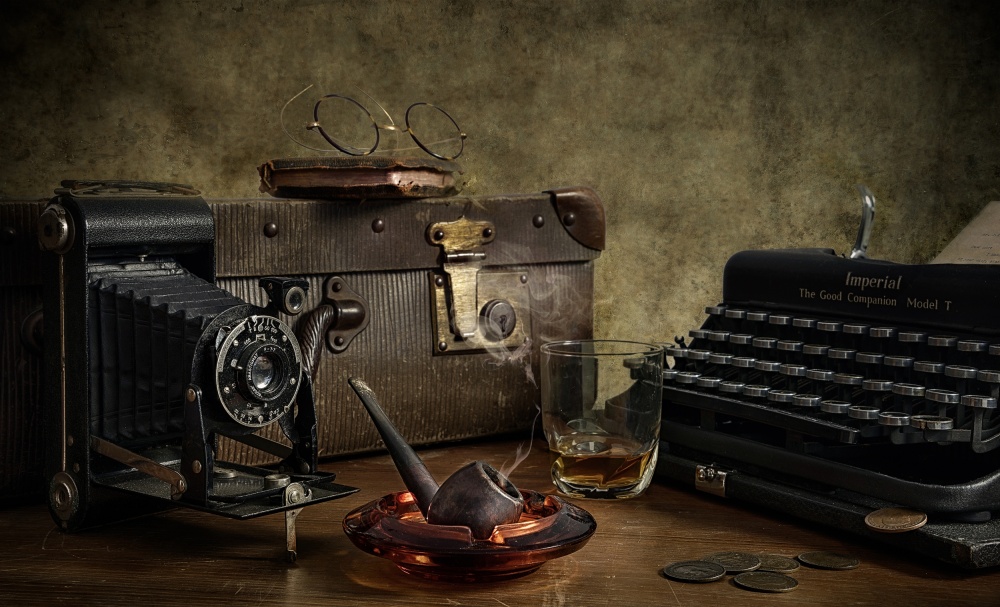
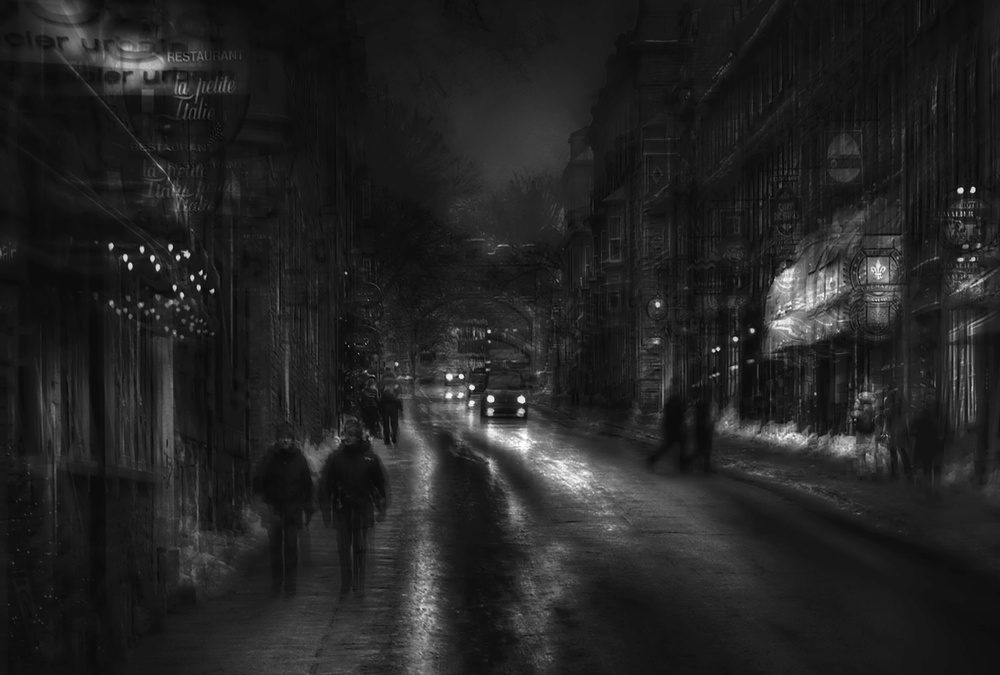
'The Travel Writer' by Nick Walton
It should be noted, however, that the selected camera does not only have auto programs, but also allows manual adjustment of ISO, Aperture and Exposure values and allows to switch the most suitable lens for each motif position.
Lenses
There are no special lenses for night photography, usually any lens can be used for night photo shooting.
However, it would make sense to use a fast prime lenses, if available f/2.8 or wider, for example 14mm, 35mm, 50mm, 70mm and also very popular 8-12-15mm Fisheye lenses.
Very practical and cost-effective option can be the use of zoom lenses, for example 14-24mm, 24-85mm or even 18-200mm.
Tripod
Night photography usually requires longer exposure times. In such case, it is very important that the camera does not move during the exposure.
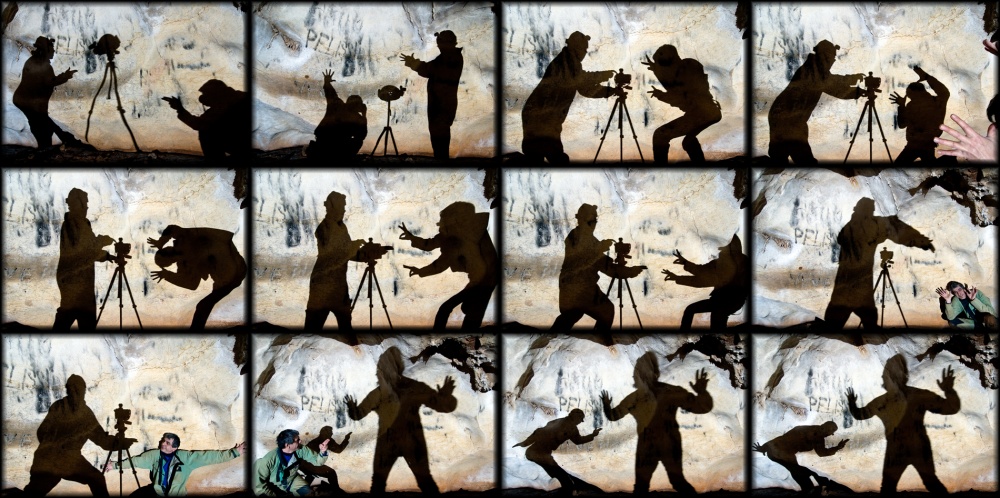
'Fighting for a tripod' by Kikroune (Christian R.)
Therefore it is necessary to mount the camera on a tripod. Which tripod is used depends on the photographer. However, one should pay attention to a very good stability, stiffness and robustness.
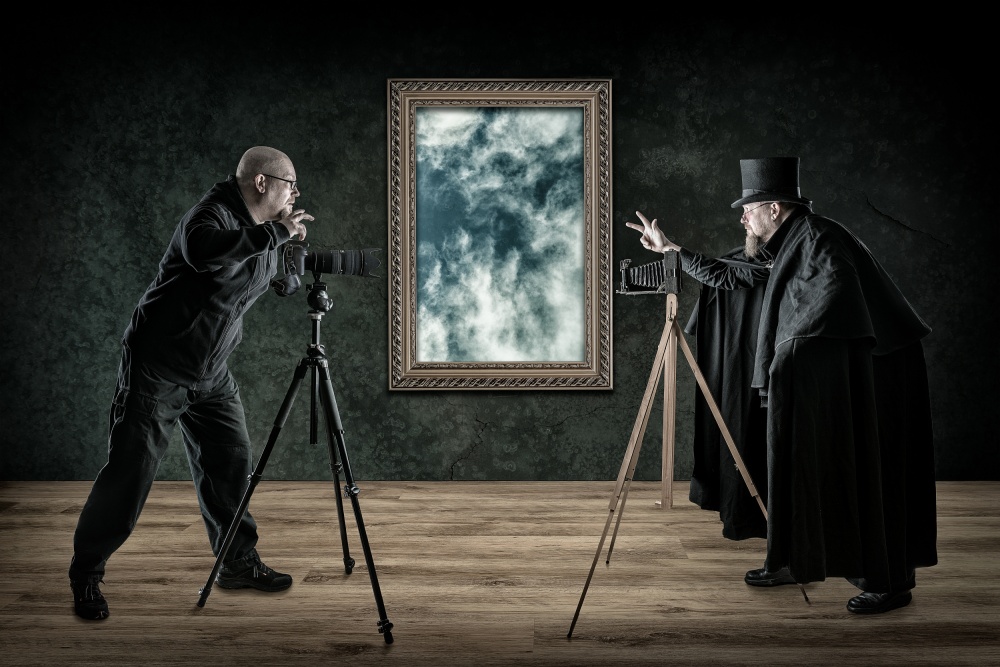
'The Duel' by Petri Damstén
It also sometimes can happen that the camera stands on shaky legs despite the tripod. When setting up the tripod, it is important to ensure that the tripod legs do not touch any surrounding railings or any other vibrating surfaces.
The main purpose of the tripod is to eliminate camera shake, but it is also essential for precise camera alignment.
Remote Shutter Release
For night scenes, with a tripod and longer exposure times, a remote shutter release can be very helpful. With it pictures can be captured without touching the camera, i.e. even the smallest vibrations are minimised.
The remote exposure release is very important in most cases of night photography.
Neutral Density Filter (NDF) & Polarization Filter (PF)
NDFs have a smooth neutral grey gradient that allows slightly darken the areas of the sky, especially when the sun is setting or the so-called "Blue Hour" is beginning; the sky becomes much brighter or even outshines the rest of the photo.
The NDF reduces or eliminates this problem. The darkening of the filter is indicated by the letters ND, which describe either the ND or the shutter speed extension factor.
'Nightfall' by Mathijs van den Bosch
During the Blue Hour, the use of a 2-4 stops (ND 0.6-1.2) filter is suggested.
Even though that it is possible to generate an artificial gradient with today's image editing, the contrast from the ground to the sky might be very strong, especially in the early evening.
Often the areas on the ground are too dark, while the sky is already over-illuminated and frayed.
A subsequent darkening with image editing makes the mood in the sky disappear very quickly. In the worst case, even the colors are completely degraded.
The Neutral Density Filter reduces the problem of sky degradation and helps to darken the sky reliably.
PF is useful for creating or avoiding certain effects on reflective surfaces, PF is designed to polarize the various light beams that penetrate into the lens.
Simply formulated, a Polarization Filter can allow individual light beams to pass through or block them completely.

'Moonlight rhapsody' by Miro Susta
Depending on the PF angle of rotation, the light beams are transmitted, blocked or amplified. However, this property only works on all non-metallic reflecting surfaces.
In night photography, for example, the PF can either intensify or weaken a reflection of the water surface or block light reflections from the glass panes.
NDF darkens the sky – PF reduces reflections.
IMPORTANT TECHNICAL BASICS
The Resolution
Especially for the night photography it is of advantage to select the maximum available camera resolution, this allows more flexibility in the subsequent image processing, e.g. high-resolution photos can be easily enlarged without limiting the image quality.
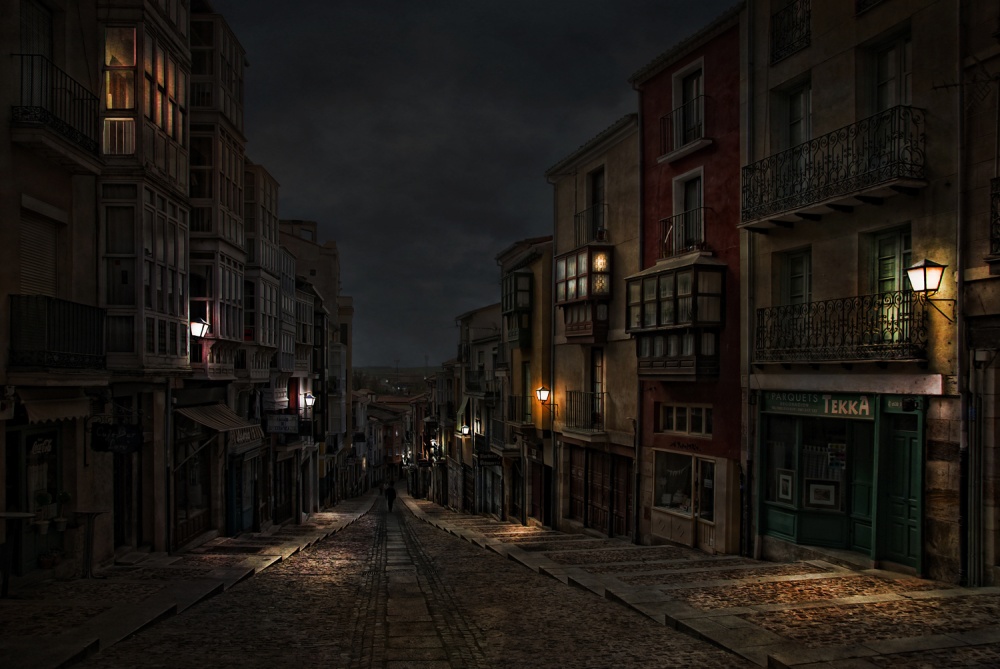
'Balborraz' by Jose C. Lobato
On the other hand, high-resolution photography inevitably leads to a larger data volume in the captured images, therefore a sufficiently large and fast memory card should be used.
Mirror Lock-up Function
SLR cameras are equipped with a movable deflecting mirror that reflects light rays through the lens into the viewfinder so that the subject can be seen in the viewfinder.
When the shutter-release button is pressed, the mirror is lifted and the light rays enter the sensor, however, the deflected mirror can cause even the slightest vibration in the camera body.
'Over The Rainbow' by Paul Reiffer
Mirror lock-up eliminates this problem and reduces vibration-related motion blur during exposure. Although the camera works without activating the mirror lock up, the use of this option is highly recommended.
In order to achieve maximum image sharpness and avoid all possible disturbing vibration factors, it is advisable to activate the mirror lock-up function during night photo shooting.
ISO Sensitivity
As already mentioned, to avoid camera shake during night photo shooting, the camera is normally placed on a tripod and the shutter is controlled by a remote shutter release. Therefore, it is not always advisable to increase the ISO sensitivity for night scenes. The exposure time is slightly longer at lower ISO values, but the image noise and sensor errors are considerably reduced. This means that the finished image quality is better at lower ISO values.
'Signature' by Andreas Agazzi
However, higher ISO sensitivity value can be used during night photo shooting to capture the special image details in the dark.
'Midnight Story' by Alfredo Yaňez
It is preferable to use the lowest possible ISO value for night photos. However, there are scenes where a higher ISO value makes sense, but the default camera settings should be low-level to minimize noise.
The Exposure
Due to the difficult lighting conditions, a longer exposure time is normally used during night photographing. Depending on the light conditions, this can range from a second fractions to several seconds or even hours.
'In the teeth of cold wind' by Yvette Depaepe
The amount of light entering the lens and thus the length of exposure required can also be regulated by using the aperture setting.
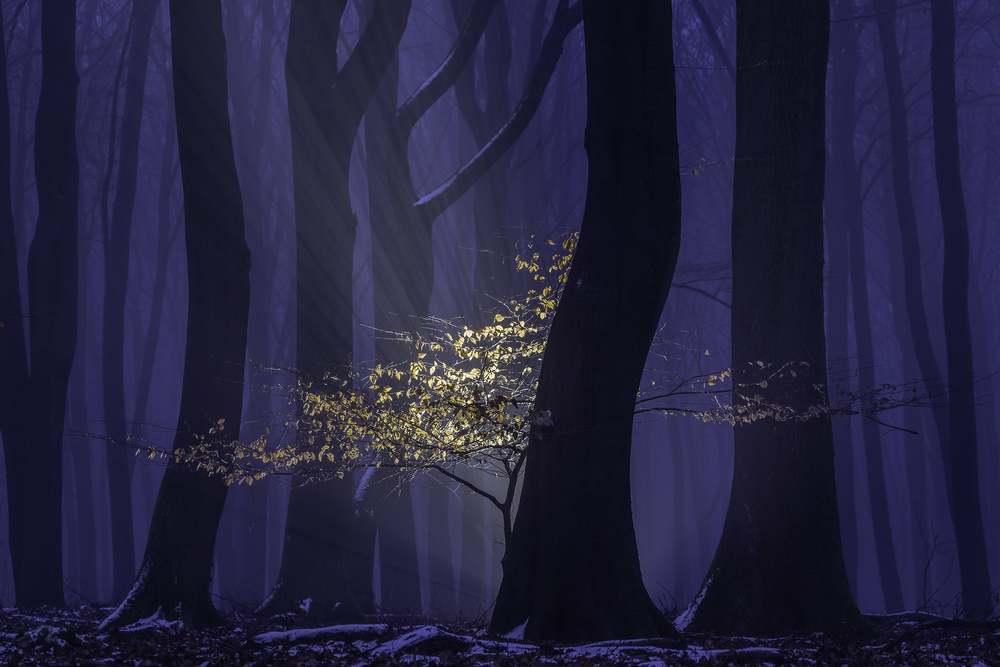
'Misty forest' by Hans van Wijck
For the very beginning, an exposure time of 5-15 seconds is a reasonable choice.
The Aperture
For many camera users, the aperture represents a book with seven seals. But correct understanding of aperture principle will make easy to use it properly and always find the right value.
The aperture controls the amount of light that passes through the lens to the image sensor and thus the depth of field. If, for example, a narrower aperture is selected, i.e. a larger aperture value, the depth of field is increased and the entire image area is sharply displayed from front to back.
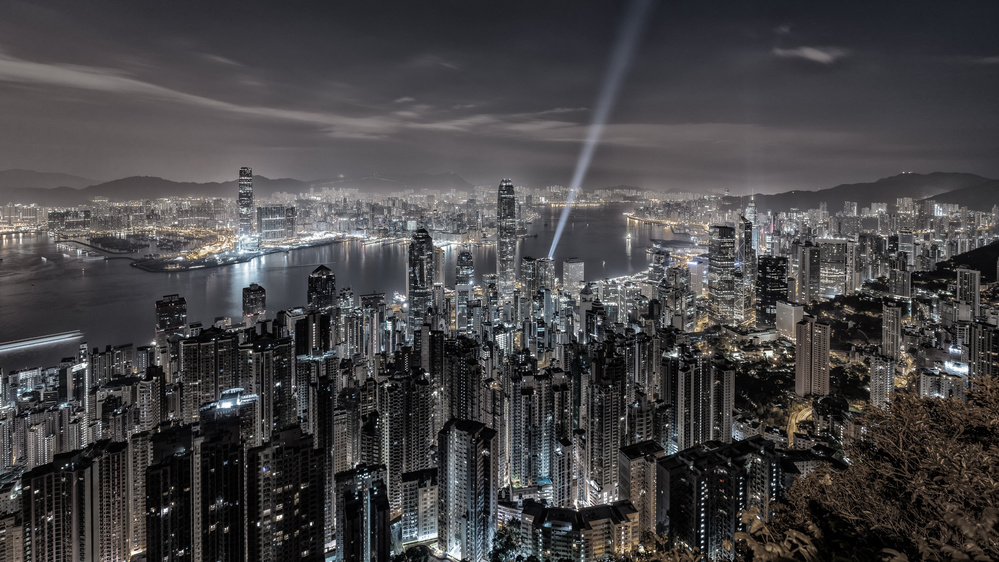
This can be advantageously used in nocturnal urban landscapes where a larger depth of field is preferred.
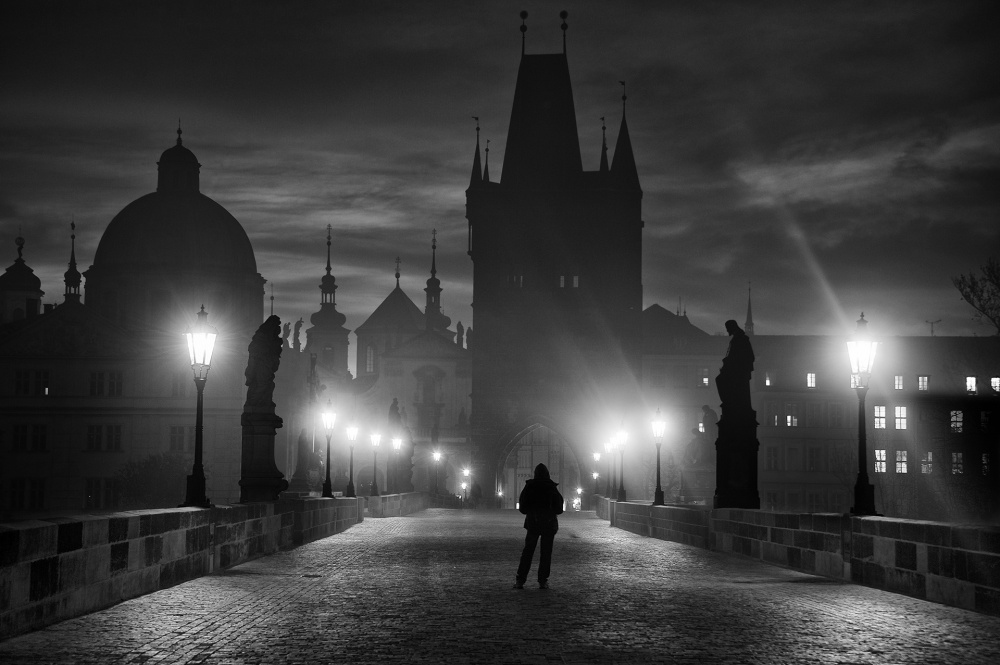
'Prague in Black & White' by Marcel Rebro
For example, an aperture value of f/22 together with a longer exposure time will surround the light sources with rays that end up looking like stars. How strongly these so-called aperture rays appear in the image is determined by the aperture setting and the length of the shutter speed.
Focal Length
Wide angle or zoom? When selecting the correct focal length, the main factor is usually the photo subject.
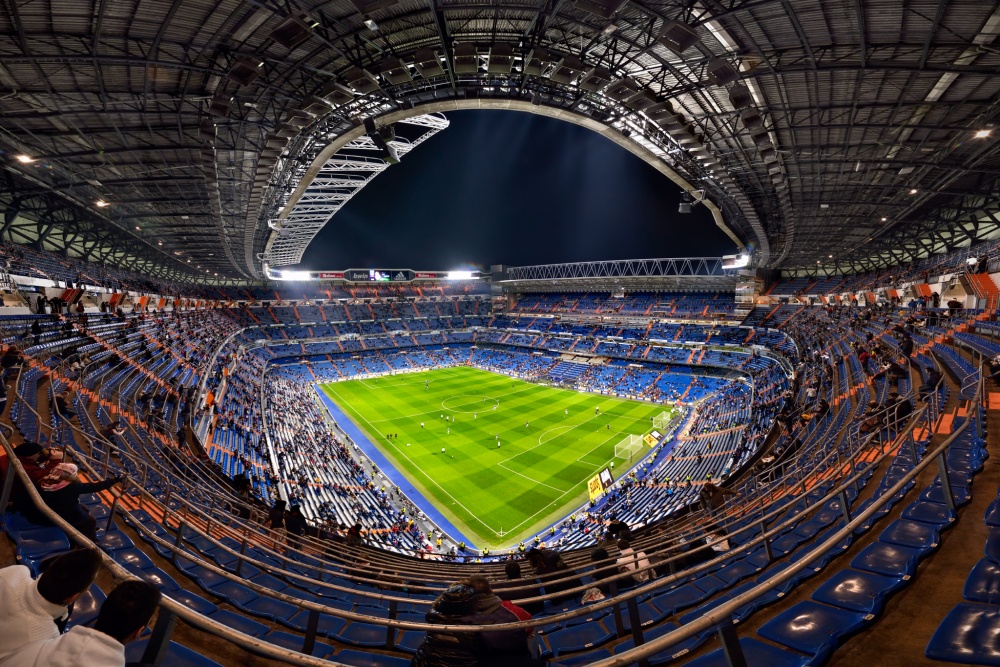
'Santiago Bernabéu' by Jesús M. García
Taking pictures of a narrow street, a small urban area or as much of the landscape as possible at night? Which lens should I use?

'The Wedding Night' by Mohammadreza Momeni
There's plenty of choice. After all, it depends on the availability of the lens and the choice of the photographer.

'Unwinding' by Andreas Agazzi
With sufficient focal length, surreal night photos can be captured without complex image processing.
TIME, POINT OF VIEW, MOTIVE AND PERSPECTIVE
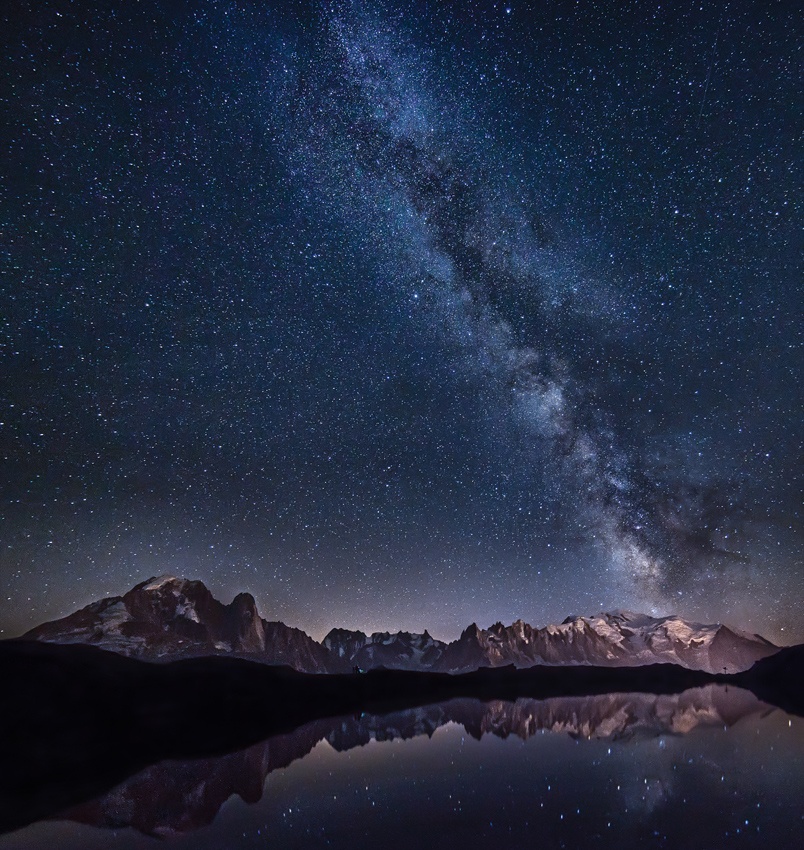
The appropriate time for photographing makes it possible to determine the later mood of the image. The Blue Hour, the time between sunset and twilight, is one of the most popular times for night photographs.
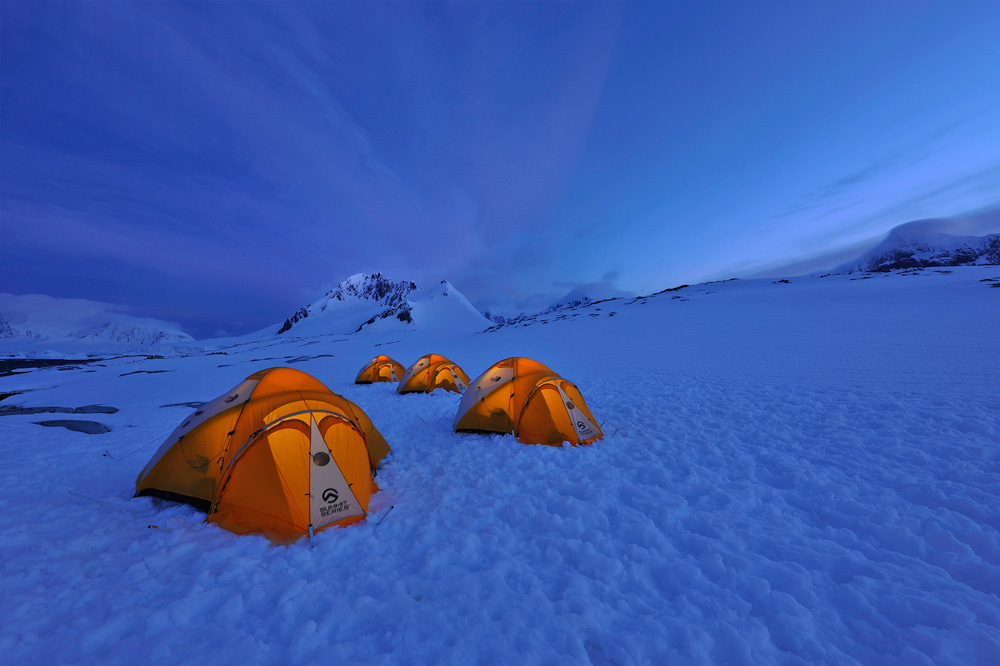
'Camp Antarctica' by Marcel van Oosten
In addition to the Blue Hour, both the colourful city lights as well as the deepest night with a dark sky offer special motifs.
'Dancer in the Lights' by Timucin TOPRAK
In the best case even the stars sparkle in the sky. With so little light, the exposure times are of course longer, however, with a little patience very nice night-time photographs succeed.
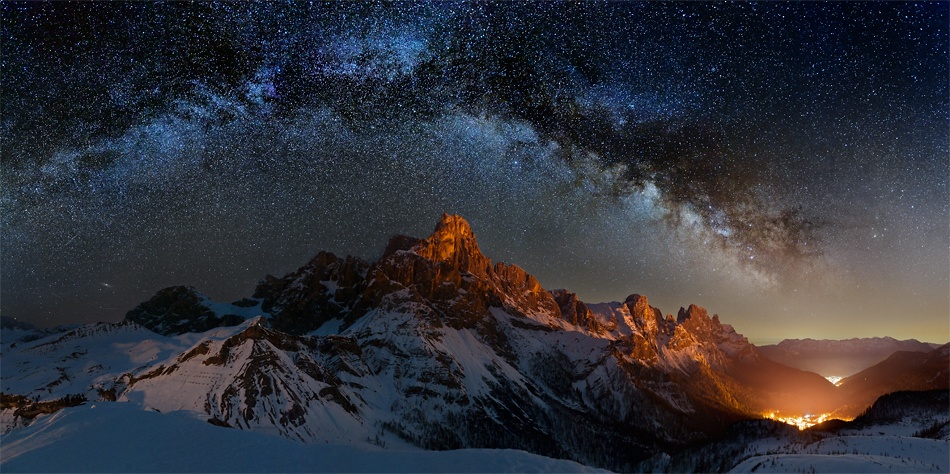
'My Galaxy' by Claudio Dalla Costa
A choice of the motif and the standpoint belongs to the most important basic rules of the night photography, therefore it should be carefully selected.

'Madrid City Lights' by Javier de la Torre
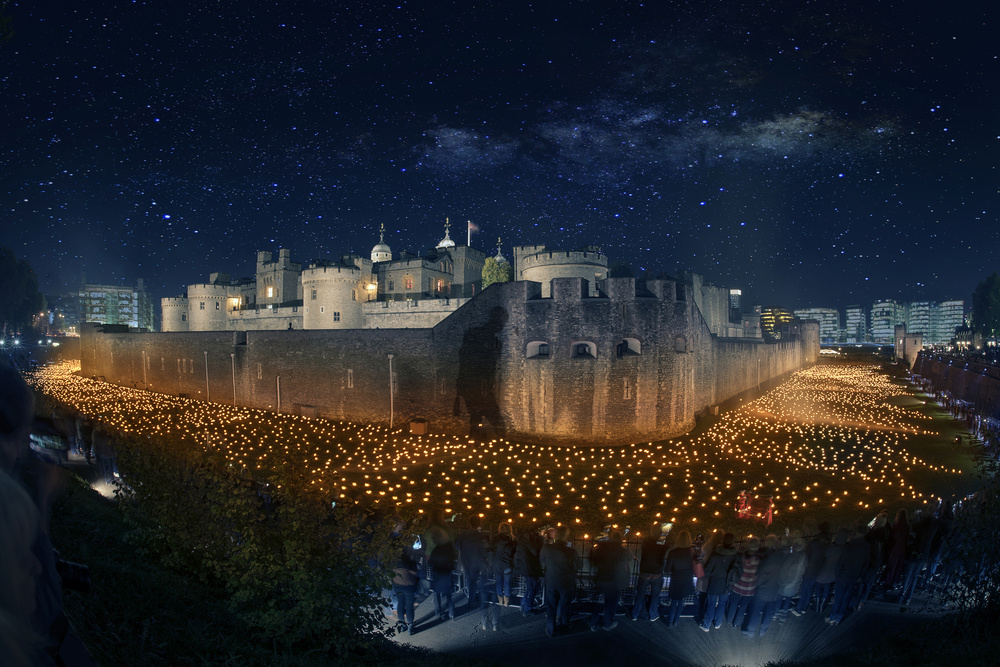
'Shadow of the Unknown Soldier' by Peter Davidson
A high point of view is good for photographing buildings or whole cities at night, low point for street photography and night close-up photography.

'Waiting for customers' by Miro Susta
When photographing the night sky with as many stars as possible, it is advisable to go to a place where it is very dark and where there is no disturbing ambient light.
'Lost in the stars' by Alfredo Costanco
Most rules apply when photographing night thunderstorms. Since thunderstorms often take place at night - or turn day into night - that's why I include this topic in night photography. When photographing a thunderstorm, the highest priority is safety.
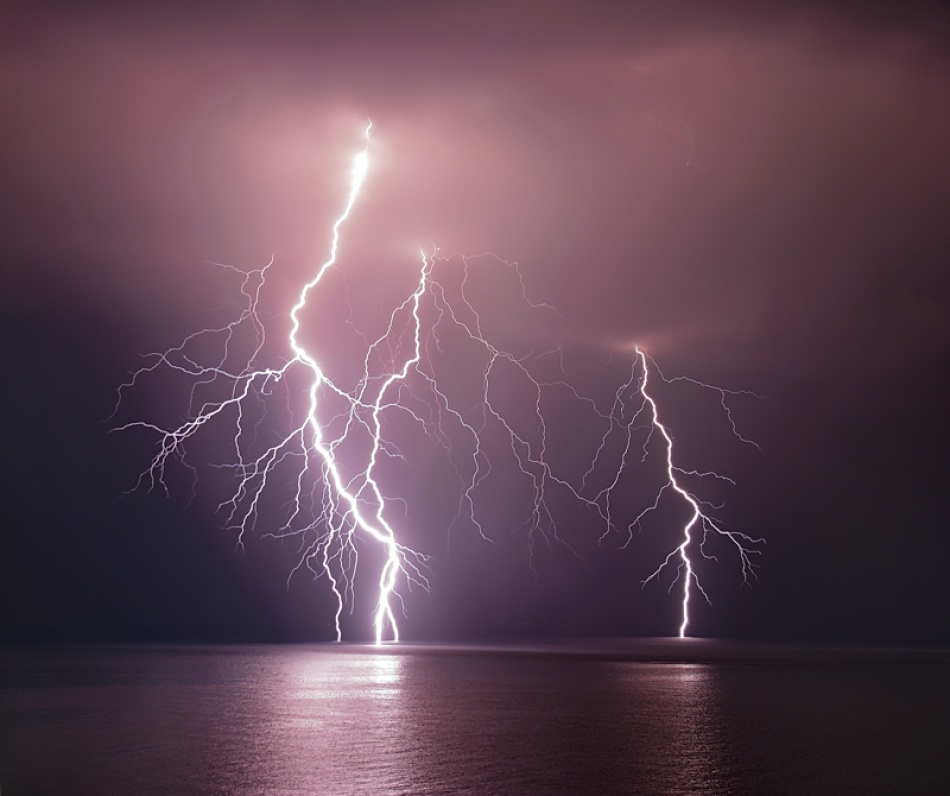 'Thunderbolt over the sea' by nini_filippini
The very first and most important point when choosing the right and safe photo position is to be well protected from an approaching thunderstorm. Wide bridges, passageways, building entrances or the like are in most cases very suitable for this.
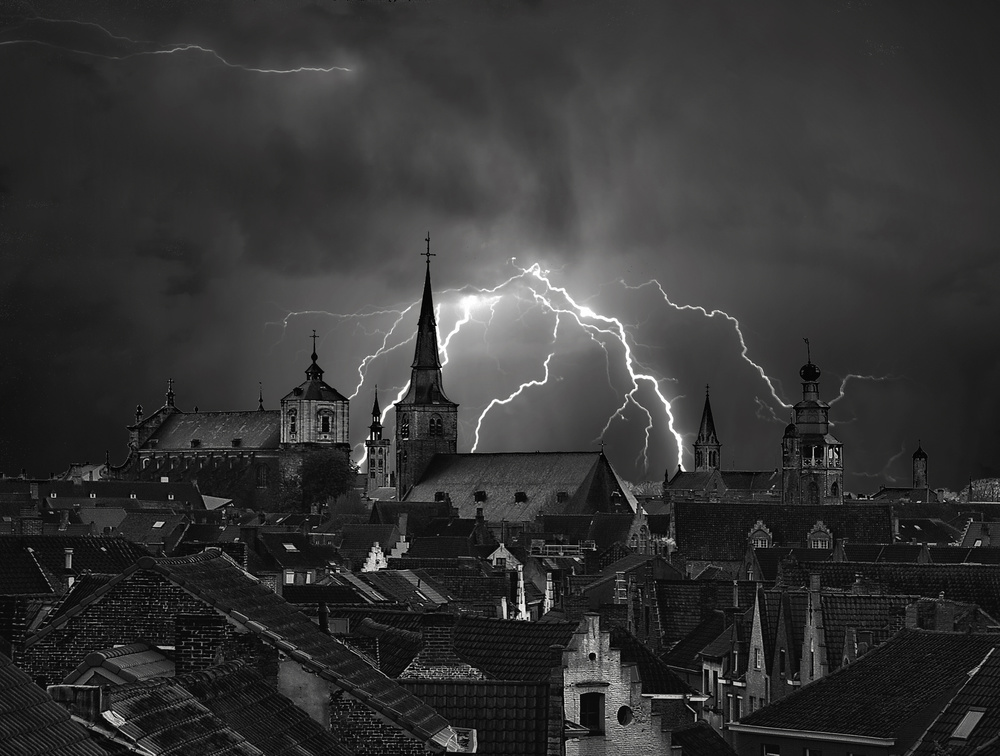
'Chaos in the sky of Bruges' by Yvette Depaepe
Thunderstorms conjure up fascinating lightning in the photo motif, will definitely attract a great deal of enthusiasm.
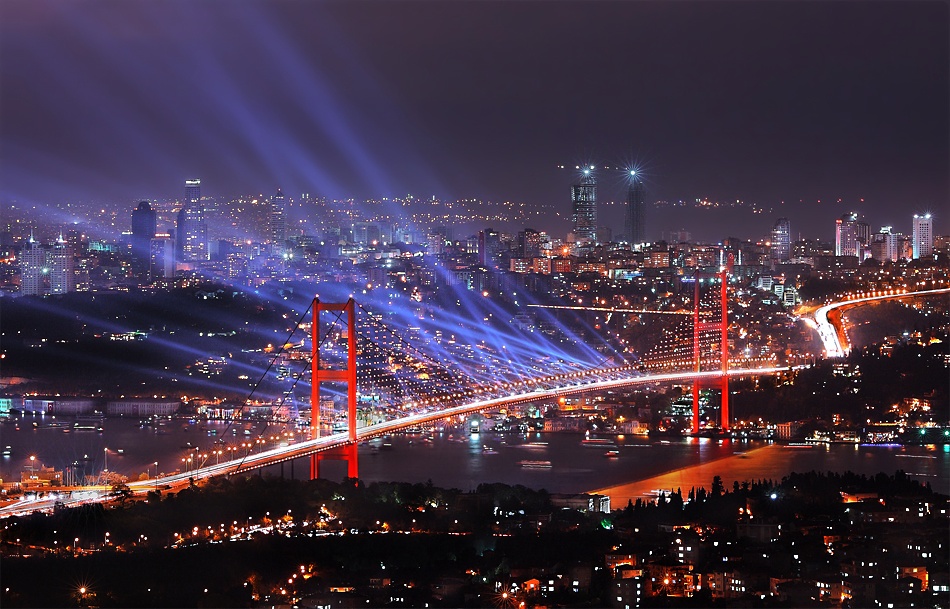
There are a few things to consider when choosing a location for photographing fireworks display. There's nothing more disturbing than taking fireworks images of people running around.
It is important to find an elevated position for this reason. Due to the size of the fireworks, it is not necessary to be directly on the spot, even longer distances can often be very attractive. If selected location allows to merge the fireworks with the area around it, then some parts of the area should be integrated into the scene.
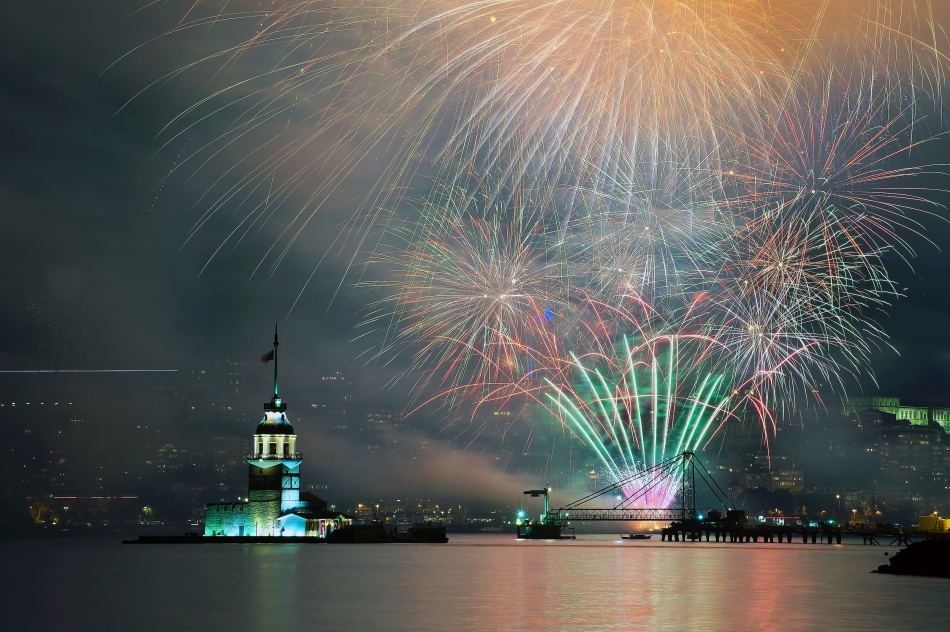
'celebration' by Ibrahim canakci
There are many factors that play a role in the photo creation to make the photo more powerful and exciting than other images.
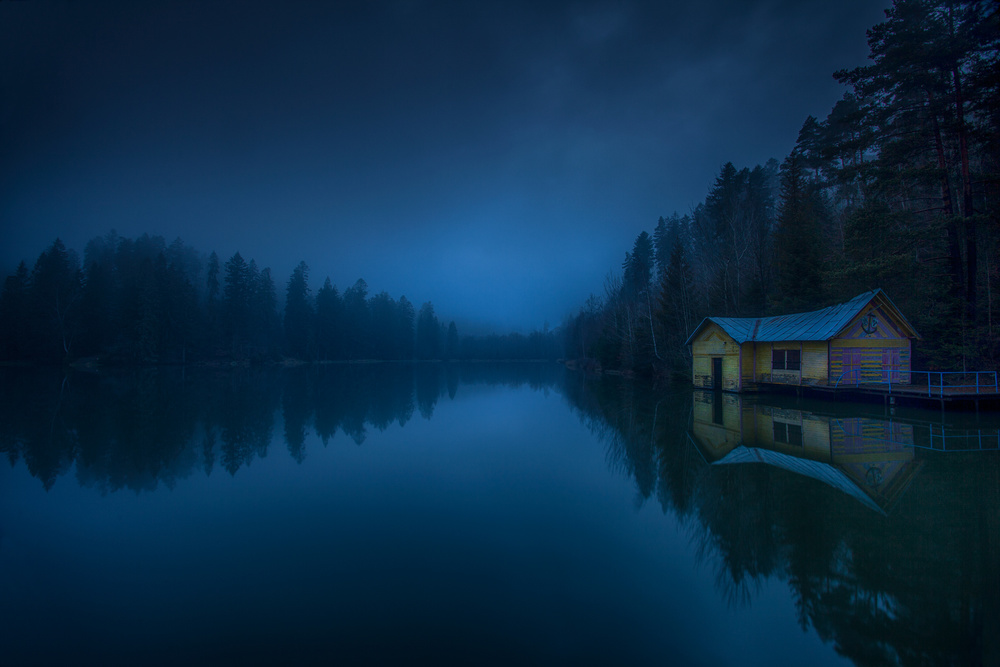
'When clouds and night were falling' by Peter Svoboda
In addition to choosing the right image detail, it's often the right image composition and perspective that make the difference whether or not an image gets more attention than others.
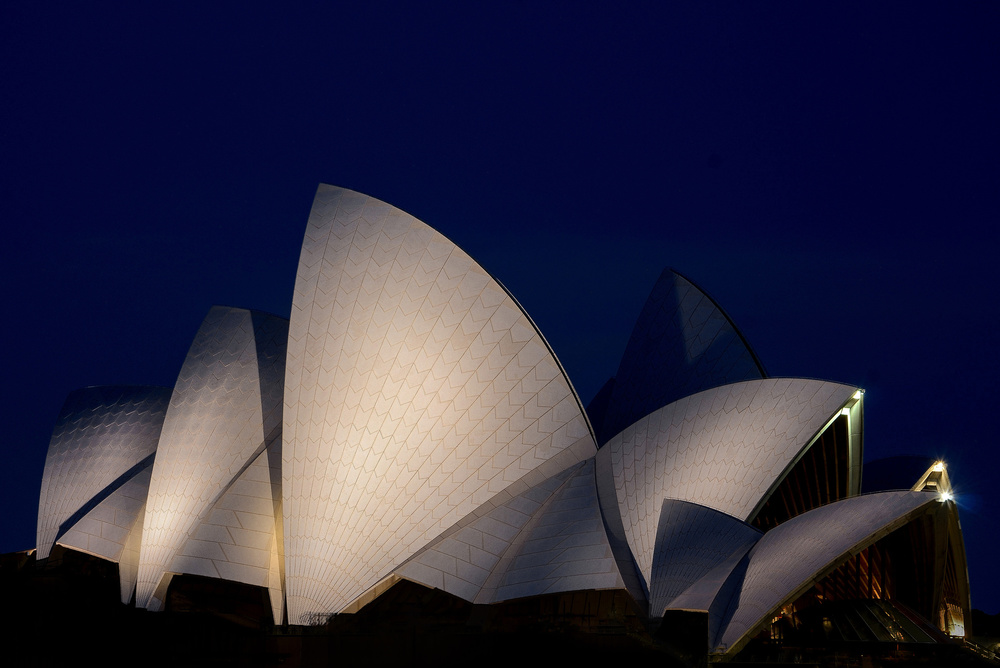
'Opera House' by Miro Susta
As a conclusion of this article a summary of important facts.
· *Follow the basics of night photography – place the camera on a tripod, use a wide-angle lens with the narrowest aperture possible, and focus to infinity.
· *Turn the camera's mode dial to Manual or Bulb shooting mode and use a slow shutter speed (1-30 or more seconds) for longer exposure.
· * Leave the lens hood on your lens to prevent lens flare from street and other point source lights.
· * Night shots can be quickly underexposed, so to facilitate image processing it is advisable to switch the camera from JPG to RAW mode and save the images lossless as RAW or both JPG and RAW mode.
· * The autofocus is tempting, but if the autofocus cannot see which object is being focused at high night contrast differences, the focus should be adjusted manually.
· * Even if the flash built into the camera encourages the use at night, it is not recommended to use it except in special cases.
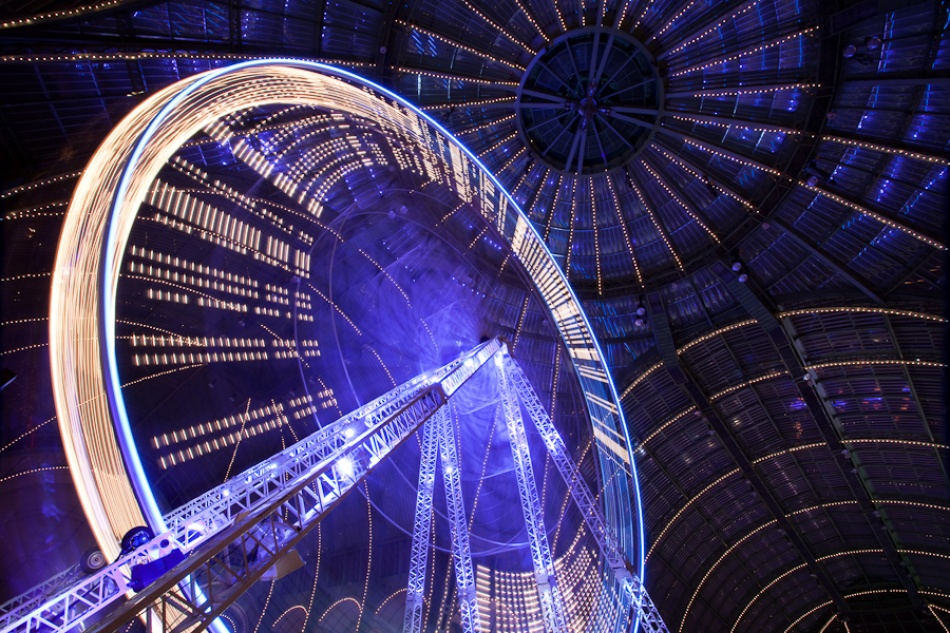
'Wheeeeeeeeeeeeeel!' by Guilaume Vigoureux
Night photography is a very interesting, challenging and rewarding photograph activity.
On the one hand it is known in photography that it is not possible or difficult to take pictures in the dark, but on the other hand, if you take pictures at night, you can get unrepeatable photos that could not be taken during the day.
Just try it and publish the result in 1x-Photo Gallery.
 | Write |
 | Hakki Aydin Ucar Good explanation of night shot basics and well chosen examples ! Congrats ! |
 | Miro Susta CREW Thanks Hakki. |
 | Peter Davidson CREW Great article Miro, and thanks for the picture inclusion! |
| Miro Susta CREW Many thanks Peter. |
 | Jose C. Lobato PRO Fantastic and interesting article I look, my congratulations for this work, and thanks to you and Yvette. It has been wonderful to enjoy it. Greetings to all.
|
| Miro Susta CREW Many thanks for nice words Jose. |
 | Carmine Chiriacò CREW thanks so much Miro! Very important is the summary of the article . Congrats to all. Thanks Yvette |
 | Yvette Depaepe CREW Thanks for passing by, dear Carmine! |
| Miro Susta CREW Many thanks for your appreciation Carmine. |
 | Eddy Verloes Very interesting article ! Thanks a lot ! Very nice pictures as well ! Best regards. Eddy |
| Miro Susta CREW Thanks Eddy, Greetings Miro. |