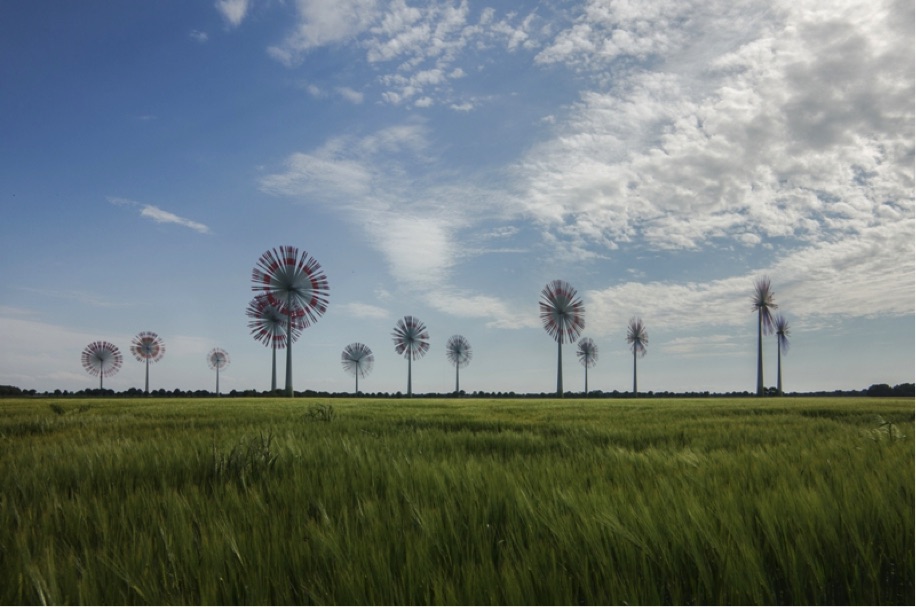
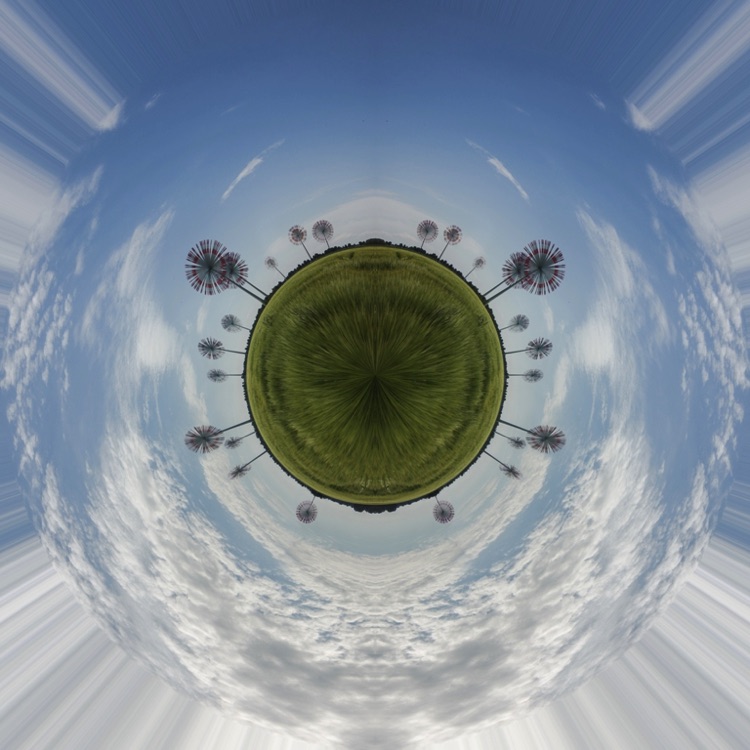
In this image I tried to create a fun, energetic and joyful mood. It was in my head for a while and I had chosen a location, but I had to wait for the perfect moment — a bright, sunny day in early summer when the fields were still green. To achieve the energetic mood and also to create the idea of motion, I decided to take a series of images of the mills and merge them together in Photoshop instead of use a long shutter speed, for instance. I wanted the mills to look like flowers.
Canon 550D . Canon 18-55mmf3.5-5.6
To photograph the windmills I mounted my camera on a tripod and connected a remote to the camera. I counted the amount of time it took for one blade to go around, and based on that I set the remote's delay, which was necessary in order to capture the blades at different positions in each frame. I didn't know for sure how many images I needed, so I had to guess, and I ended up taking 40 images. The camera was set to manual because I wanted every shot to have the same ISO, aperture and shutter speed. The autofocus on the lens was turned off because the focus had to remain the same while I was shooting.
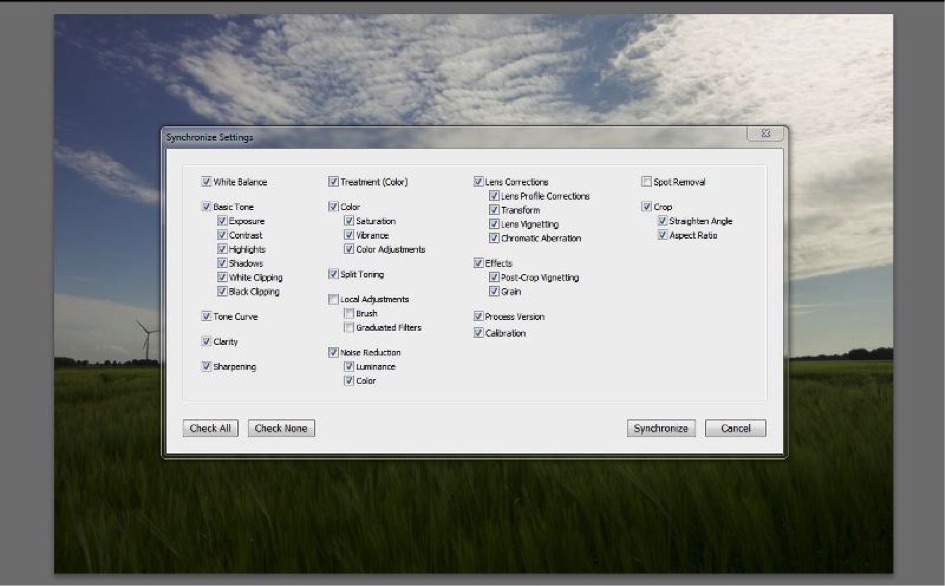
All 40 images were processed in Adobe Lightroom and Photoshop.1) First I opened the images in Lightroom and selected the first image to make some basic adjustments, like adding a bit of Clarity and Contrast, straightening the horizon and adjusting Lights and Shadows. After that I scrolled to the last image and held the Shift key while I clicked on it; all 40 images were then selected. I clicked the word Sync in the bottom-right corner. Now I could synchronize the settings. I made sure that all the settings I used were checked, and after that I clicked Synchronize. Every image was then edited the same way.
3) I didn't like the two mills on the right very much, so I decided to remove them using the Clone Stamp tool. I'm always scared of making mistakes, so as I work I merge the layers but keep the existing layers too by selecting the layers I want to merge and then simultaneously pressing Shift+Control+Alt+E. I wanted to clone on that merged layer, and I knew that if something went wrong in my editing, I could just remove the layer entirely. It is not always the best method because if I later change something on any of the layers beneath the merged layer, the change will not be visible because that layer is above all the rest. But I often use this option at the end of post-processing when I want to add a Lens Flare filter, for instance. 4) For a better balanced composition I needed to replace the two windmills that I removed in Step 3 with another windmill. I selected the first windmill on the left with the Rectangular Marquee tool, pressed Control+J to copy it to its own layer, dragged it to the right side of the image with the Move tool, and dropped it in the spot where the two windmills once were. I set the blending mode to Darken and then flipped the windmill horizontally (Edit > Transform > Flip Horizontal) so it looked different from the original windmill on the left side. Using the Eraser tool set to a small, soft Brush, I erased the edges that were still visible. At that point, I thought the image was finished.
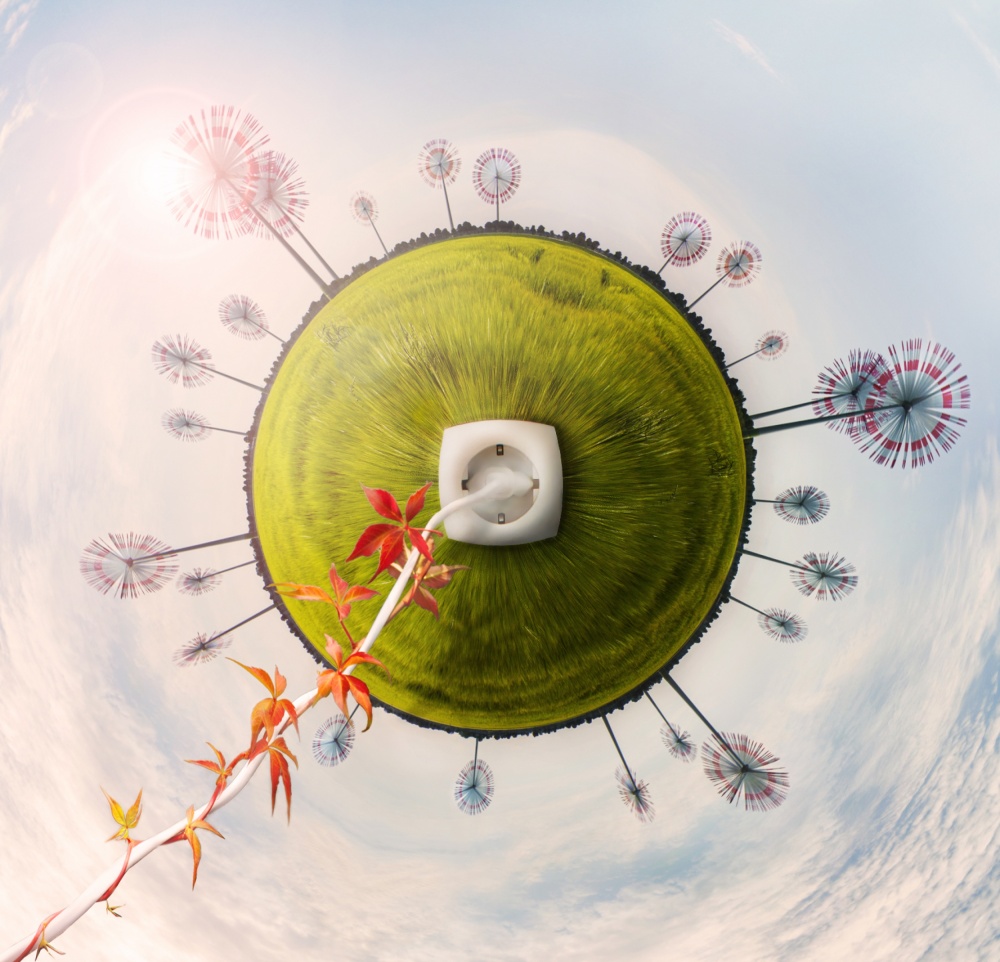
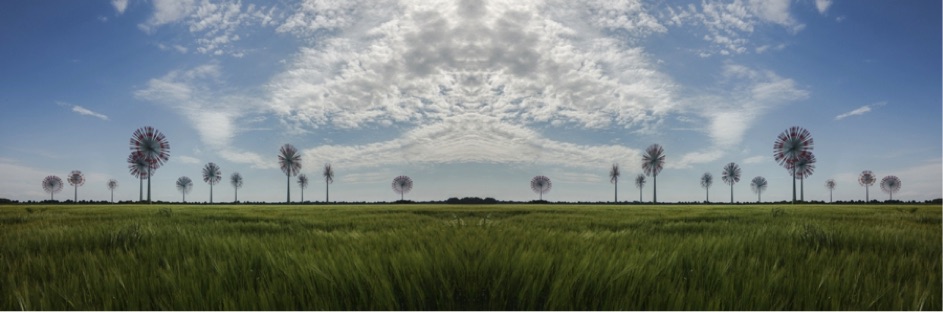
5) At first I didn't think about making a "little planet" (the technical name for it is "stereographic projection"), but when the image was finished, 1x member Ben Rea told us about a Polar Coordinates filter in Photoshop. I saw what he created with this filter, and I liked it so much that I wanted to try it too. When I was creating a few little planets with this filter, I suddenly thought about the green field with windmills: I could make this a green planet — fresh, green and happy because of renewable energy. In the middle of the planet there would be an electrical outlet from which the energy would flow through a power cord to the bottom-left corner of the frame. The idea stayed in my head for a few months until I noticed that the 1x Weekly Theme for the following week would be Energy.6) I selected all of the layers and flattened them to create one layer, which I saved as a new project. The Polar Coordinates filter bent the left and right edges upward, toward each other until they were attached. But the left and right edges of the image didn't match, so I duplicated the layer, flipped it horizontally, and then I doubled the width of the canvas size. With the Move tool I dragged the duplicate layer to the other side of the canvas and now the left and right sides were exactly the same. I flattened the layers.
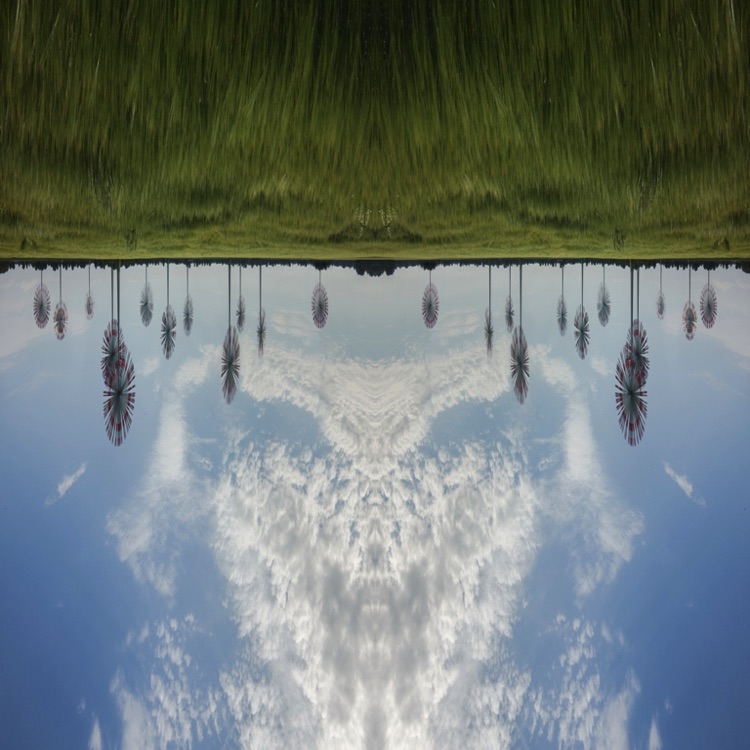
7) Now the canvas had to change to a square because I want the planet to be a perfect circle, not an oval. I selected Image > Image Size and made the width and the height values the same. I also rotated the canvas 180 degrees; otherwise, I would not have a round field in the middle of the image with the sky surrounding it, which is what I wanted.
8) Next I applied the Polar Coordinates filter: Filter > Distort > Polar Coordinates, selected Rectangular to Polar and clicked OK.
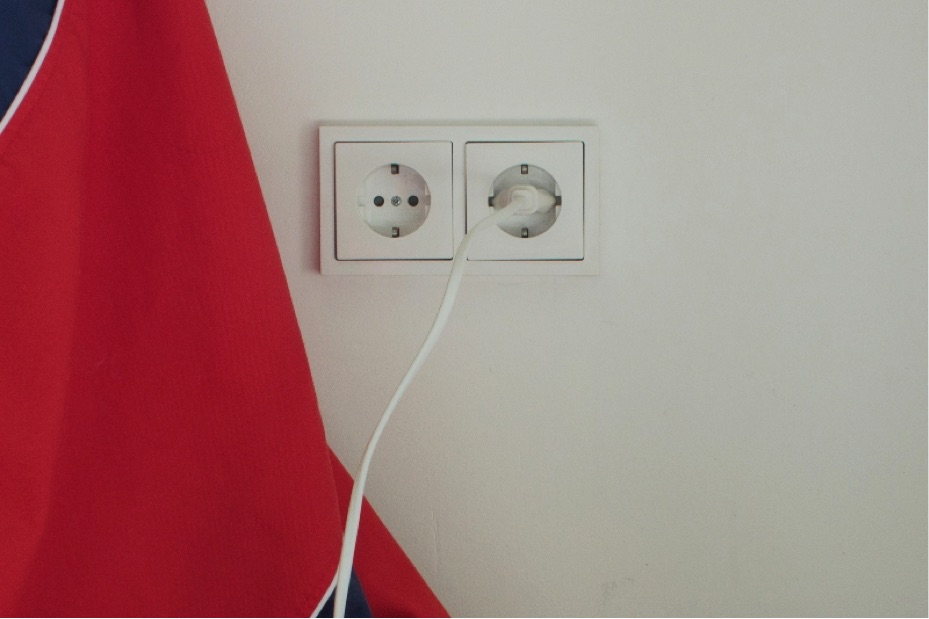
9) For a better composition I rotated the canvas counterclockwise a bit and cropped it afterward to get rid of the strange looking corners.10) I searched my house for a white power cord and made some photographs of an electrical outlet with the power cord connected to it.
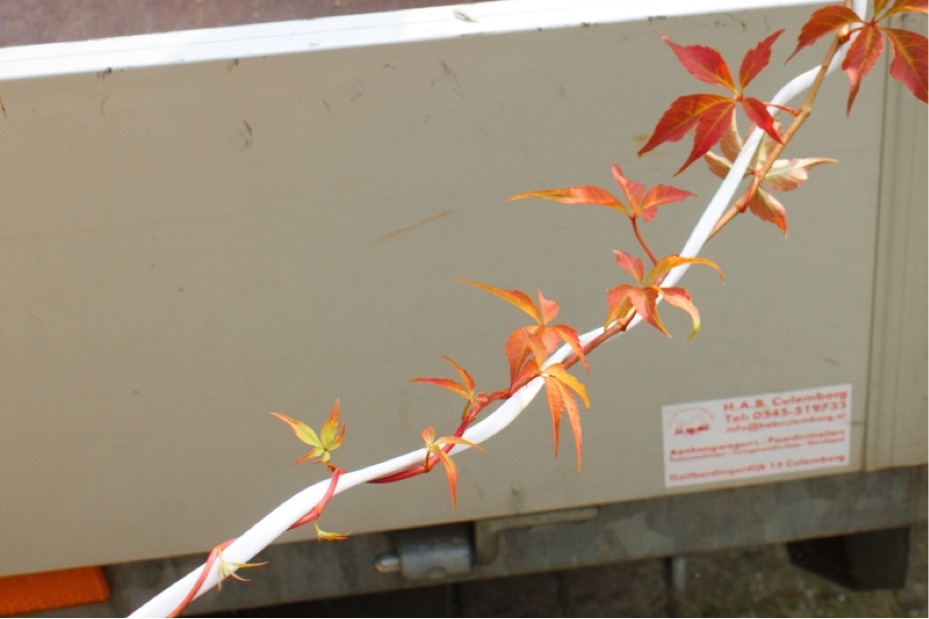
11) I then took the power cord outside, wrapped a climbing vine around it and took some more images, keeping in mind the angle and light that I needed for this project.
12) The electrical outlet and the power cord with the climbing vine were cut out using the Polygonal Lasso tool. I moved the electrical outlet to the middle of the planet, and then I rotated and Transformed the power cord until it was connected to the power outlet.13) The power outlet was flat and square, and I wanted it to have a more organic look and shape; it had to be a bit rounded at the edges to coincide with the roundness of the little planet. So I distorted the shape of the electrical outlet with the Transform tool. To further create the illusion of the round, curved shape of the power outlet I created a layer filled with 50% grey, changed the blending mode to Overlay, and then drew shadows with a soft, black Brush and highlights with a soft, white Brush on the power outlet, both at very low Opacity, in order to optically change the shape of the outlet from flat to curved.14) Under Blending Options (double-click on the layer icon to open the Layer Style dialog box) I created an Inner Shadow on the power cord on the opposite side of where I would soon create the sun, and I created an Inner Glow on the sunny side. To add shadows produced by the electrical outlet on the grass I created a new layer, filled it with 50% grey, changed the blending mode to Overlay, and then I started to paint with a black Brush set to a low Opacity (somewhere between 5% and 10%) on the parts where I thought the shadows should be, always keeping in mind where the sun would be. Very close to the borders of the power outlet I painted the shadows a bit darker. I also painted half of the globe darker to create depth and the illusion that the circle was a globe.15) To create a shadow from the cord and leaves on the planet I duplicated the layer that I renamed "power cord with plants," set the blending mode to Color Overlay in the Layer Style dialog box, and chose the color black. I added a Gaussian Blur filter, moved and Transformed it and changed the Opacity to 45%.16) I added two adjustment layers: Brightness/Contrast to add a bit more overall brightness and contrast and Vibrance to increase the overall vibrancy.17) To create the sun I first pressed Shift+Control+Alt+E at the same time again, and on this merged layer I added a Lens Flare filter (Filter > Render > Lens Flare). Next I added a layer mask so I could paint away the parts I didn't like with a soft, black Brush.18) Since I wanted to create a fun, energetic and joyful mood I decided to add a Warming Photo Filter adjustment layer set to an Opacity of 25%. The last thing I did was create a new layer, select a soft Brush set to a very low Opacity, and then I brushed with a very light pink color over the sunlit part of the image to create a hazy look.
1) Don't force yourself to create something immediately if you have an idea. Sometimes you have to wait for the right moment, subject or light.
2) Draw or write down your ideas. Many times a lot of ideas come to mind, but I either have no time to create the images or I'm just not quite sure what the final image should look like. Ideas might morph into better ideas if they stay in your head for a while.
3) When you are thinking about something, ask yourself: How would I tell this story/feeling in just one, single image? I think it helps when you're creating new ideas.
I'm a 31-year-old woman from the Netherlands. Ever since childhood I have been very interested in the weather, especially clouds. In 2010 I bought my first DSLR camera because I wanted to photograph the clouds as accurately and realistically as possible. I immediately fell in love with photography, and since that day my camera has been with me everywhere I've been. About a year ago, I started to work with Adobe Photoshop and I'm trying to learn as much as possible about creative editing.