I was inspired by a video tutorial on the internet describing how to create water splashes in a glass. After understanding the basic procedure, I came up with an idea to make something different. I decided to not only freeze the splash in action, but to also tell an abstract story, as if the glasses were living things.
I tried several different shaped glasses — cocktail glasses, wine glasses, martini and ice cream glasses — and also photographed many splash shapes. It was a messy photo shoot in my backyard. I was testing all kinds of colors and splashes until I found the combination I liked. Eventually I made these two simple splashes, and I thought they would best express my idea.
Canon 7D . Canon 17-40mmf/4L . 17mm . 1/250s . ISO100
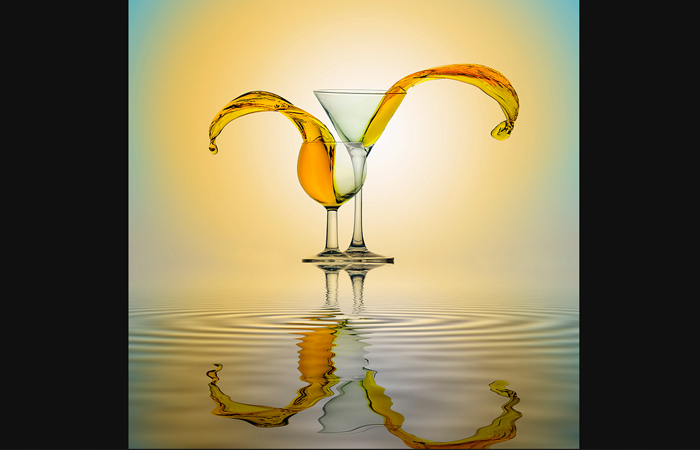
The idea was to position the glasses side by side to represent a loving couple. I wanted reflections beneath them so it appeared that the couple was standing at the water's edge, watching the ripples after throwing a stone into the water.
"I chose orange for the color of the water. It was more eye-catching and vibrant than the other colors I tried, like blue and red."
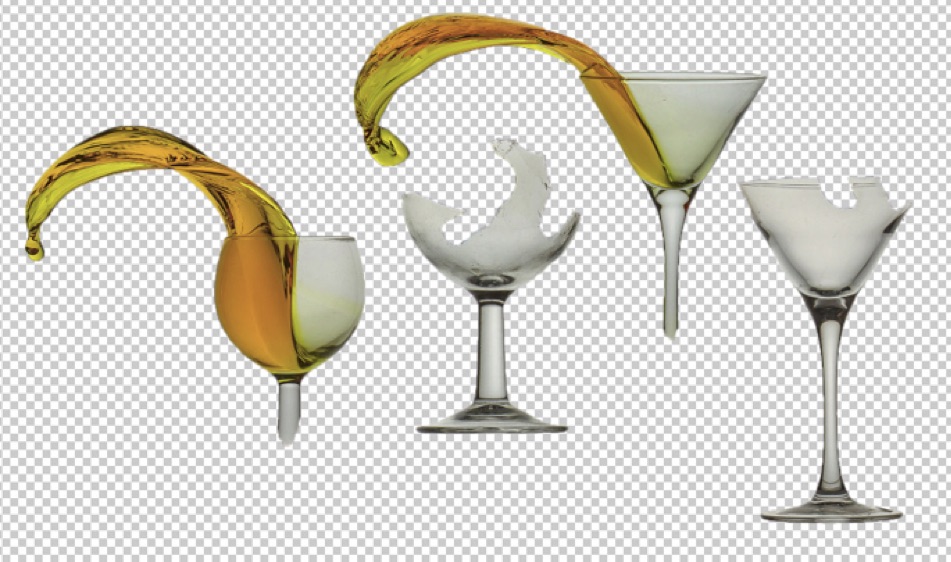
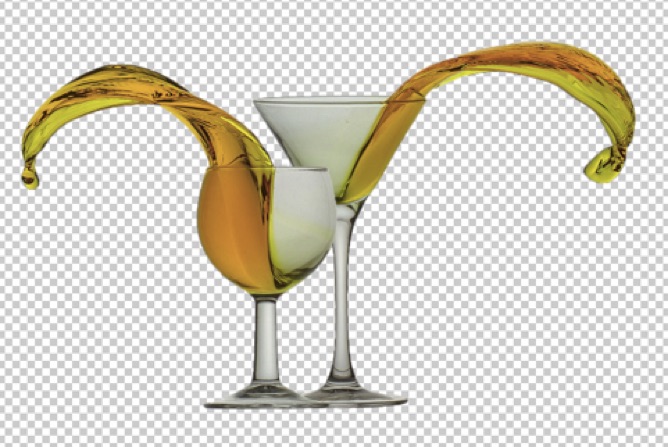
The picture is a compilation of four images: the top half of the ice cream glass and the splash; the stem and base of the ice cream glass; the top half of the martini glass and the splash; and the stem and base of the martini glass. I chose orange for the color of the water. It was more eye-catching and vibrant than the other colors I tried, like blue and red. I knew that there should be no ambient light on the set. Direct sunlight, for instance, would affect my ability to freeze the splash and would show movement in the water. Instead, using a flash set to 1/32 power would perfectly freeze the split-second action. I shot these images in my backyard around 6:00 p.m. when the sun was setting. I placed a Canon Speedlite 580EX II flash attached to a tripod behind a white sheet of acrylic serving as my backdrop, the camera was mounted on another tripod and I used a wireless trigger.
"It's a good idea to draw an 'X' on the chair so you know precisely where to hold the glass and where to put it back down."
I fitted a white board frame around the large sheet of acrylic to give the background some support so I could position it about three feet (one meter) off the ground. I put a plastic chair in front of the background for a place to stand each glass. My camera on the tripod stood eye level to the glass and about three feet away from it. I lifted the glass, pressed the shutter button to autofocus on the glass and then locked the focus by changing to manual focus. It's a good idea to draw an "X" on the chair so you know precisely where to hold the glass and where to put it back down. During the focusing process, make sure that you hold the glass directly above the marked spot on the chair. This ensures perfect sharpness in the glass and the splash.Next, I prepared a bucket of colored water. I used food coloring since it's harmless and easy to clean up. I also had some clean towels handy to wipe up any water splashes that might wind up on the background after each shot, and I kept a lens cloth by my side in case any drops landed on my lens.
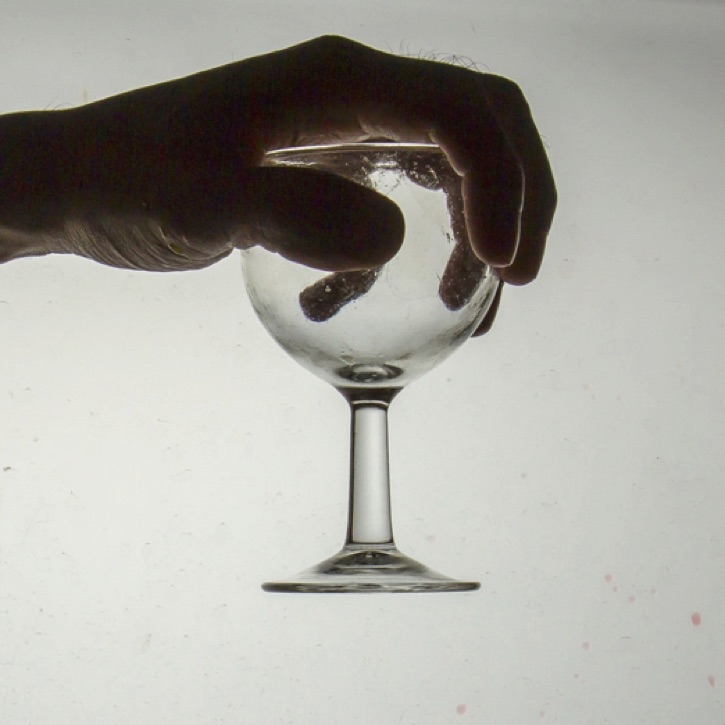
The stem and base of the ice cream glass
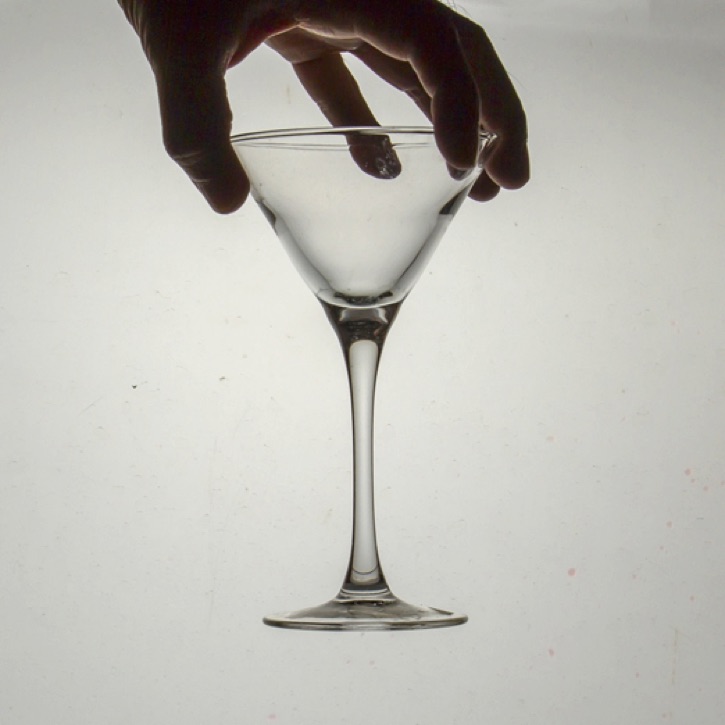
The stem and base of the martini glass
The splashes were created by moving the glass back and then snapping it forward quickly, as if cracking a whip.
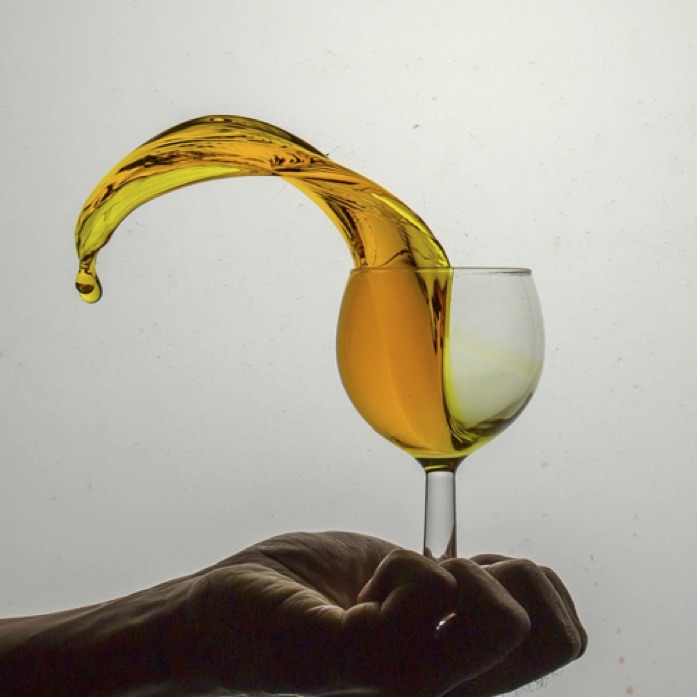
The top half of the ice cream glass and the splash
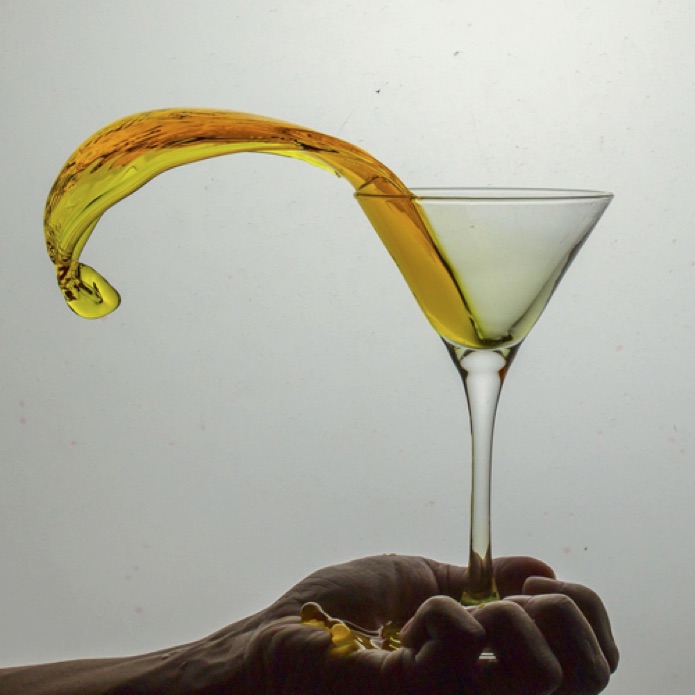
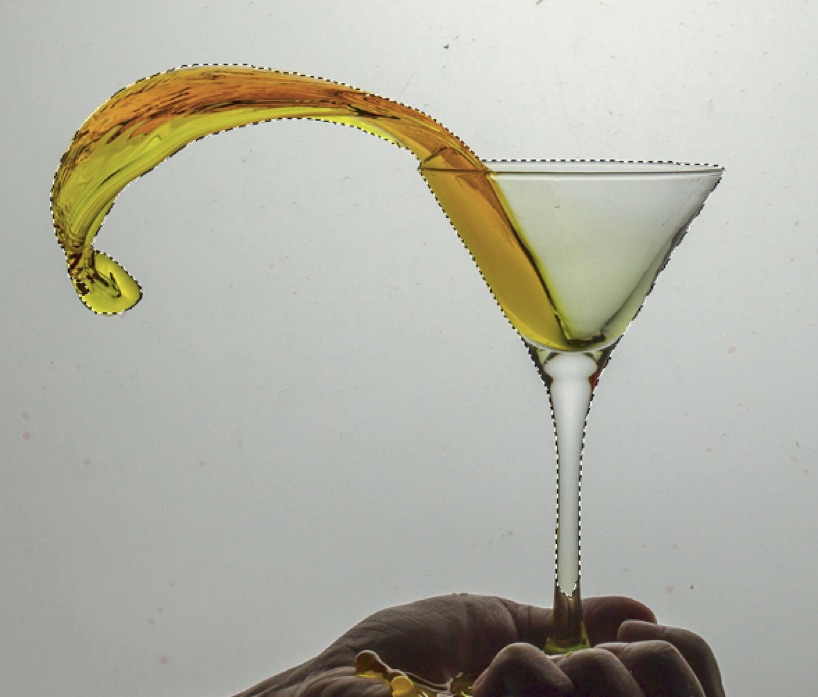
The top half of the martini glass and the splash
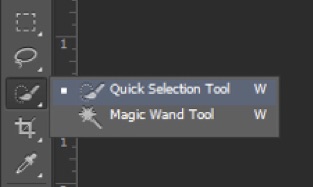
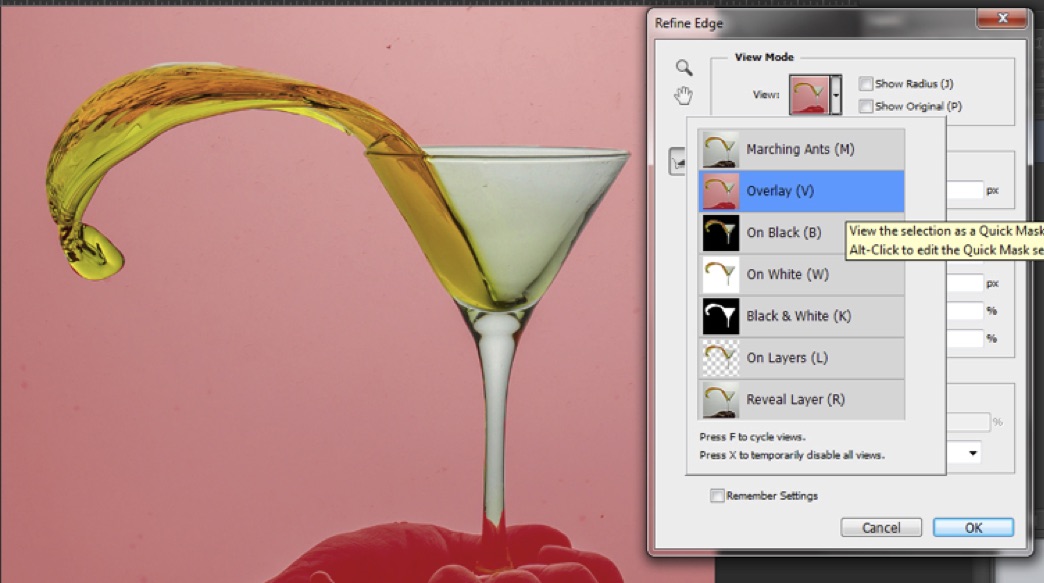
All of the post-processing was done in Adobe Photoshop CS6 and a Flaming Pear plugin.1) Select each glass one by one with the Quick Selection tool. Zoom in to 100% on the monitor for better precision when making the selection.
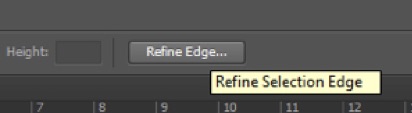
2) In the Quick Selection tool Options bar, click Refine Selection Edge.
3) Select the Overlay View Mode.
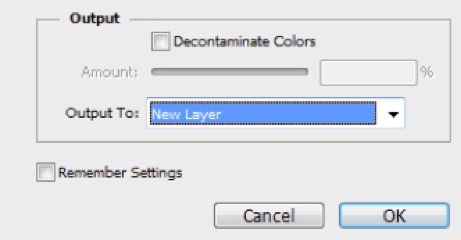
4) Make sure the Output is set to New Layer and then click OK.
The result will look like this.
5) Repeat the same process on the other glass pictures until all four glass parts are cut away from their respective backgrounds. Create a new document and drag the four parts into it.
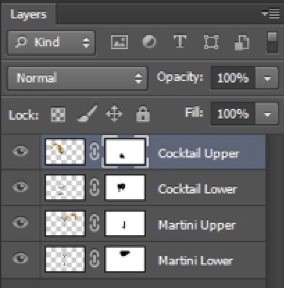
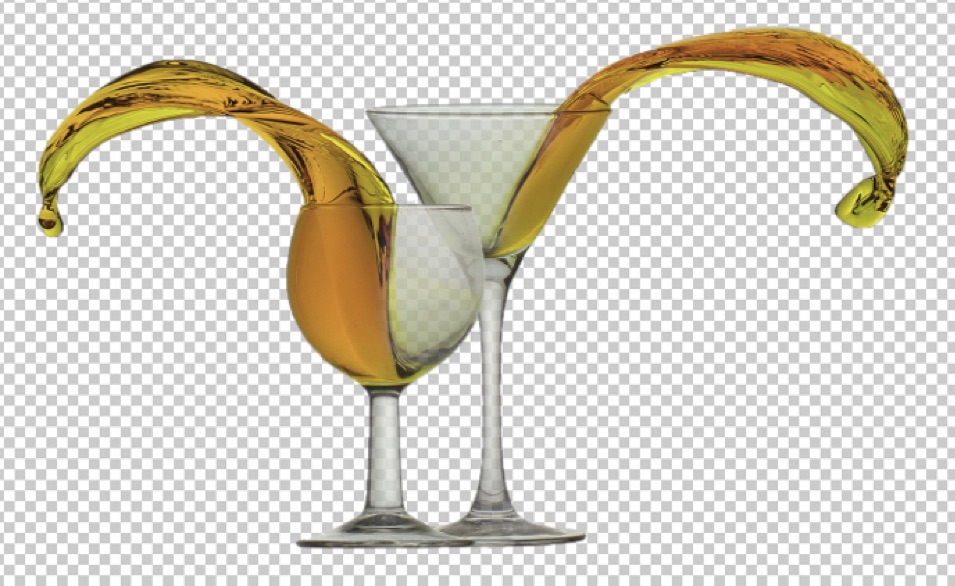
6) Combine each upper and lower part of the glasses using layer masks.
7) Using the Transform tool, flip the martini glass horizontally (Edit > Transform > Flip Horizontal).
8) To create a transparent effect in the glasses, apply another layer mask on the glasses, and then paint on them using the Brush tool set to 10% Opacity.
The result will look like this.
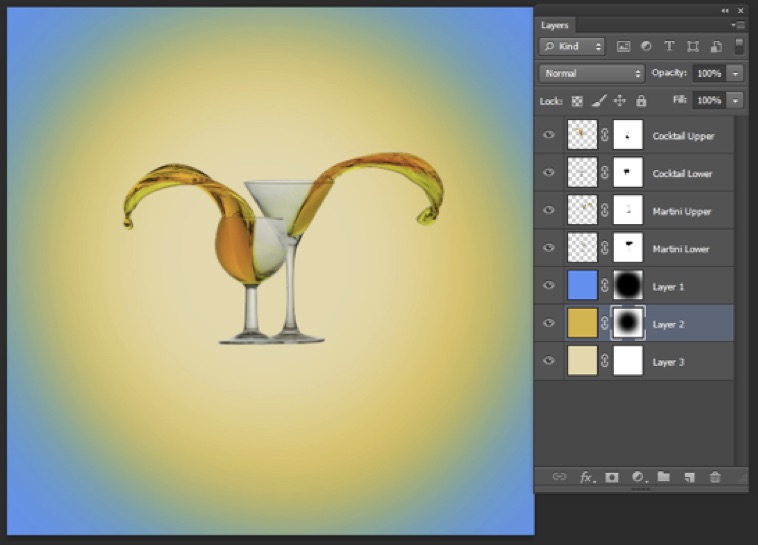
9) Create three new layers. Fill one with light blue, one with orange and one with light yellow. Arrange the layers as shown in the screenshot below. Apply a layer mask to each layer, and using a large, soft Brush, paint over each mask in a circular motion until you create the blended, fall-off effect seen below.
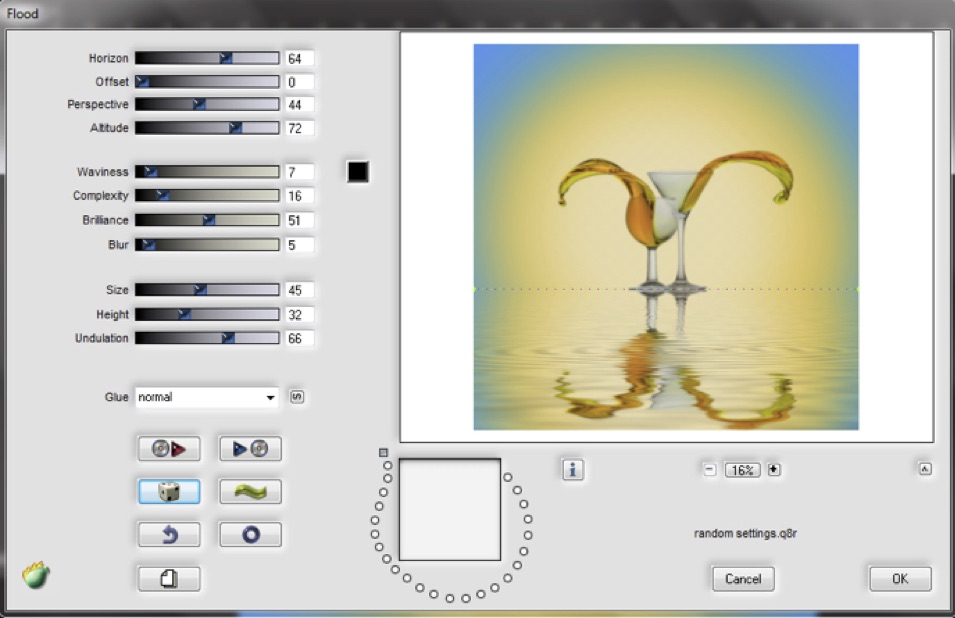
10) Flatten the layers.11) Add the water reflection effect by applying Flaming Pear's Flood plugin.
12) Back in Photoshop, make some adjustments to the picture, such as Levels, Brightness, Contrast and Hue/Saturation, if necessary.13) Crop the picture. For this image I decided to crop to a square format, using the Crop tool's 1×1 preset.This is end result.
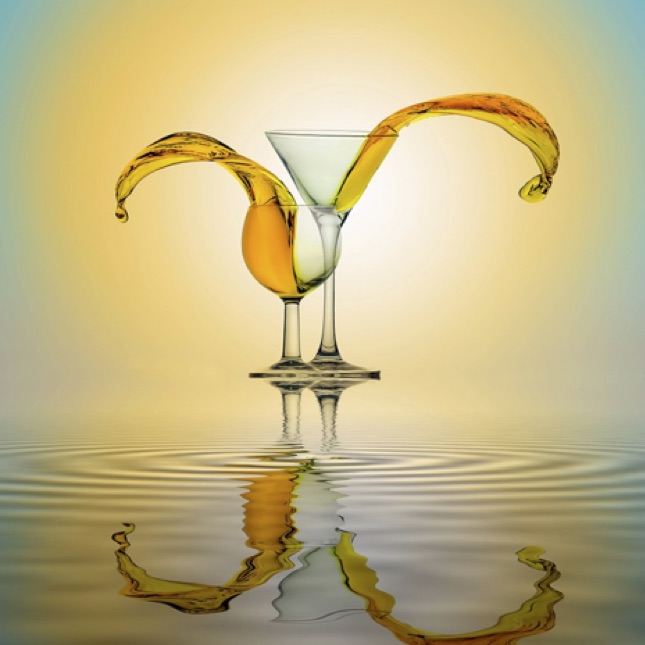
The final image
1) Color selection is the most important aspect in this picture. It helps the glass pop out from the background, and it gives depth to the overall image. Appropriately adjusting the settings in Levels, Brightness, Contrast and Hue/Saturation also improved the picture's sharpness, but don't over-process, especially using the Hue/Saturation tool; too much can ruin the natural, realistic look of the picture.
2) All images must be incorporated seamlessly so the end result is believable and convincing. The fact that this is a compilation of several pictures should not detract from the overall impression. The masking must be very neat and precise; otherwise, the picture will not give a good impression since the editing will be obvious.
3) It is not necessary for the glasses to be sharp; you want to the picture to look natural. For this reason, increase the clarity only in the water.
I live in Tangerang, Indonesia, and I have a background in aeronautical engineering. I work for a private airline in Indonesia as an aviation legal officer. I have been passionate about photography for the past 10 years. I used a simple compact camera at first and then graduated to my current DSLR four years ago. My focus is macro photography, and I specialize in water drop photography, but I also enjoy portrait, cityscape, insect and still life photography and conceptual digital manipulation.