


|
|
|
|
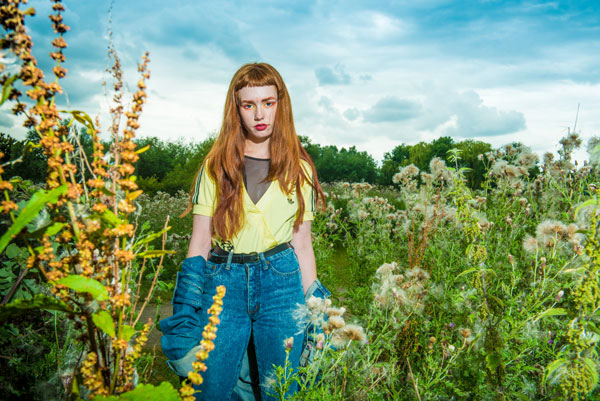
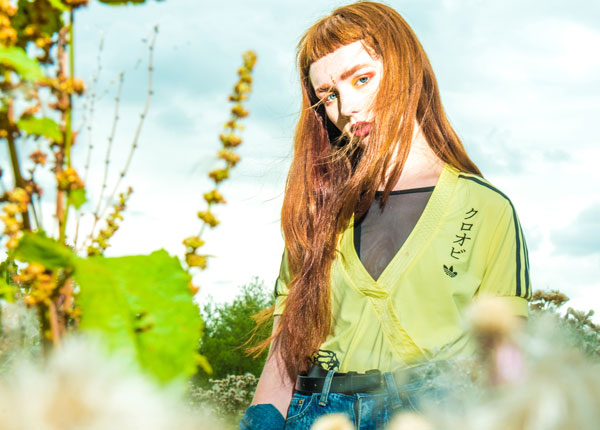
Many associate the use of flash with low-light shooting situations, but it can also be a great creative tool during daylight. While natural light can be manipulated and directed to a certain degree with the help of reflectors and scrims, its intensity and angle can limit your freedom as a photographer over the images that you are able to create. Strong sunlight can also cause problems with overexposure in skies, leaving them void of detail, but this is something that can also be tackled with flash. For these reasons, many portrait photographers will incorporate a flashgun into their setups.
On-camera flash can illuminate a backlit model, enabling the use of lower ISOs and faster shutter speeds that reduce the intensity of ambient light captured for a sky that’s well-exposed. However, its fixed position directly above the lens can lead to harsh, flatly lit shots unless an adjustable head is used to bounce and diffuse the light off a nearby surface. It can also cause unattractive shadows when shooting with the camera set to a portrait orientation, as the light comes from an angle that’s off to one side of the lens.
For greater control of a flashgun, an off-camera flash cable or – even better – wireless triggers are recommended. Using these devices, and light modifiers like portable soft boxes, it’s possible to achieve almost studio-style lighting on location, with total control over the light’s strength and angle.
How to use off-camera flash for creative lighting…
1. Get your camera set-up
Set your camera to its Manual shooting mode, and select an aperture that will produce the depth-of-field that you want. Now choose the ISO and shutter speed combination that will properly expose the scene. To maintain detail in a sky, expose for this area. Be careful not to set a shutter speed faster than the camera’s flash sync speed.
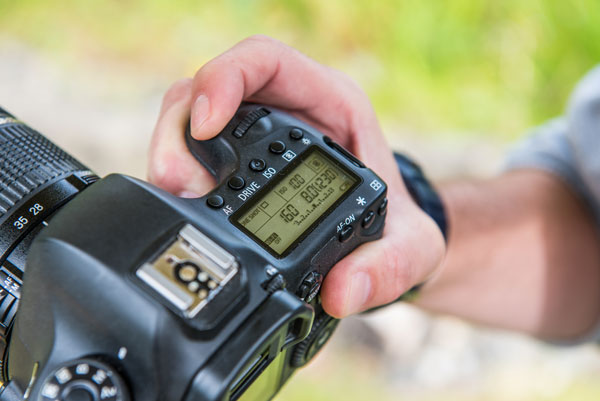
Attach your flashgun to either an off-camera flash cable or a wireless receiver, then affix the other end of the cable or the wireless transmitter to your camera. Set the flash to its manual mode, and choose a mid-range power level. Move the flashgun so that its light will come from the desired angle and take a test shot.
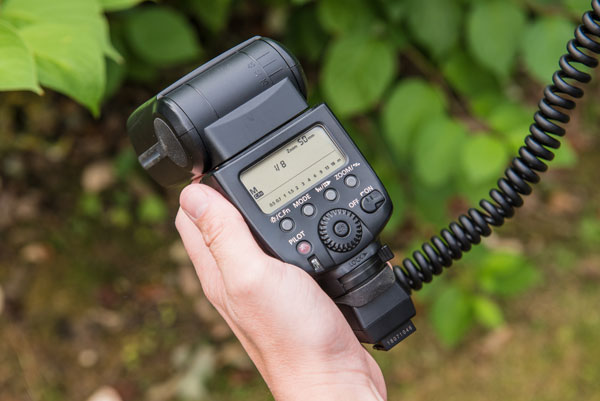
Check the image that you have taken on the camera’s display. If the subject appears overexposed, select a lower power level. If they appear underexposed, select a higher power level. Also look for unattractive shadows and, if present, consider moving your flash to an angle that removes them, or positions them better.
You can watch a video version of the tutorial here.
Digital Photo is the number one magazine to improve every image you take. You can download a free back issue by clicking this link.
 | Write |