


|
|
|
|
I have always wondered how photographers take such incredible images of the night sky. You know, those gorgeous landscapes that have zillions of pinpoint stars against a velvet blue backdrop, the Milky Way in all its glory stretching across a pitch-black sky, some even have luminous clouds reflecting the ambient light from below.
I have failed miserably every time I’ve tried it; all of my photos are notoriously too blurry, too dark or too noisy. So for a long time it only made sense to me that those night photographers are highly intelligent extraterrestrials from another solar system, capable of tasks that no human being could ever achieve. There was no other rational explanation.
Guess what. There really is another explanation!
I found out recently that night photographers actually are human, and they know a little secret that helps them capture this sort of image. It’s a magical mathematical formula specifically used to avoid capturing movement so the stars appear as the sharp, brilliant points of light that we see with our eyes. It’s called the “500 rule” (or the “600 rule,” depending on who you talk to), and if you’ve never heard of it, you’re not alone. But once you see how it works, and once you realize that you too can take these stunning images, you will jump out of your chair and do a happy dance, just like I did.
The 500 rule is simple: For a full-frame sensor, divide 500 by your focal length to get the maximum exposure time in seconds. For a cropped sensor, divide 500 by (the focal length multiplied by the crop factor).
It’s ok if you’re not dancing yet. If you’re like me, you need visuals and someone to show you exactly how to apply that rule. And we’re in luck because four very talented 1x photographers have done just that.
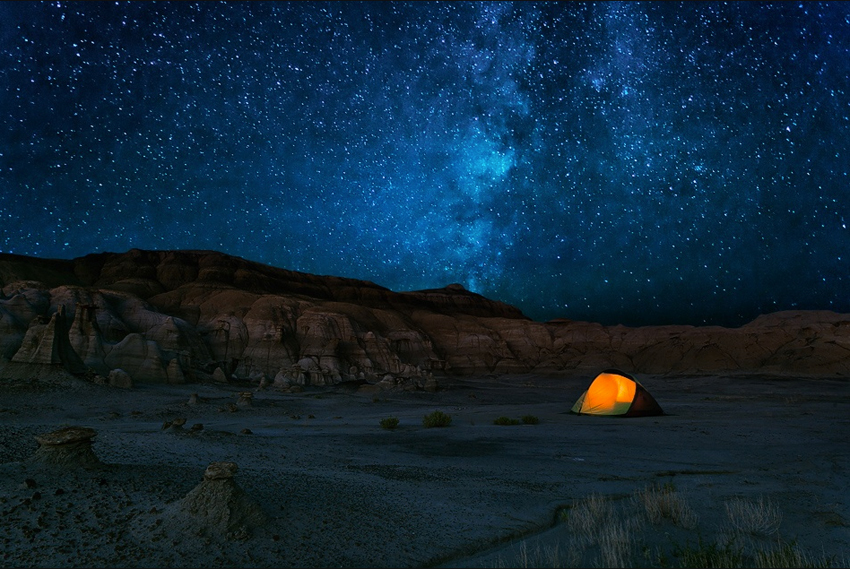
For starters, as Yiming Hu says, “Modern digital cameras need a combination of large aperture, high ISO and long exposure time to properly capture the stars of the night sky.” When he was photographing the Bisti Badlands in New Mexico, he wanted to include the night sky, the illuminated tent and the surrounding area, so he chose to use a wide-angle lens at its shortest focal length of 17 mm. Consequently, he calculated the exposure time by dividing 500 by 17, which resulted in a 30-second exposure and produced this exquisite capture of the sky.
Gilles Monney agrees that “a camera with good, high ISO performance along with a fast lens (a maximum aperture of at least f/2.8) helps a lot in these situations,” and don’t forget to bring a sturdy tripod with you. When he was photographing the Matterhorn in the Swiss Alps, he knew the earth’s rotation would eventually cause star trails to appear in his image. So relying on the 500 rule, he was able to calculate the longest exposure possible for his Canon 7D cropped sensor [500 / (24 × 1.6) = 13] without capturing movement.
It’s important to remember that the 500 rule is simply a guide to give you a starting point, as in this case. The 13-second exposure time was a bit too long since the clouds were reflecting so much ambient light. So he reduced the exposure time to 8 seconds, producing this single-frame image full of pinpoint stars. Perfection.
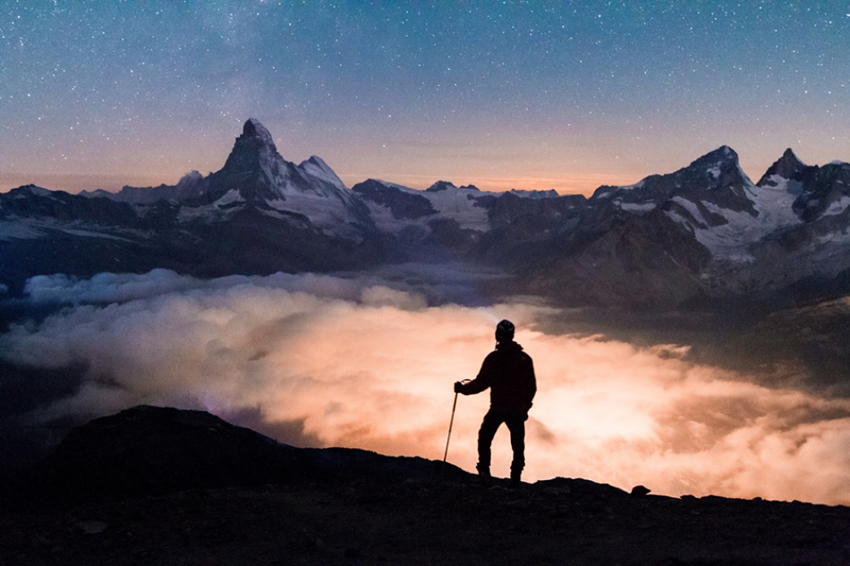
Above the Clouds © Gilles Monney
John Fan wanted to combine the otherworldly appearance of the terrain in White Pocket, Arizona, with the Milky Way hovering over it on a moonless night. He used a full-frame camera, a wide-angle lens with its shortest focal length (16 mm), a large aperture of f/2.8 and a high ISO of 3200. And by doing some quick math (500 divided by 16), he succeeded in capturing this phenomenal night sky with a 30-second exposure.
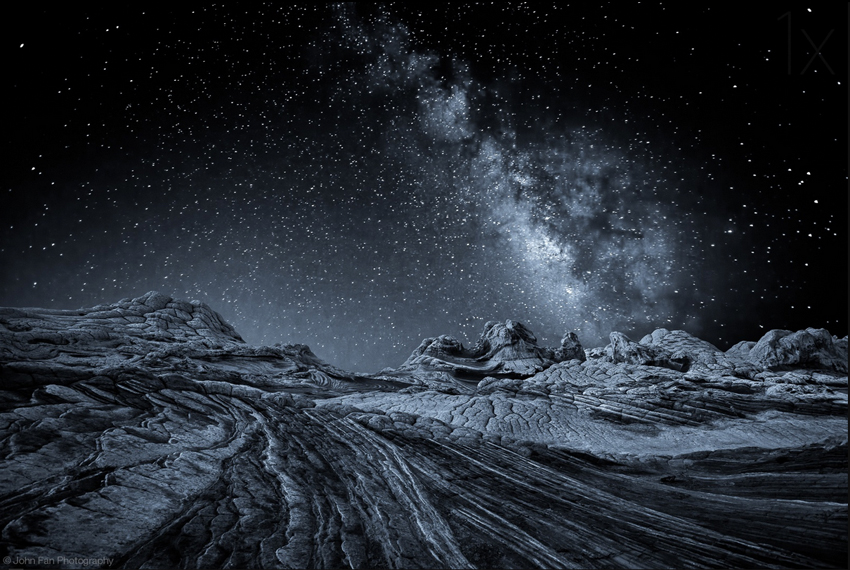
Companions of Darkness © John Fan
So now you see that this simple rule really does help photographers hone in on the correct exposure time to avoid capturing star trails. Although, in these situations when you’re shooting in absolute darkness, there is usually one more step involved: taking another shot to get a perfectly exposed foreground.
When Guido Brandt was at Cape Schanck in Victoria, Australia, photographing the night sky, the seascape and the Melbourne-bound ferry in the distance, he used the 500 rule to calculate his exposure time of 30 seconds to ensure the Milky Way would remain tack sharp (500 / 16 = 31). Thirty seconds is rarely enough time to obtain a good exposure of the foreground at nighttime. Shooting with a Canon 5D Mark III and a Canon 16-35mm lens at 3200 ISO, he was able to take another longer exposure with more depth of field, and then he blended the two images together in Photoshop.
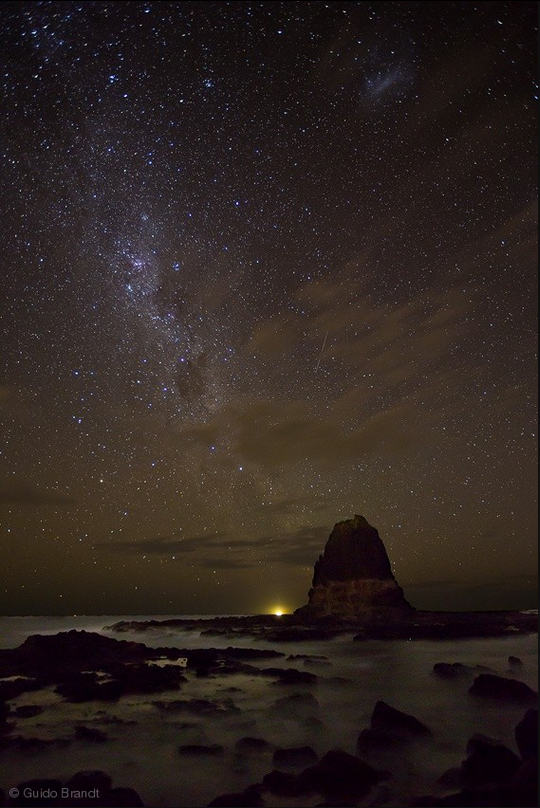
Night at Cape Schanck © Guido Brandt
In fact, of the four photographers, Gilles was the only one who was able to get everything properly exposed in one frame. This was primarily because he was not shooting in complete darkness as the others were, which helped tremendously.
John’s second frame of the landscape was taken about an hour after the first, when dawn was approaching and with more depth of field (f/8) and a much lower ISO (400) at 30 seconds. Yiming said that he could have tried to light the foreground to capture everything in one frame; “however, the high ISO and large aperture would have resulted in poor image quality and shallow depth of field. The ground would have become noisy and not as sharp as it should be. While it is relatively easy to reduce the noise in the sky in post-processing, it is very difficult to clean up the landscape portion without sacrificing image details.” So he left the camera and tripod exactly where they were and then slept in that nifty tent until a couple hours before dawn, which is when he took the second shot (f/11, 4 seconds, ISO 100).
Guido added that these long exposure times do have an effect on print quality. “It’s always best to use the shortest exposure time (even less than 30 seconds, if possible) if you’re planning to make really large prints.” It’s possible that the stars in the 30-second exposures will not appear as pin sharp on a massive print as they will on a smaller print or when viewing the image on a monitor.
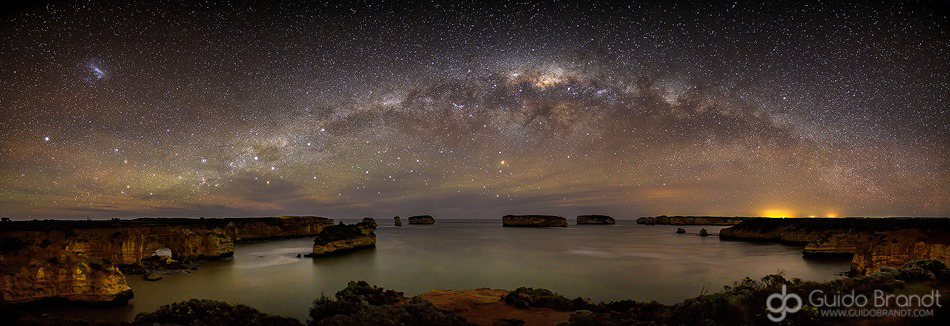
I Have Been Waiting for You © Guido Brandt
This breathtaking image by Guido is a 12-shot panorama, taken around 2:00 a.m. in Australia. After many attempts of shooting this scene in the daytime, and after waiting months for the Milky Way to be in the right position and low on the horizon, he finally was able to get the nighttime shot he had been dreaming about for a very long time.
You’re happy dancing now, aren’t you?
For more details about Yiming’s, Gilles’ and John’s images mentioned here, including post-processing, follow these links to their tutorials on 1x Learning.
Yiming Hu — Call of the Wild tutorial
Gilles Monney — Above the Clouds tutorial
John Fan — Companions of Darkness tutorial
 | Write |
 | Phil Villanueva I understand the 500 rule. It is easy to calculate. I am not dancing yet, because there is one more variable to consider, the aperture. Should the aperture be opened wide for these type of shots?
In the case of Gilles Monney's 'Above the Cloud', he calculated 500 / (24 x 1.6) to obtain 13 seconds. However, he chose to reduce the exposure time to 8 seconds. Could he have simply closed the aperture by a half or full stop, to get the same results? |
 | Mandy Schoch PRO I suppose he could have, Phil, yes. But he said that he prefers to shoot with this lens (Canon 24mm f/1.4L) specifically at f/2 because it produces a really sharp, corner-to-corner image at that aperture. (He also set the ISO to 4000, just so you know.) To answer your question about the aperture, the rest of these photographers used the largest aperture available to them – that's key for the sky photo. Yiming used a Canon 17–40mm f/4L lens and shot at f/4 and ISO 4000. Guido shot at the widest aperture of f/2.8 on the Canon 16–35mm f/2.8L lens at ISO 3200. After shooting the sky, they (excluding Gilles) then closed down the lens and shot with much more depth of field. John and Yiming waited for a time closer to dawn so they could shoot with a lower ISO and more depth of field too. Glad you asked. Hope that makes things more clear. |
 | Ralf Stelander FOUNDER Just need to start practising more math! Very enlightening article Mandy, I have always wondered how these are made and tried it a few times myself without luck. Of course the Nikon D200 was quite a noisy camera though... |
| Mandy Schoch PRO I used to have a noisy camera for night photos too, Ralf. Frustrating in these situations, but without knowing the trick = lousy pics anyway :) I'm looking forward to trying it now. |
 | Harsa Mitra thank you for such an enlightening blog! |
| Mandy Schoch PRO It's great to hear that, Harsa. Thanks so much for telling me! |
 | Gerard Sexton Very useful resource Mandy thanks for sharing this. |
| Mandy Schoch PRO My pleasure, Gerry. Thanks for checking it out. I'm hoping others will find it useful too! |
 | Andre du Plessis FRPS You have managed to demystify these images for me. On my next trip down south I might just return with our Southern Cross and that amazing Milky Way. Just need to think about the foreground ... Hmmmm, not so sure if a barbecue will quite make the cut:)
Wonderful article, and leaves me with a simple tool to remember: 500 divided by mm. That's the way I like technical mumbo-jumbo to be applied. |
| Mandy Schoch PRO Thanks Andre. Really glad to hear it simplified things. And hopefully it will inspire a Southern Cross image out of you! As for the essential foreground element... maybe you should stick to rocks like the other guys:) |