


|
|
|
|
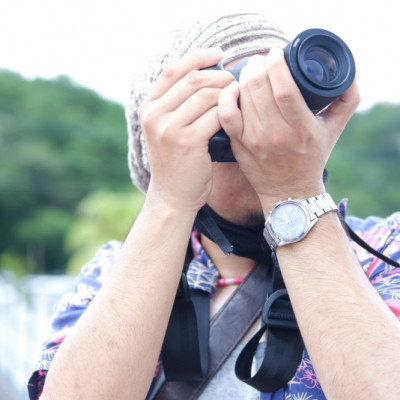

I like portrait photos that blend into the landscape.
In Japan, we have a rainy season, and it is the time of year when the hydrangea blooms.
In this photo, I want to express the humidity of the rainy season and the freshness of a moment of sunshine.
I have repeatedly submitted retouched photos, but have not received good feedback.
It may not be what you would call a pure portrait photograph, but it is my favorite.
How can I reconstruct this photo to make it more attractive?
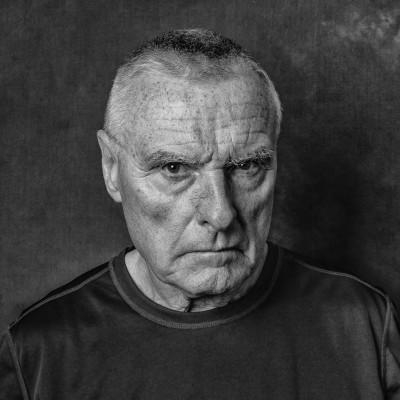
Hi Jun 43 Published images and 2 Awarded Wow congratulations and welcome to Critique. - Thank you for sharing this fine image...
All I can do Jun is give you my view on how I see your wonderful image. - This may or may not fit into your way of working. - I did take it back into Photoshop just to see up close what I could have fun with - I found your image very heavy in the shadow department but I don't have the Raw file so opening up the shadows was a problem for me.
This is what I did - A small crop off three sides to make the image more balanced and compact - I opened up the tone and contrast to add more colour and impact to this fine image. - last I used the dodge tool with Opacity set at 20% and worked on your beautuiful model and flower heads the brighten them up and give your image more power to please. I also cloned out the bright area on her dress. - Please remember this is to my taste and not yours...


Jun,
To be honest, for me this image is not good enough for 1x. But about your question "how can I make him more attractive" Daniel gave you already a good comment. I go one step further. I made a greater crop to give the model more attention with enough of the background. Than I did in Photoshop the following: I used niveaus, there you see the histogram. with three triangle. I used the two on the outside. If you push ALT on your keyboard and bring the right one (LIGHT) to the left . All is black and by moving you become some light points in it. Stop there. If you do this on the left side you will start with white by moving you become dark areas. Now your are on the best place in the histogam. With the middle triangle you can go for a little bit lighter or darker. That was my main action. After this I went to Camera raw as follows: FILTER>CAMERA FILTER there I played with the radial gradient for some special places. But you can also do this with the dodge and burntool. Below my suggestion. Theo senior critic.

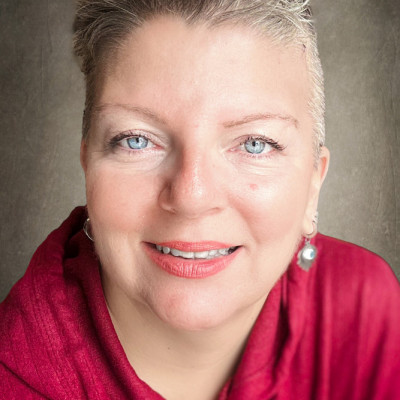

Jun,
I cannot replace my earlier photo, therefore here a new one. I lightend the eyes a fraction and did a small scale action. For me the eyes in my first version could use a fraction more light.
Theo-senior critic

